Beeping from a Platform server represents one of three types of warnings. Based on the information below you can identify the specific error and then view the associated knowledge base article to assist in solving the problem.
Warning Types
- A hard drive in a RAID set connected to the server has failed. (Most common)
- The RAID controller has detected and corrected a memory cache error (Rare)
- One of the redundant power supplies in the rear of the system has failed or is no longer receiving power. (Very Rare)
Note that issues #1 and #2 have the same rapid beeping sound, while issue #3 has a long steady tone.
Identifying your issue
In order to determine what issue you're facing, follow the steps below:
- If the system is emitting a continuous tone, proceed to the "Power Issues" section near the bottom of this article.
- If the system is emitting a rapid beeping pattern, you have a RAID based issue, and should continue to the "RAID Issues" section below.
RAID Issues
Failed Drives
Examine the front panel of the Platform system. You may need to remove the faceplate if you cannot see the drive bays clearly.
If you see one or more steady or blinking red lights on any of the drive bays, you have a failed drive. Most Platform systems can survive a single (or more, in some models) failed drive and continue to function normally, even allowing you to continue working with the missing drive.
Important: Until the drive is replaced, your data on the entire RAID set may be at risk if another drive fails before you can insert a replacement drive and the rebuild operation fully completes.
It's highly recommended that you arrange to replace the failed drive as soon as possible to avoid data loss. Please see the "How do I replace a failed drive?" article to proceed with the steps for a drive replacement.
The alarm may be silenced by following instructions in the "How do I Silence RAID Alarms on my Platform System?" article.
RAID Cache Memory ECC Warning
If there are no red lights present on the front of your system, you are likely experiencing a RAID control memory correction warning. This is a rare warning that indicates that your Platform system has detected and corrected an error in the data that was stored on the RAID controller memory cache.
Your data is safe. This pro-active warning indicates that the error correction function of your RAID controller memory successfully identified and corrected a possible memory error. This is a possible indicator that the RAM stick on the RAID controller may be failing. If this warning is encountered more than once in a 6 month period, please contact ProMAX Support for further investigation and possible RAID controller RAM replacement.
The alarm may be silenced by following instructions in the "How do I Silence RAID alarms on my Platform System?" article.
Power Issues
There are two conditions that will trigger the single long tone of a power issue on a Platform system:
- One of the redundant Power Supply Units located on the rear of the Platform system has failed.
- One of the redundant Power Supply Units located on the rear of the Platform is no longer receiving power from its power source (Battery Backup Unit, Power strip, wall-plug, etc.).
NOTE: A PSU alarm cannot be silenced until the power condition is resolved.
You can troubleshoot both conditions by following the steps below:
- Insure all power cables are securely plugged into the rear of the Platform system.
- Insure all power cables are securely plugged into their power source (Battery Backup Unit, Power strip, wall-plug, etc.)
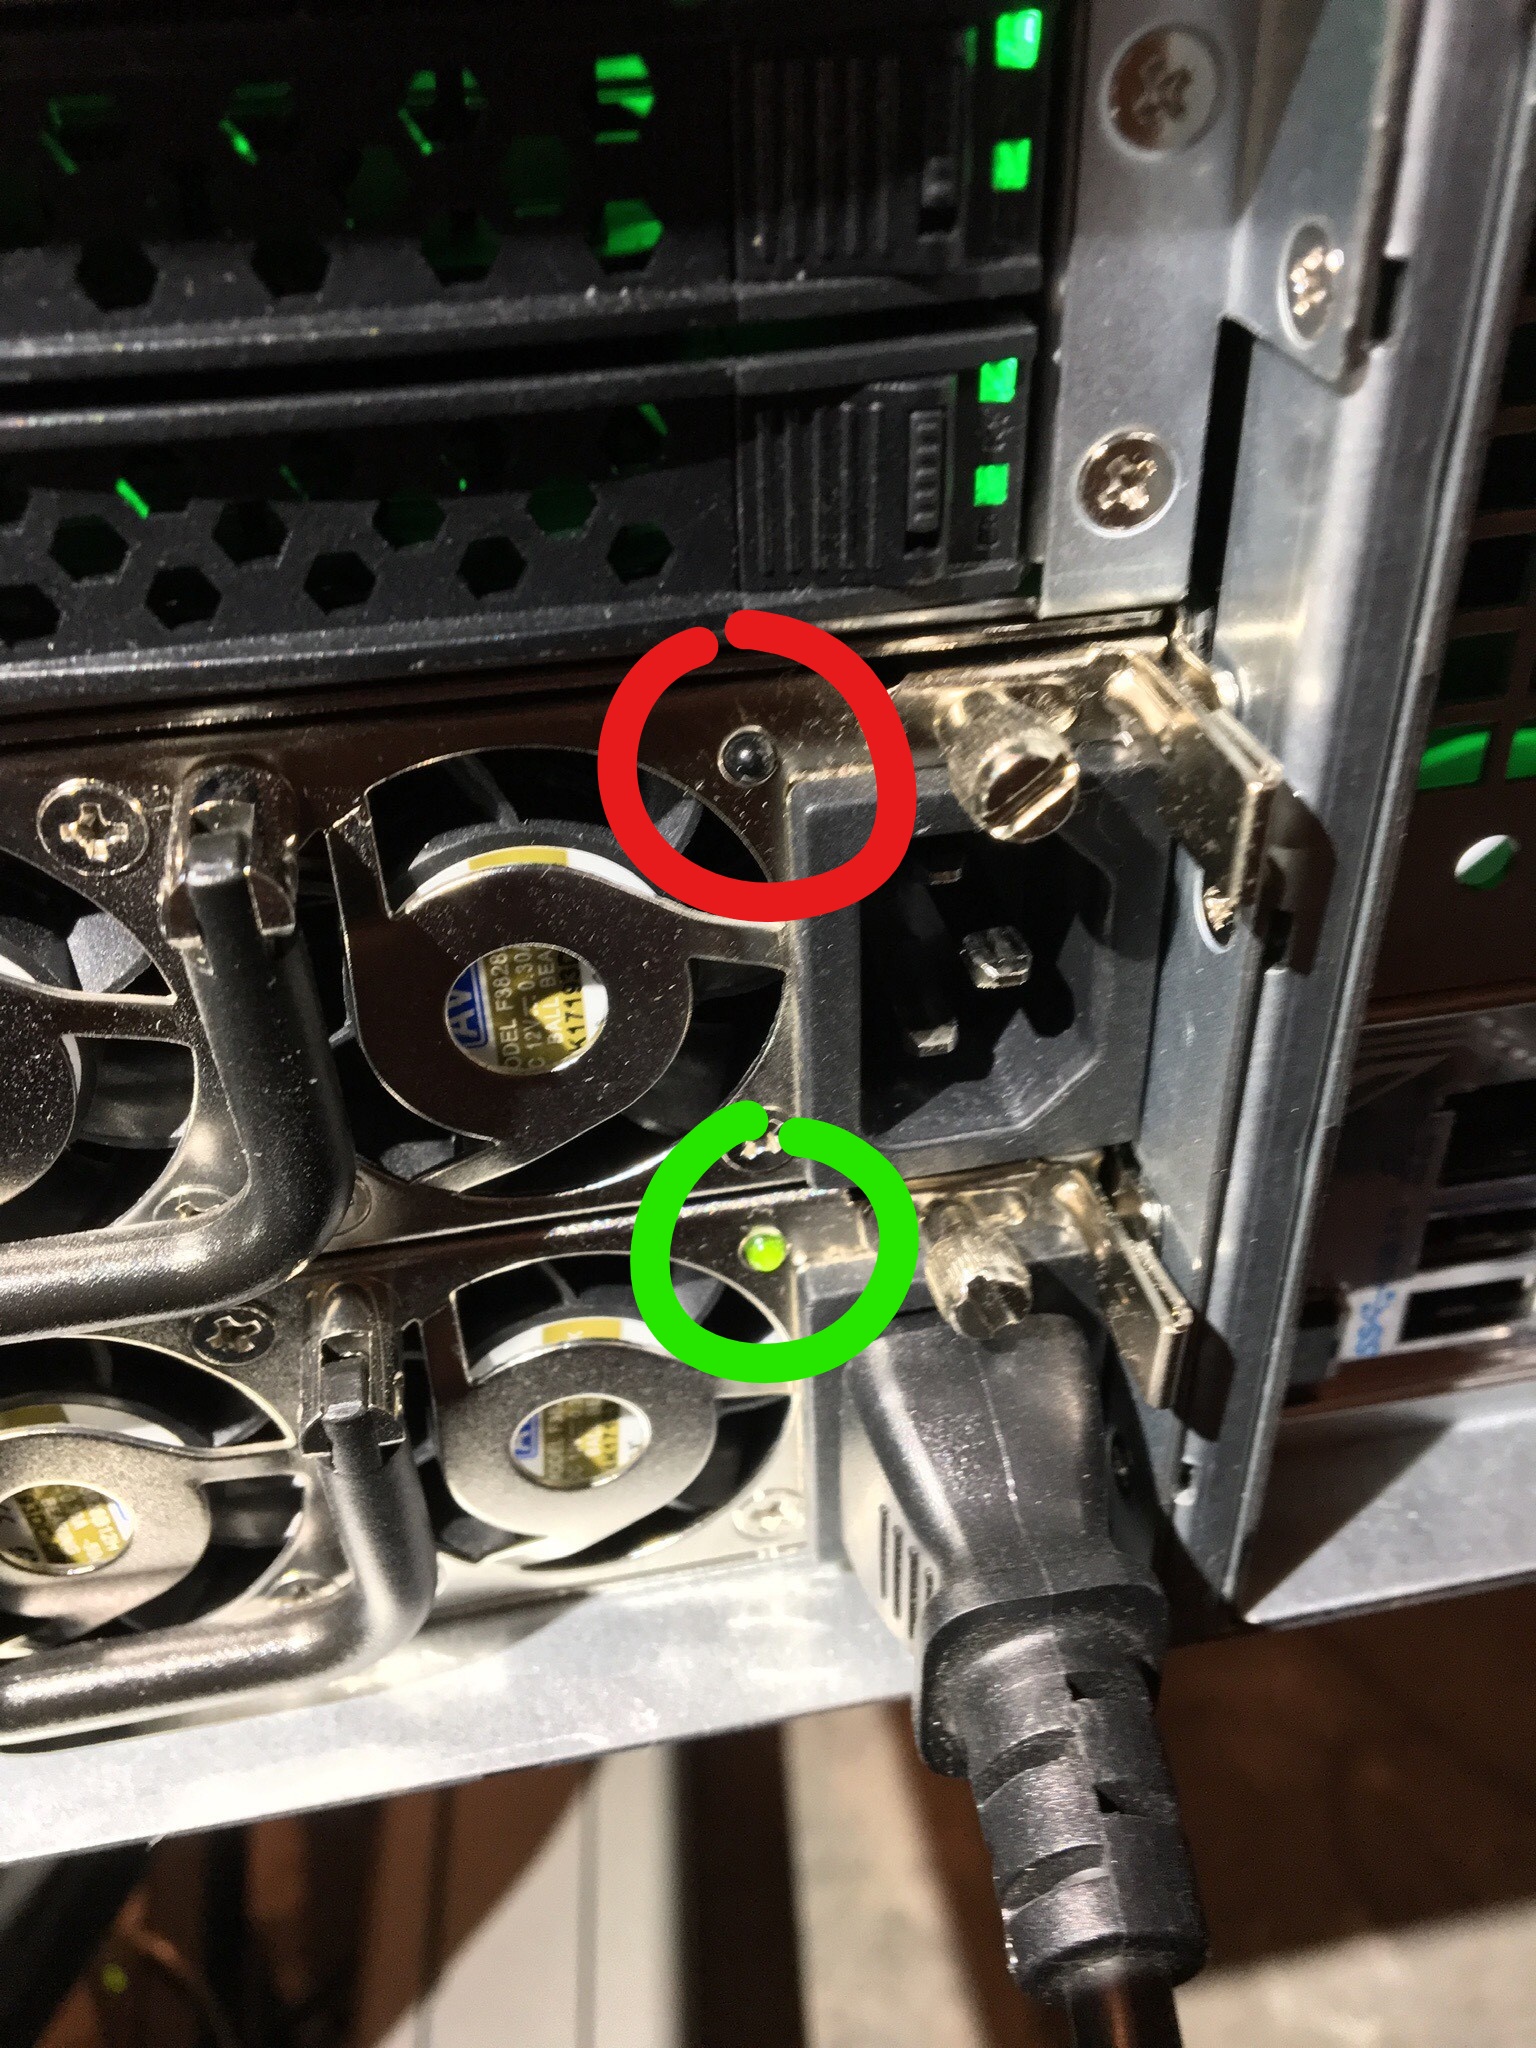
- Identify the PSU on the rear of the Platform system that has failed by noting which of the green lights near each plug are lit. A functional unit will show a solid green light, a non-functional unit will show no light (See image below).
4. Attempt to connect the non-functional PSU to a different power source (Battery Backup Unit, Power strip, wall-plug, etc.).
5. If possible, replace the power cable between the non-functional PSU and its power source with a new or known good cable.
6. If the PSU remains non-functional, unseat and reseat the PSU itself by unscrewing the thumb screw at the top right of the PSU until it's loose. Now press and hold the small lever under the screw to the left while simultaneously pulling on the PSU handle. This will dislodge the PSU and allow it to slide out towards the rear of the system. Slide the PSU out a few inches (you do not need to completely remove it from it's slot) and then firmly reseat it back into its original position. It should click into place, and no longer freely move.
7. If the PSU does not resume operation after a reseat, you likely have a failed PSU. Please contact ProMAX Support to arrange for a replacement.