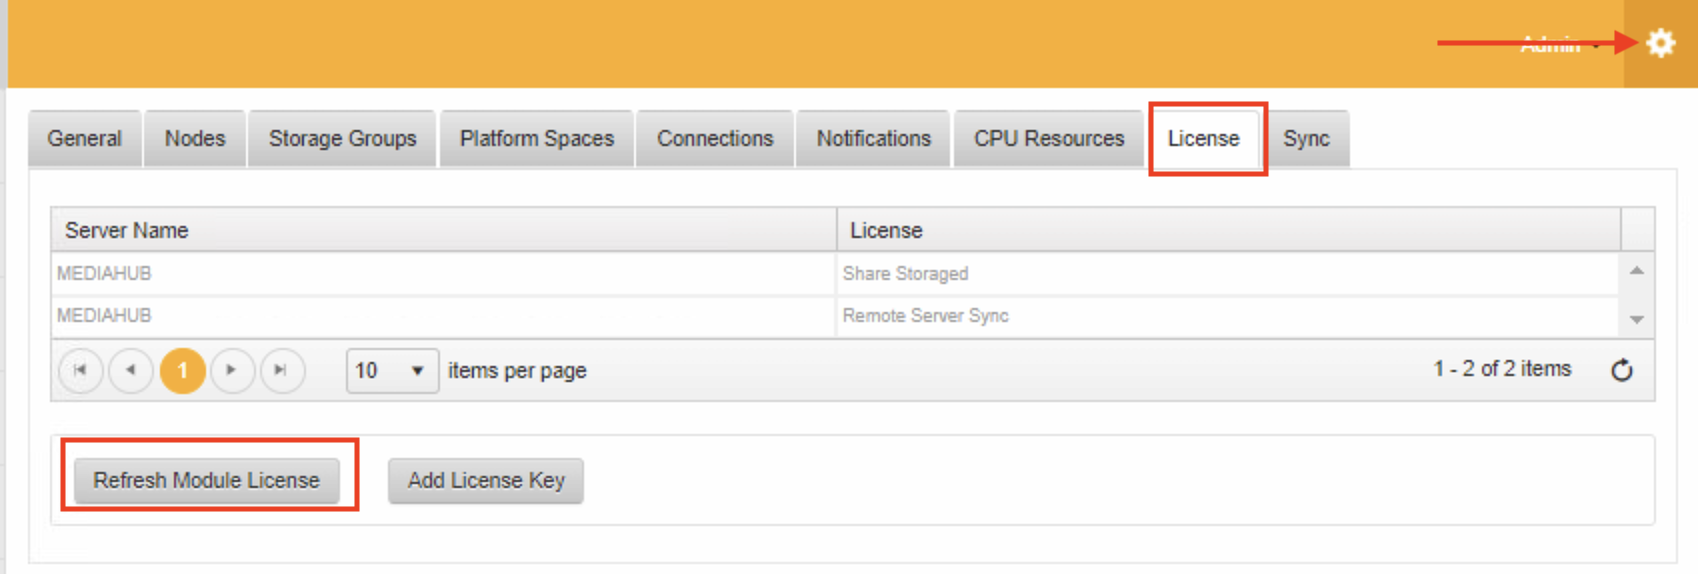
Here are the steps to start setting up your new Cloud license
(v5.6 only) Download the following utilities onto your Platform Server desktop
Platform Machine ID Generation tool
Platform License Key Validation tool
Generate your Machine ID
Download and run the Platform Machine ID Generation Tool. This will generate a large ID number like the following:

Contact ProMAX Support
Contact ProMAX Support at (949) 861-2738 or via email at Support@promax.com.
ProMAX support hours are 5a-5p US Pacific time, Monday-Friday.
Please be prepared to provide the following information:
- If reaching out via email, please title your email "License Key Request" to ensure priority response.
- Include the name of the purchasing company or organization.
- Include the Serial Number from the metal tag on the rear of the system.
- Include your original purchase date.
- Include the Machine ID from the previous step.
ProMAX will take this information and provide you with a License Key that will look like this:
Licc3iUyIvYYCgK0WCHQ6lANcgAwAH0AQAB4ADIAMAAxADQAIPA=0x9
**In order for the license to take effect, the Listener and IIS must be restarted. Alternatively, the server can be restarted as well.
(v5.7+)
Promax will update internal server list to apply the Cloud License. As long as your server has Internet connectivity, you may refresh the Licenses page and the Cloud License should appear.

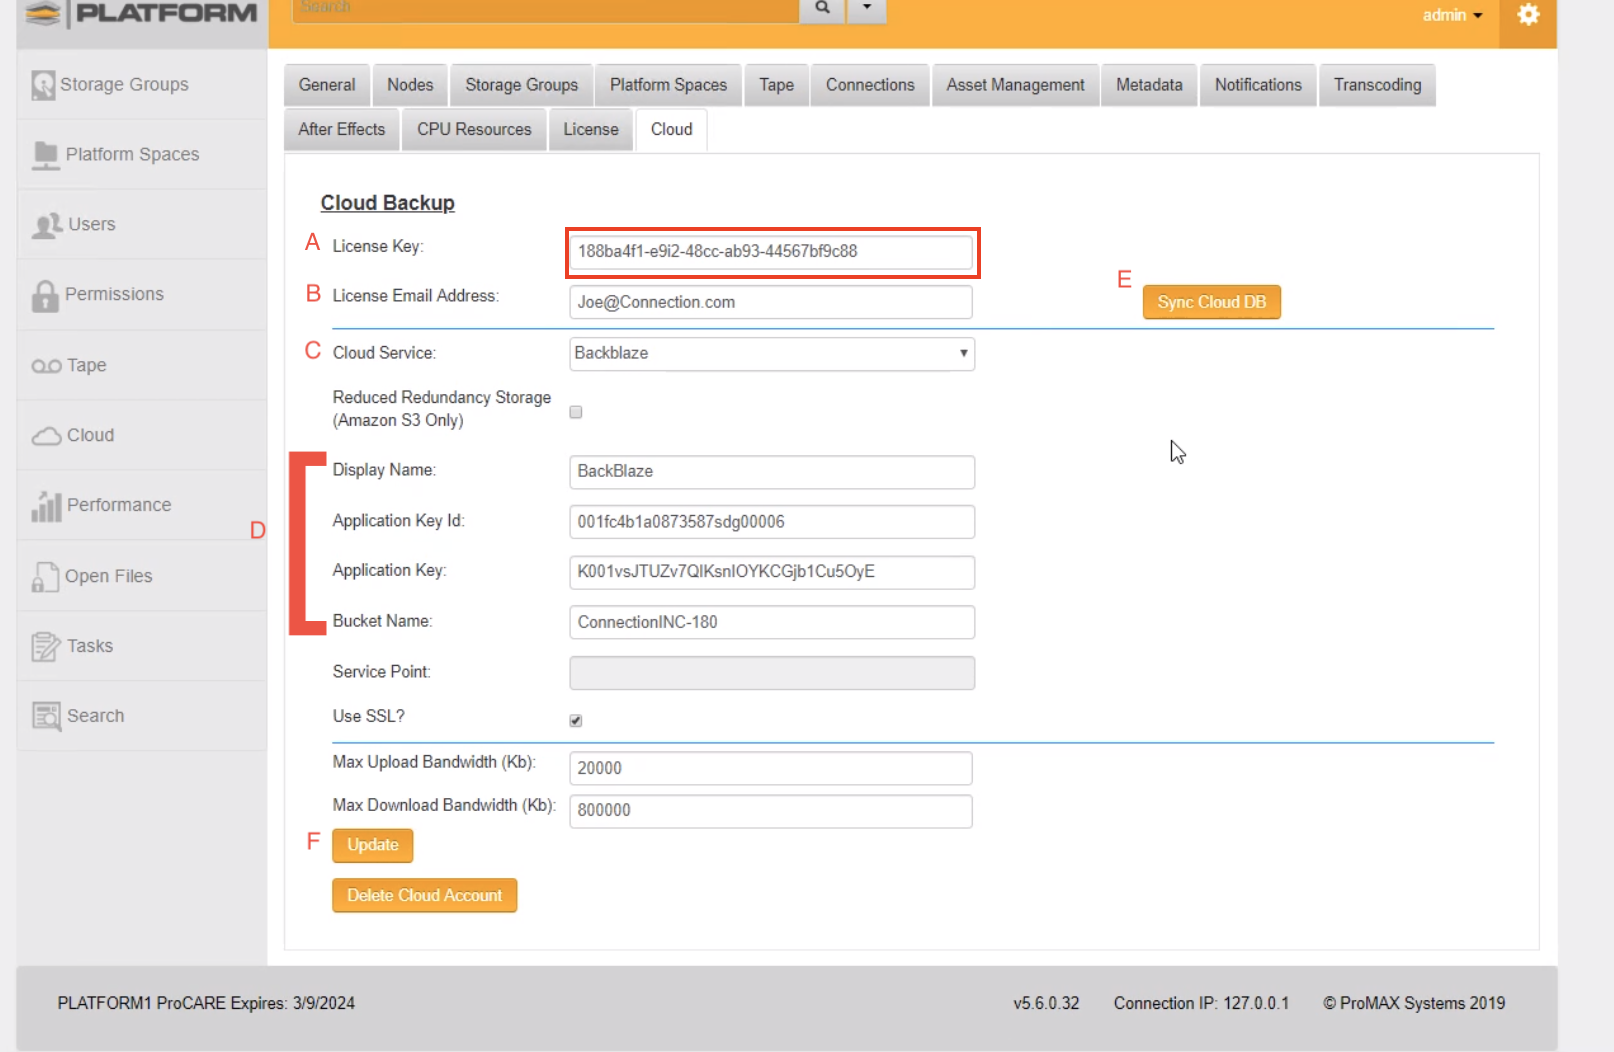
Cloud Settings Page

A - A Cloudberry Key will also be provided and will need to be added to the License Key in the Administrator Screen in Platform under the Cloud tab.
B - The License Email Address will be the user or dedicated email account that will be handling cloud long term.
C - Cloud Service - You can choose between
1. Backblaze
2. Amazon S3
3. Amazon Glacier
D - This area is for all the information that can be found with your Cloud Provider and then placed into this area. Names and Keys must be exact to what was given from the Cloud Provider.
E - Sync Cloud DB - This is for syncing with the cloudberry database to ensure the information is correct with the accounts and also the spaces that were sent to cloud
F - Update - This will save the items filled on this screen.
Once this is complete, please continue to the next article here.
