*This will only apply to systems that have an internal RAID or expansion chassis.
**Only perform this procedure if this will be a newly formatted RAID
1. Ensure all drives are loaded into the chassis
2. Turn on the server and log into the Platform OS via remote desktop or direct access.
3 Go to the start menu and click on the icon labeled "ARCHTTPSvrGui" or "ARCSAP", this will launch a small program that will appear to do nothing, however this step is important.
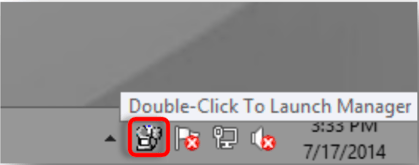
4. Return to the desktop and go to the system tray (the set of small icons near the time/date display in the bottom right hand corner). Find the small icon that looks like a grey computer with some cables coming out the top. Hovering over this icon will bring up a tooltip stating "Double- Click to Launch Manager". Double click this icon.
5. This will open your web browser to a blue and yellow page labeled "ArcHTTP Configurations". On the left side column of this page will be an option labeled "SAS RAID Controller" with a small + next to it, click the + and expand the list.
6. There will now be an option labeled "ARC-1882 Web Management", Click this.
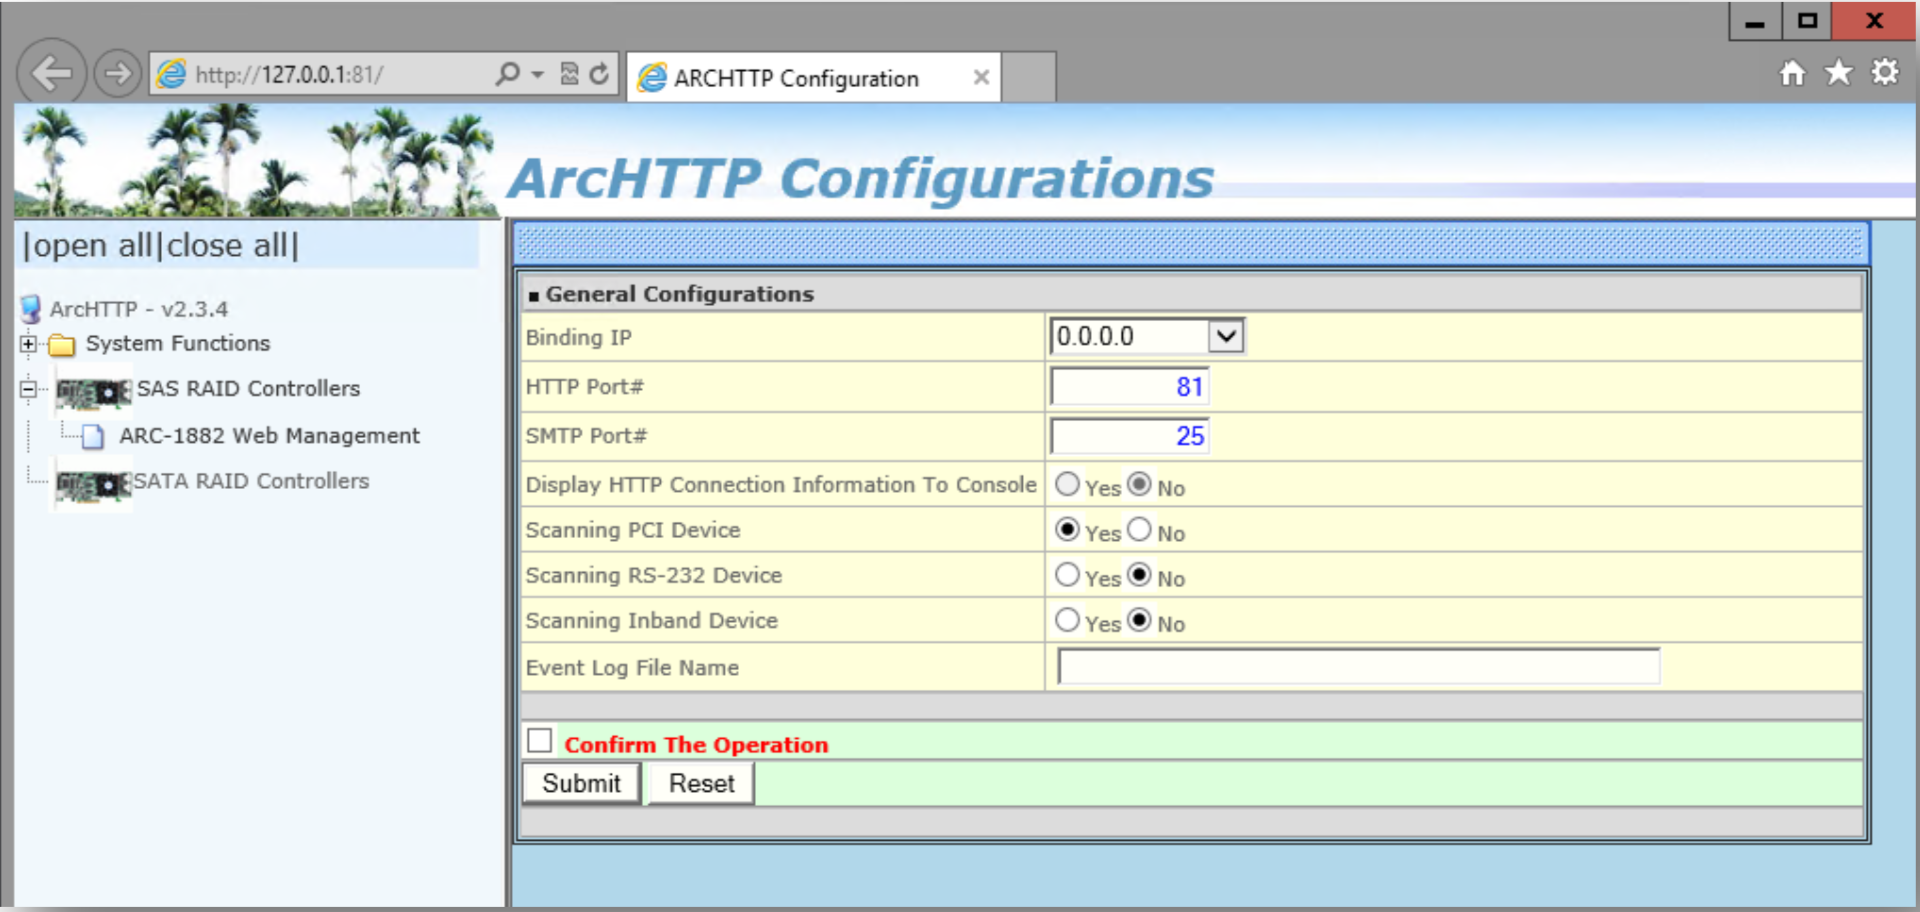
7. You will be asked for a login and password. Enter the following – Login: admin / PW: 0000 (four zeros)
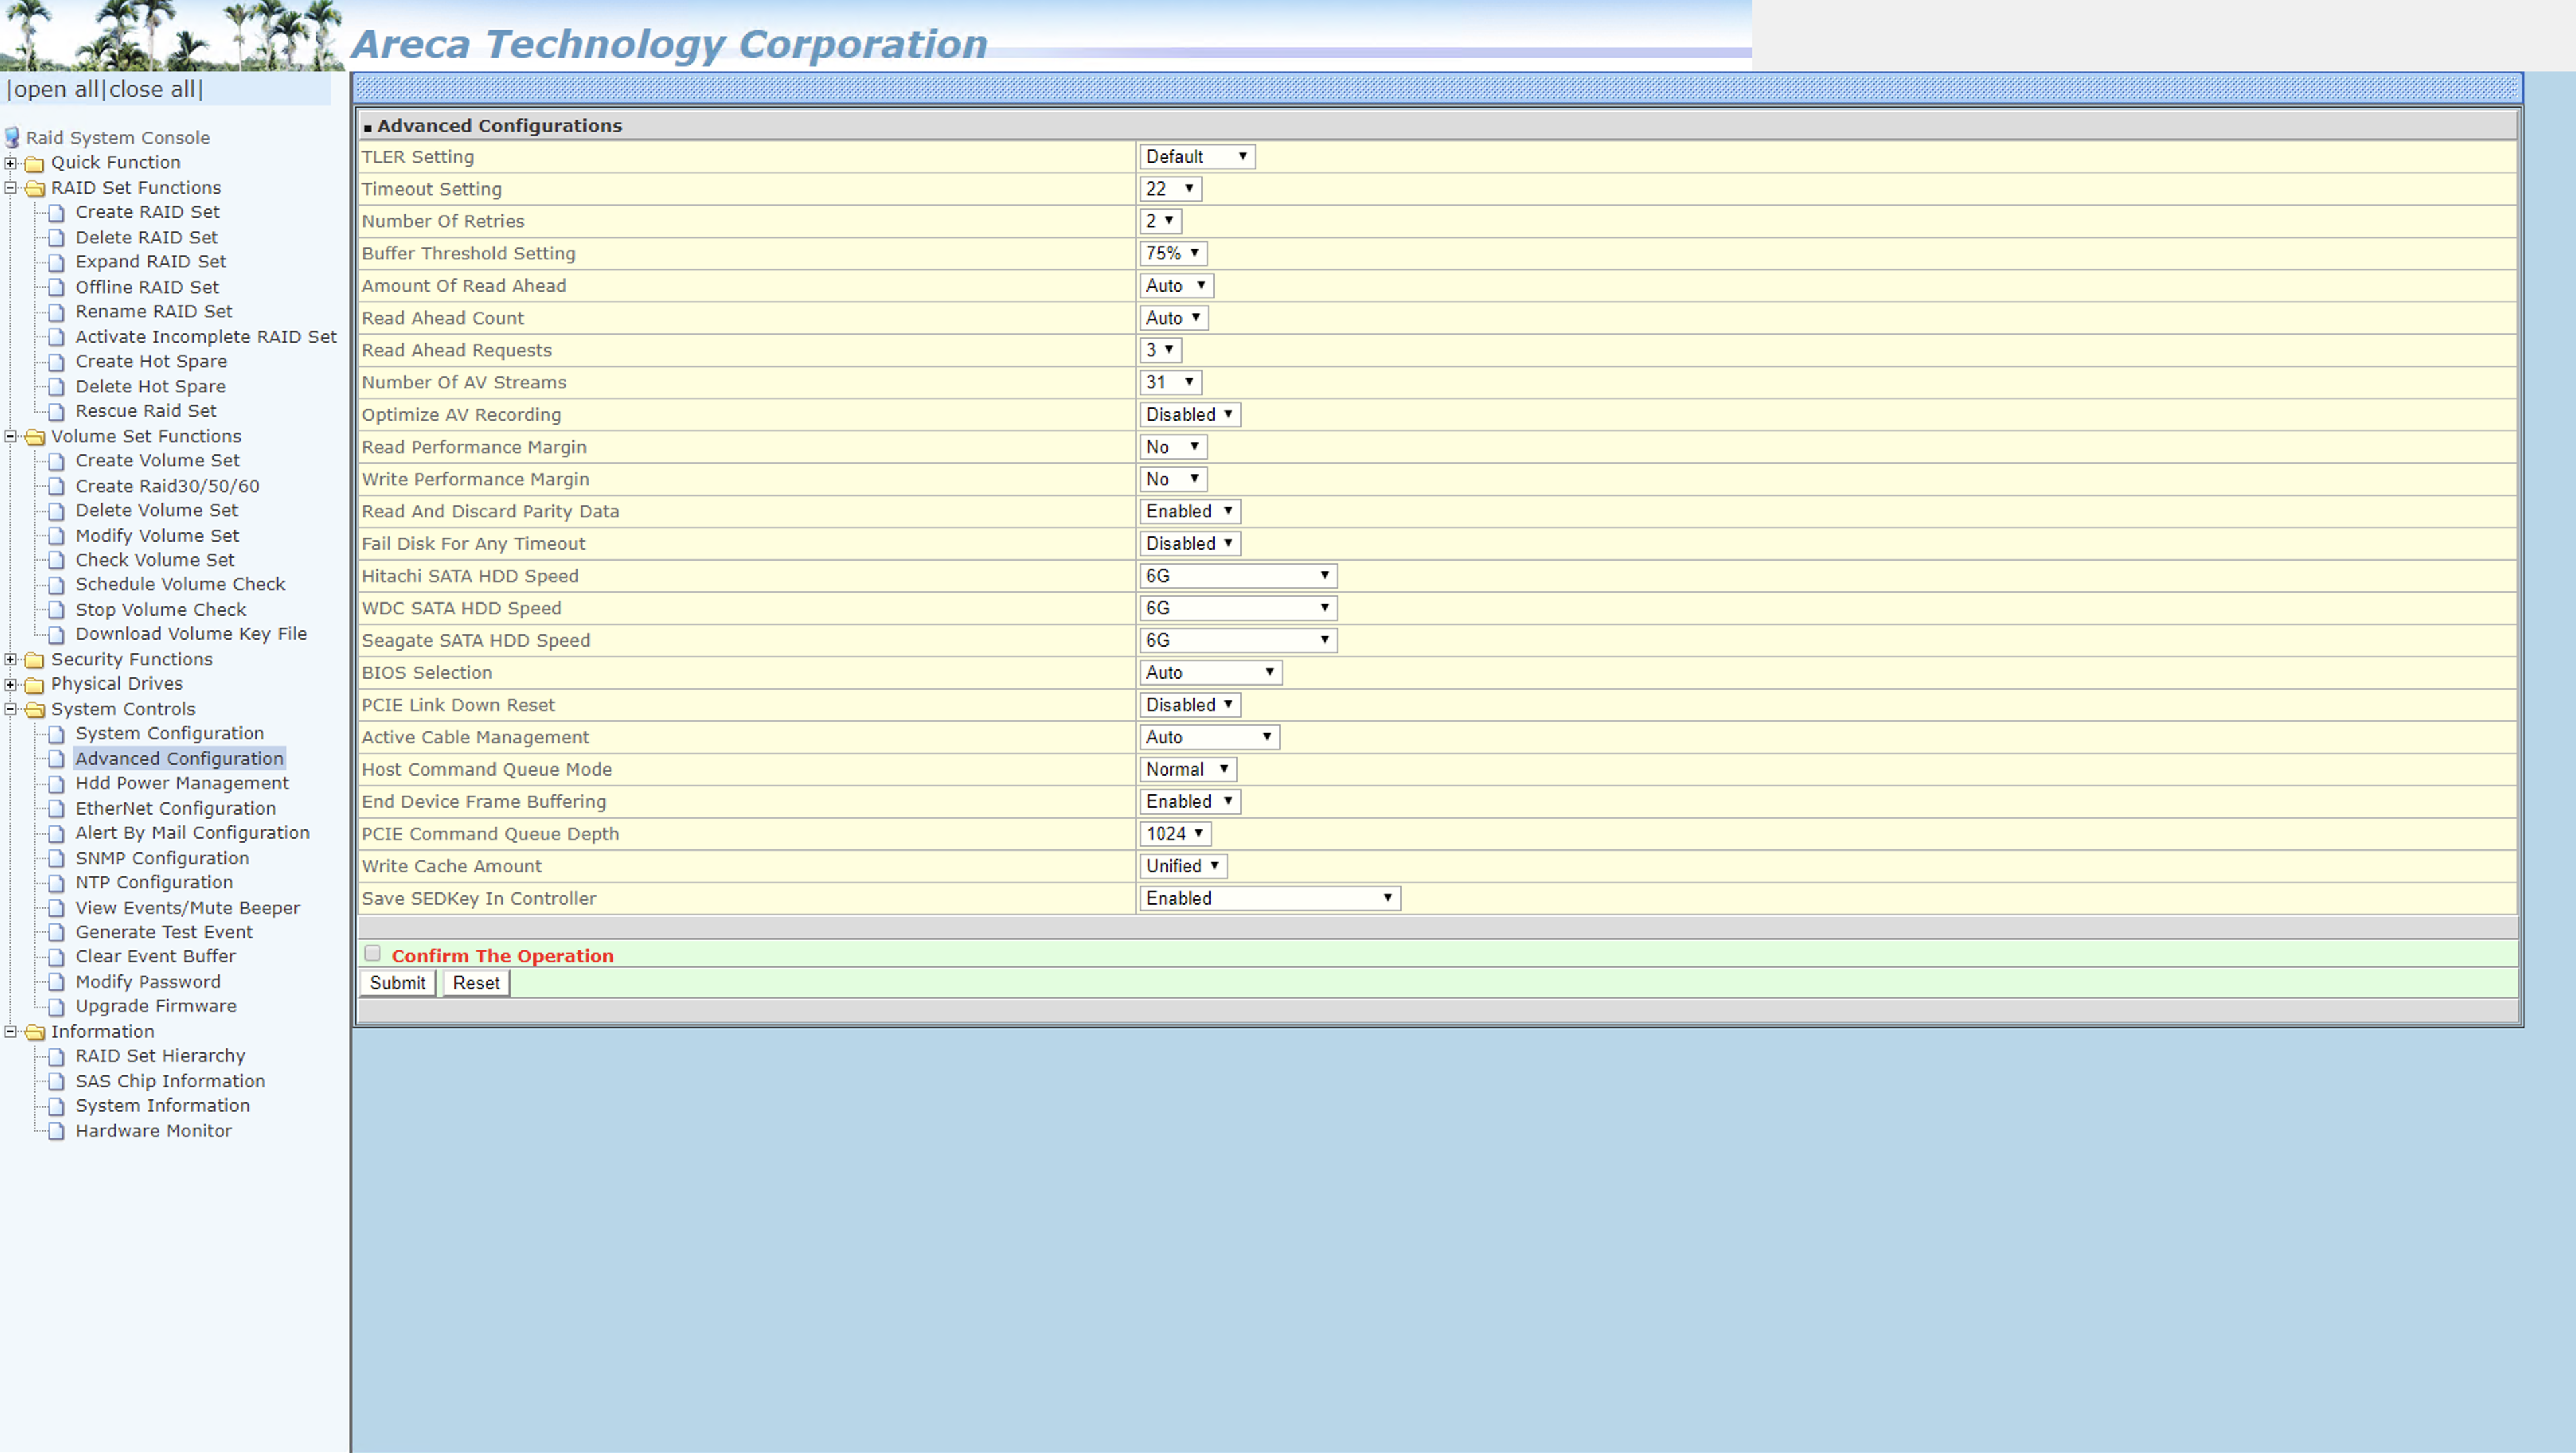
8. Ensure that the System Configurations and Advanced Configurations are as seen below.
System Configuration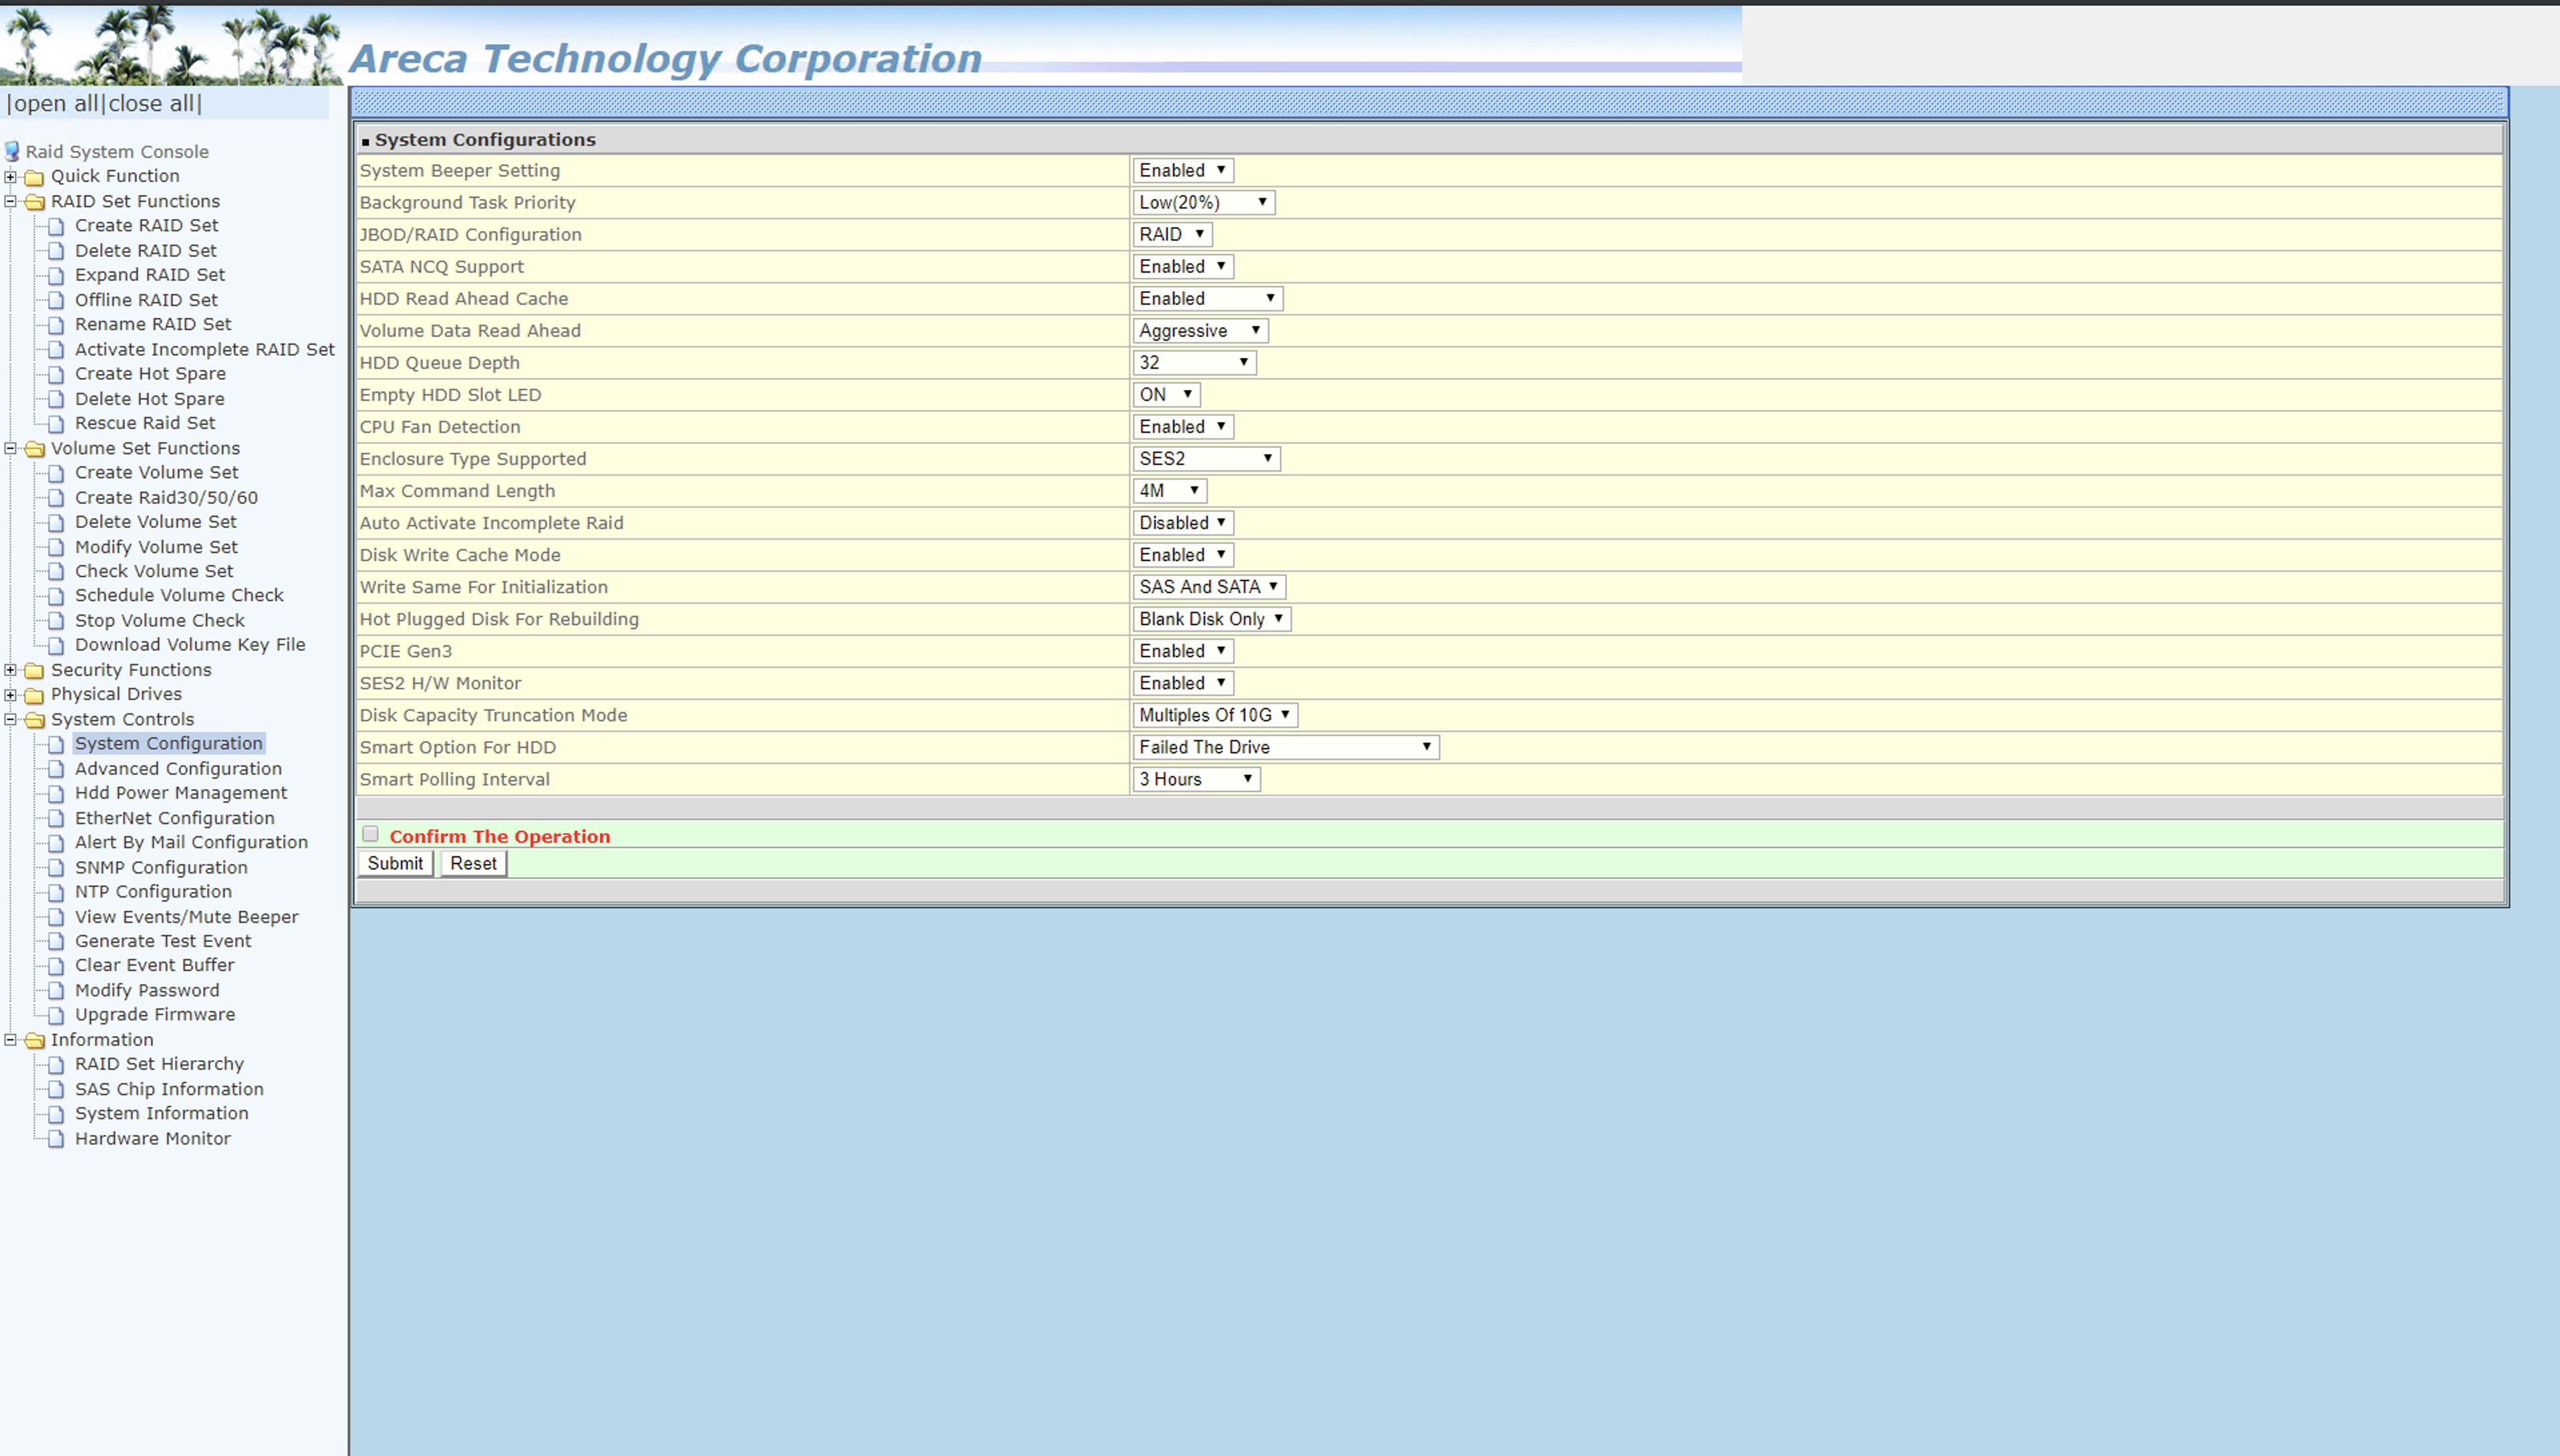
Advanced Configuration
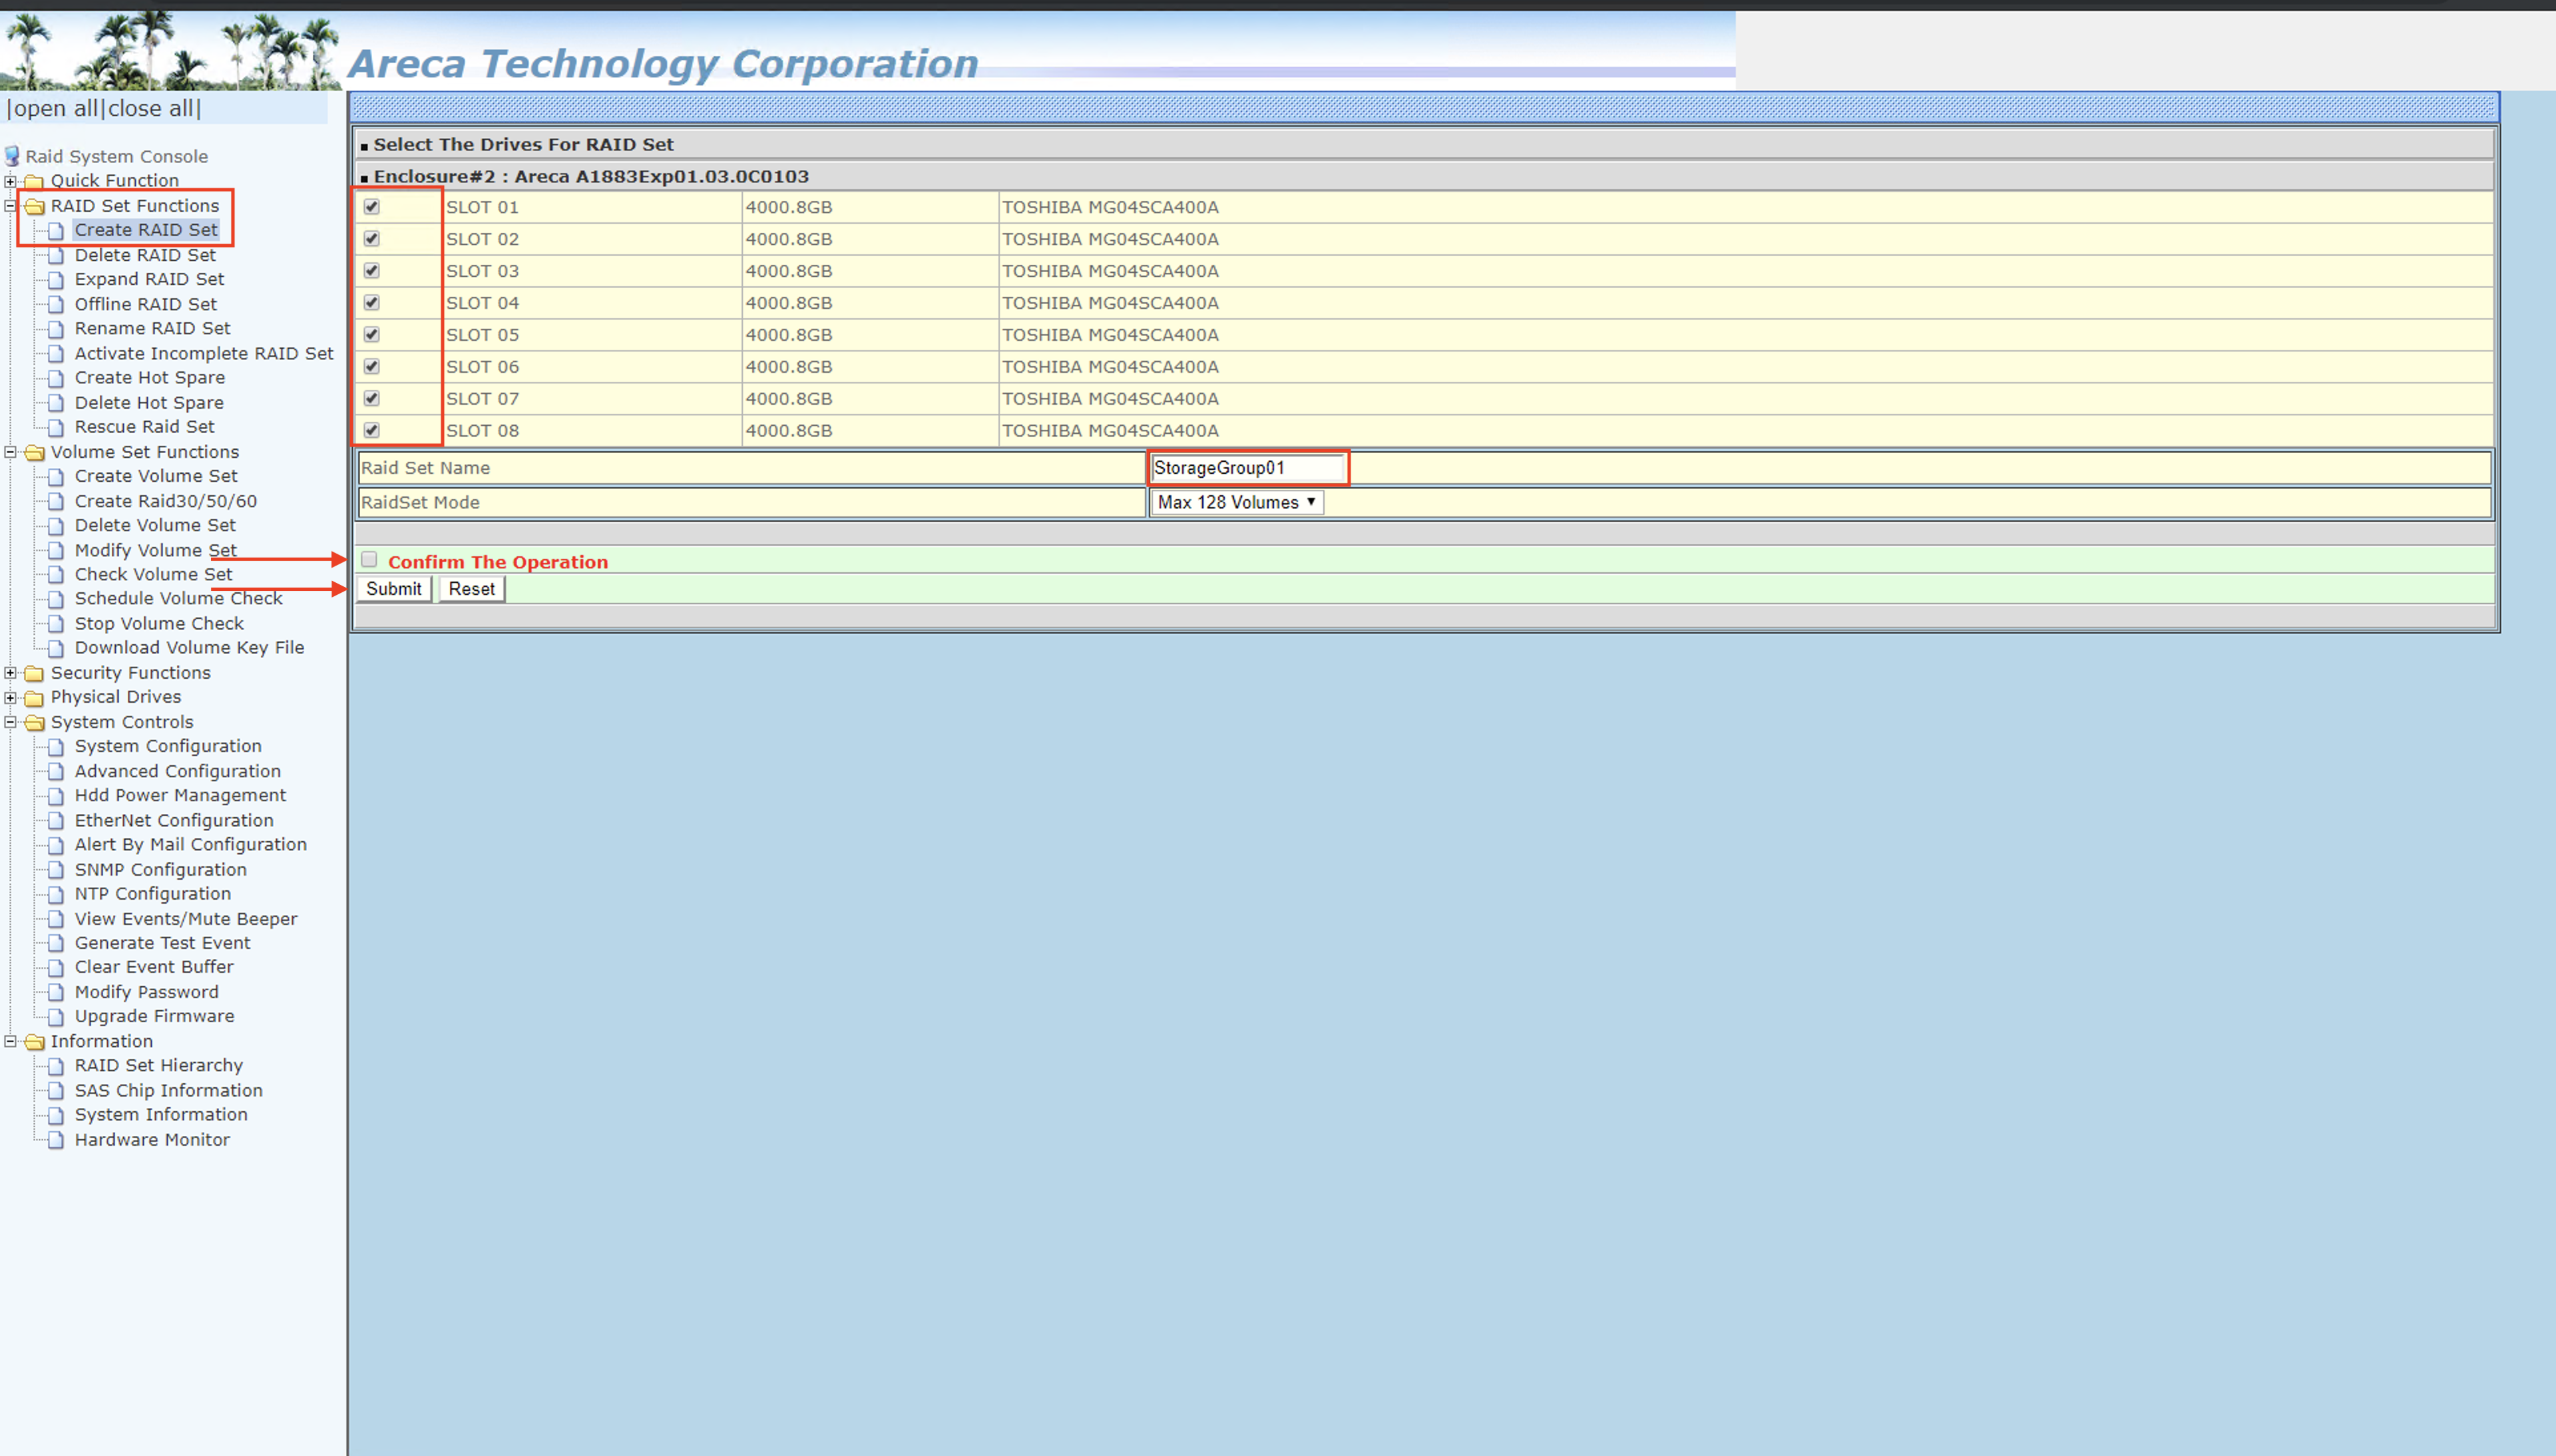
9. Navigate to RAID Set Functions-->Create RAID Set
a.) Select all drives that will be part of this RAID Set
b.) Name the RAID Set. **The RAID Set and Volume must be matching and cannot share the same as another RAID Set or Volume that already exists
c.) Select the checkmark box and submit
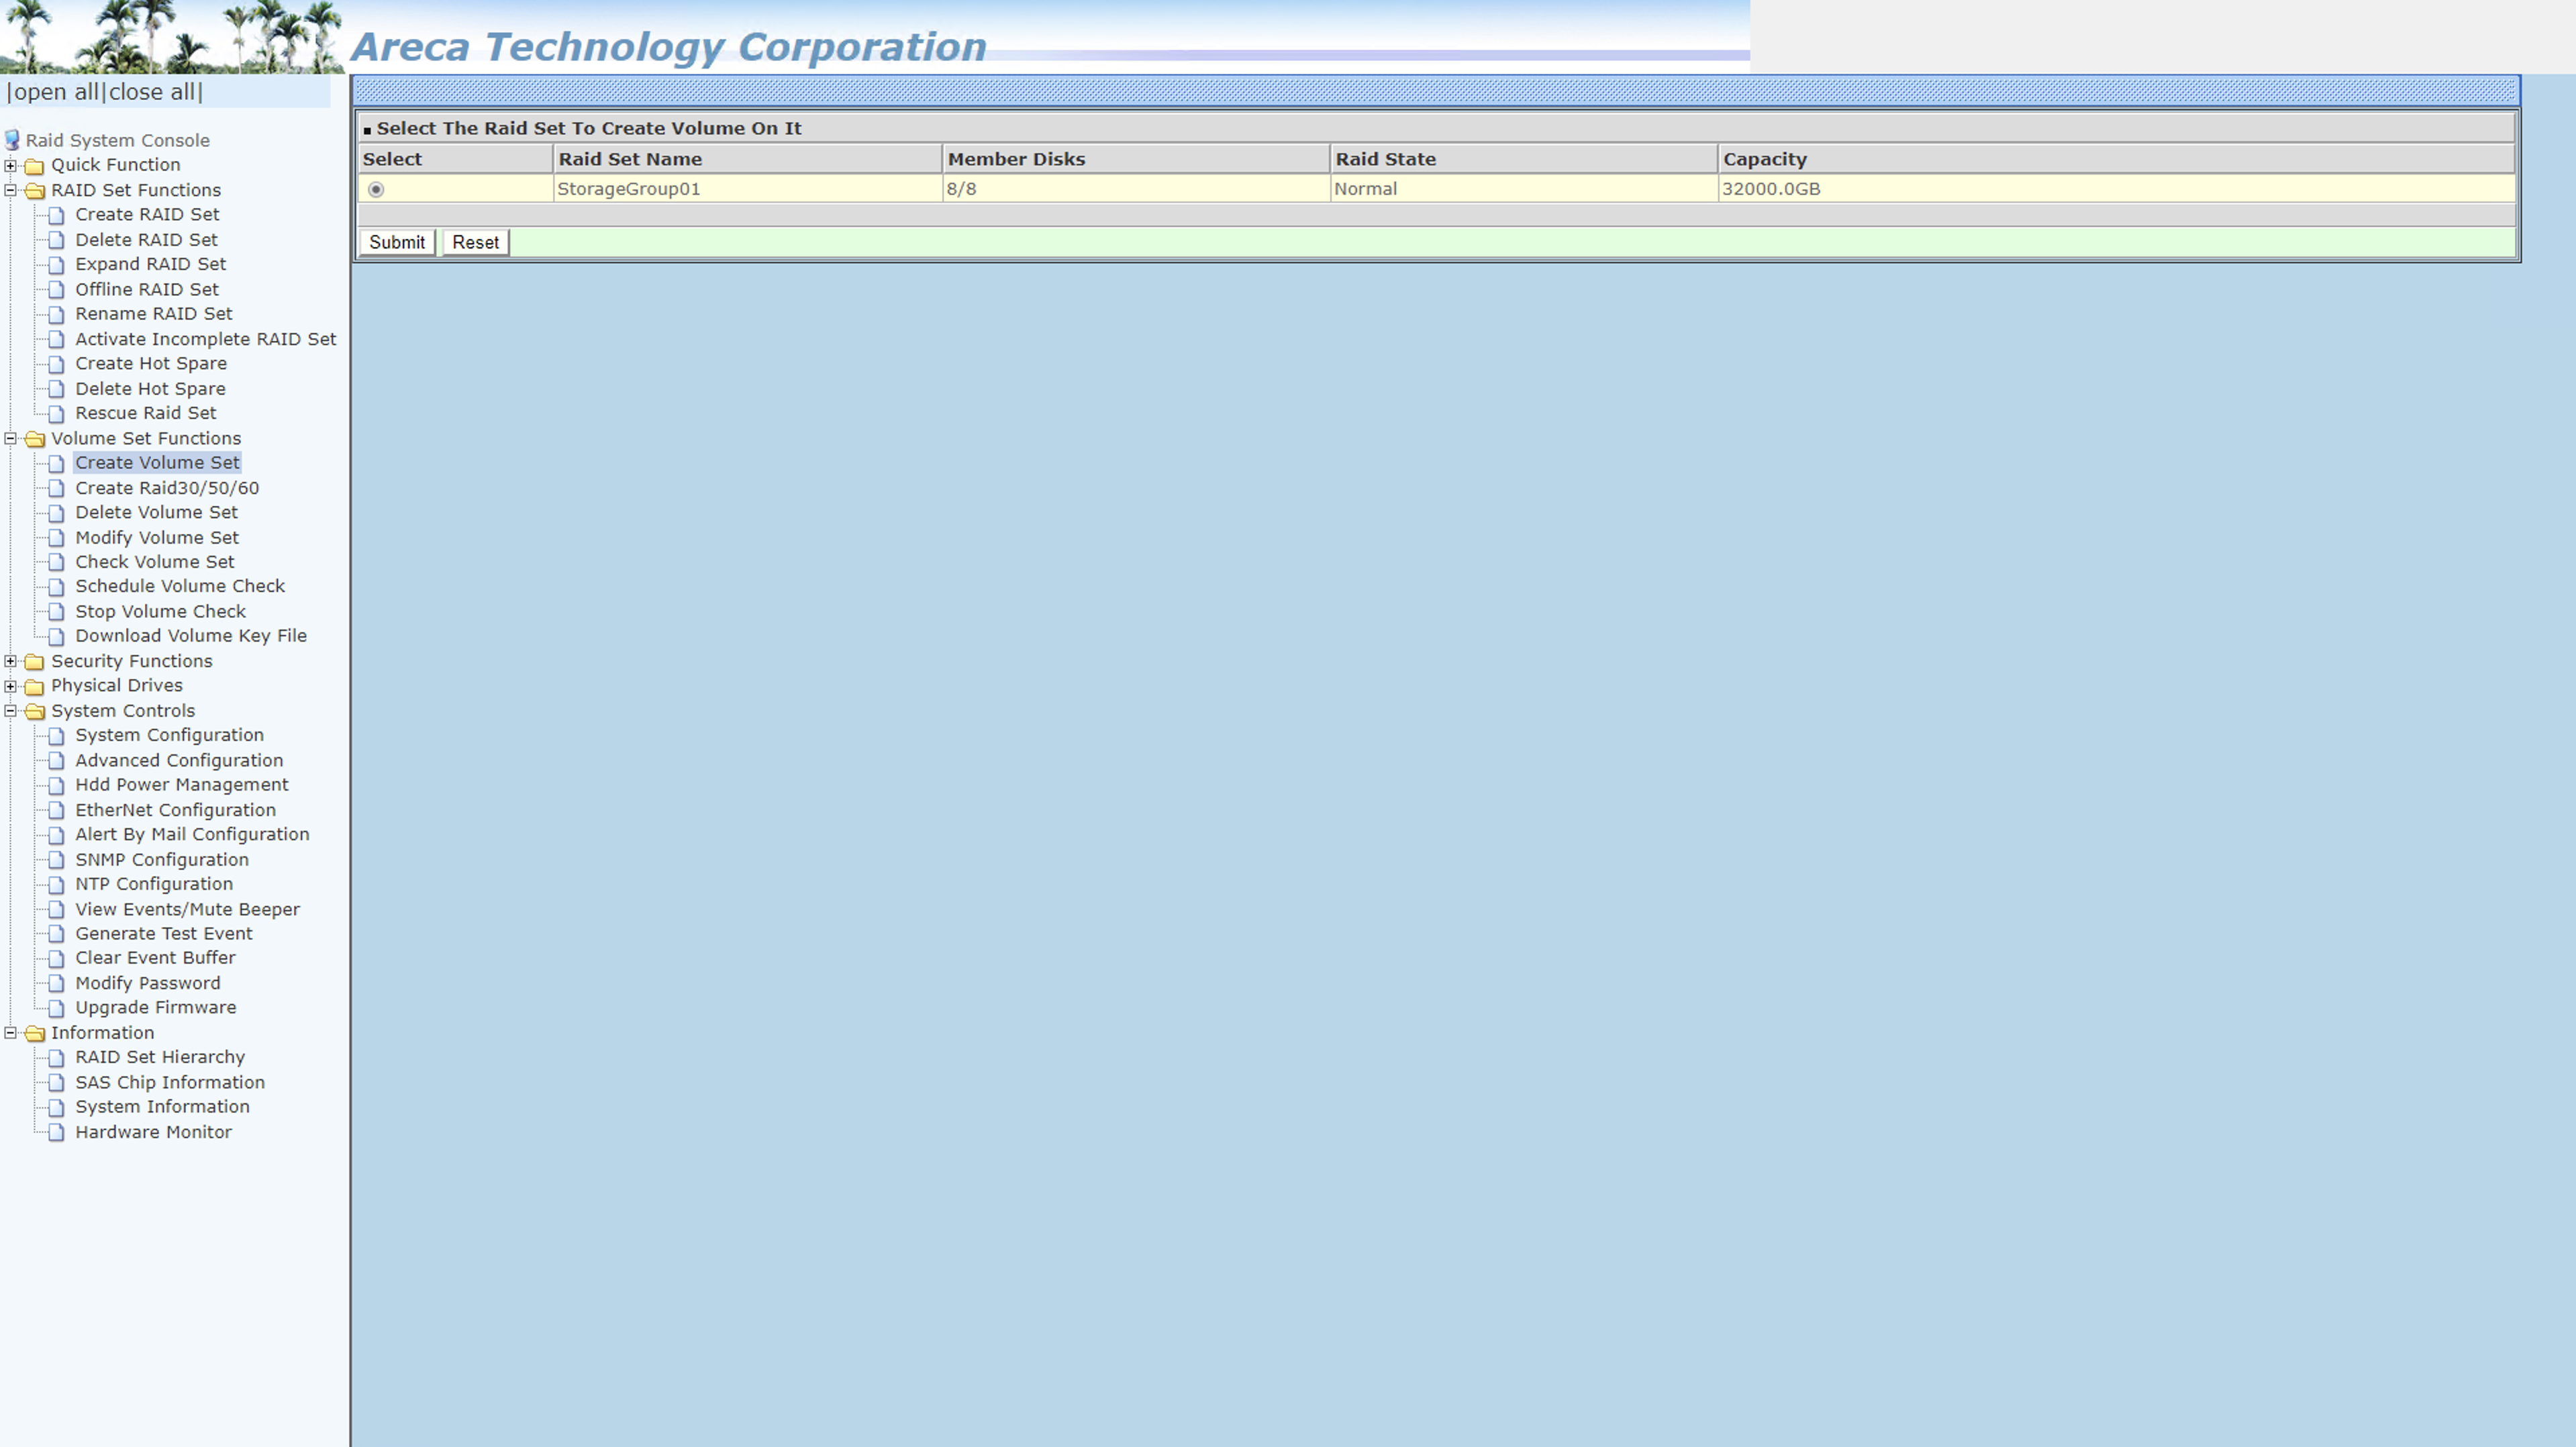
10. Navigate to Volume Set Functions --> Create Volume Set
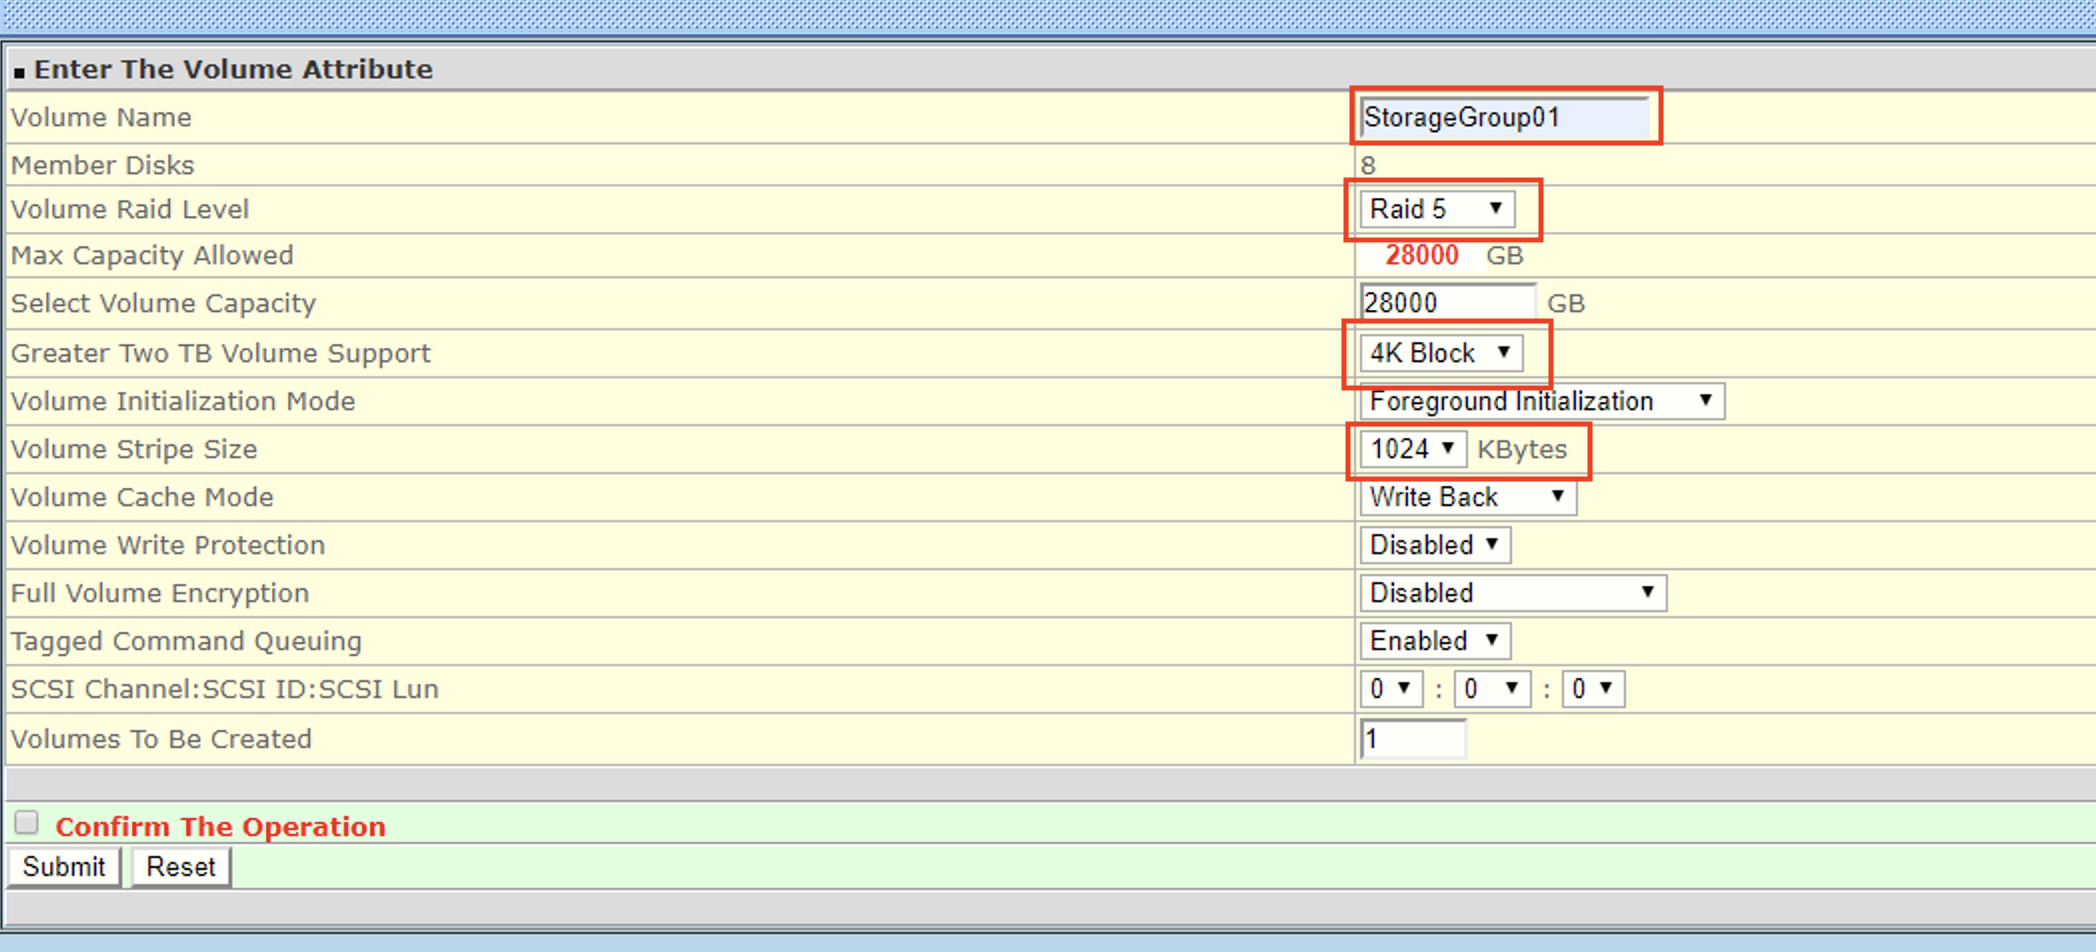
11. Volume Set Attributes
a.) Ensure that the name of the volume is the same as the RAID Set Name
b.) Choose RAID Type (RAID 5 is our default, you may do RAID 6 is desired however note that there will be less total usable space)
**Note that when you name your RAID Set, the Volume Set and Disk name must all match when you reach each of these steps.
c.) Initialization mode:
Foreground requires RAID to complete initialization before usage.
Background you will be able to use the RAID set while initialization takes place.
d.) Ensure 4K lock Size (Greater Two TB Volume Support) and 1024 KBytes (Volume Stripe Size)
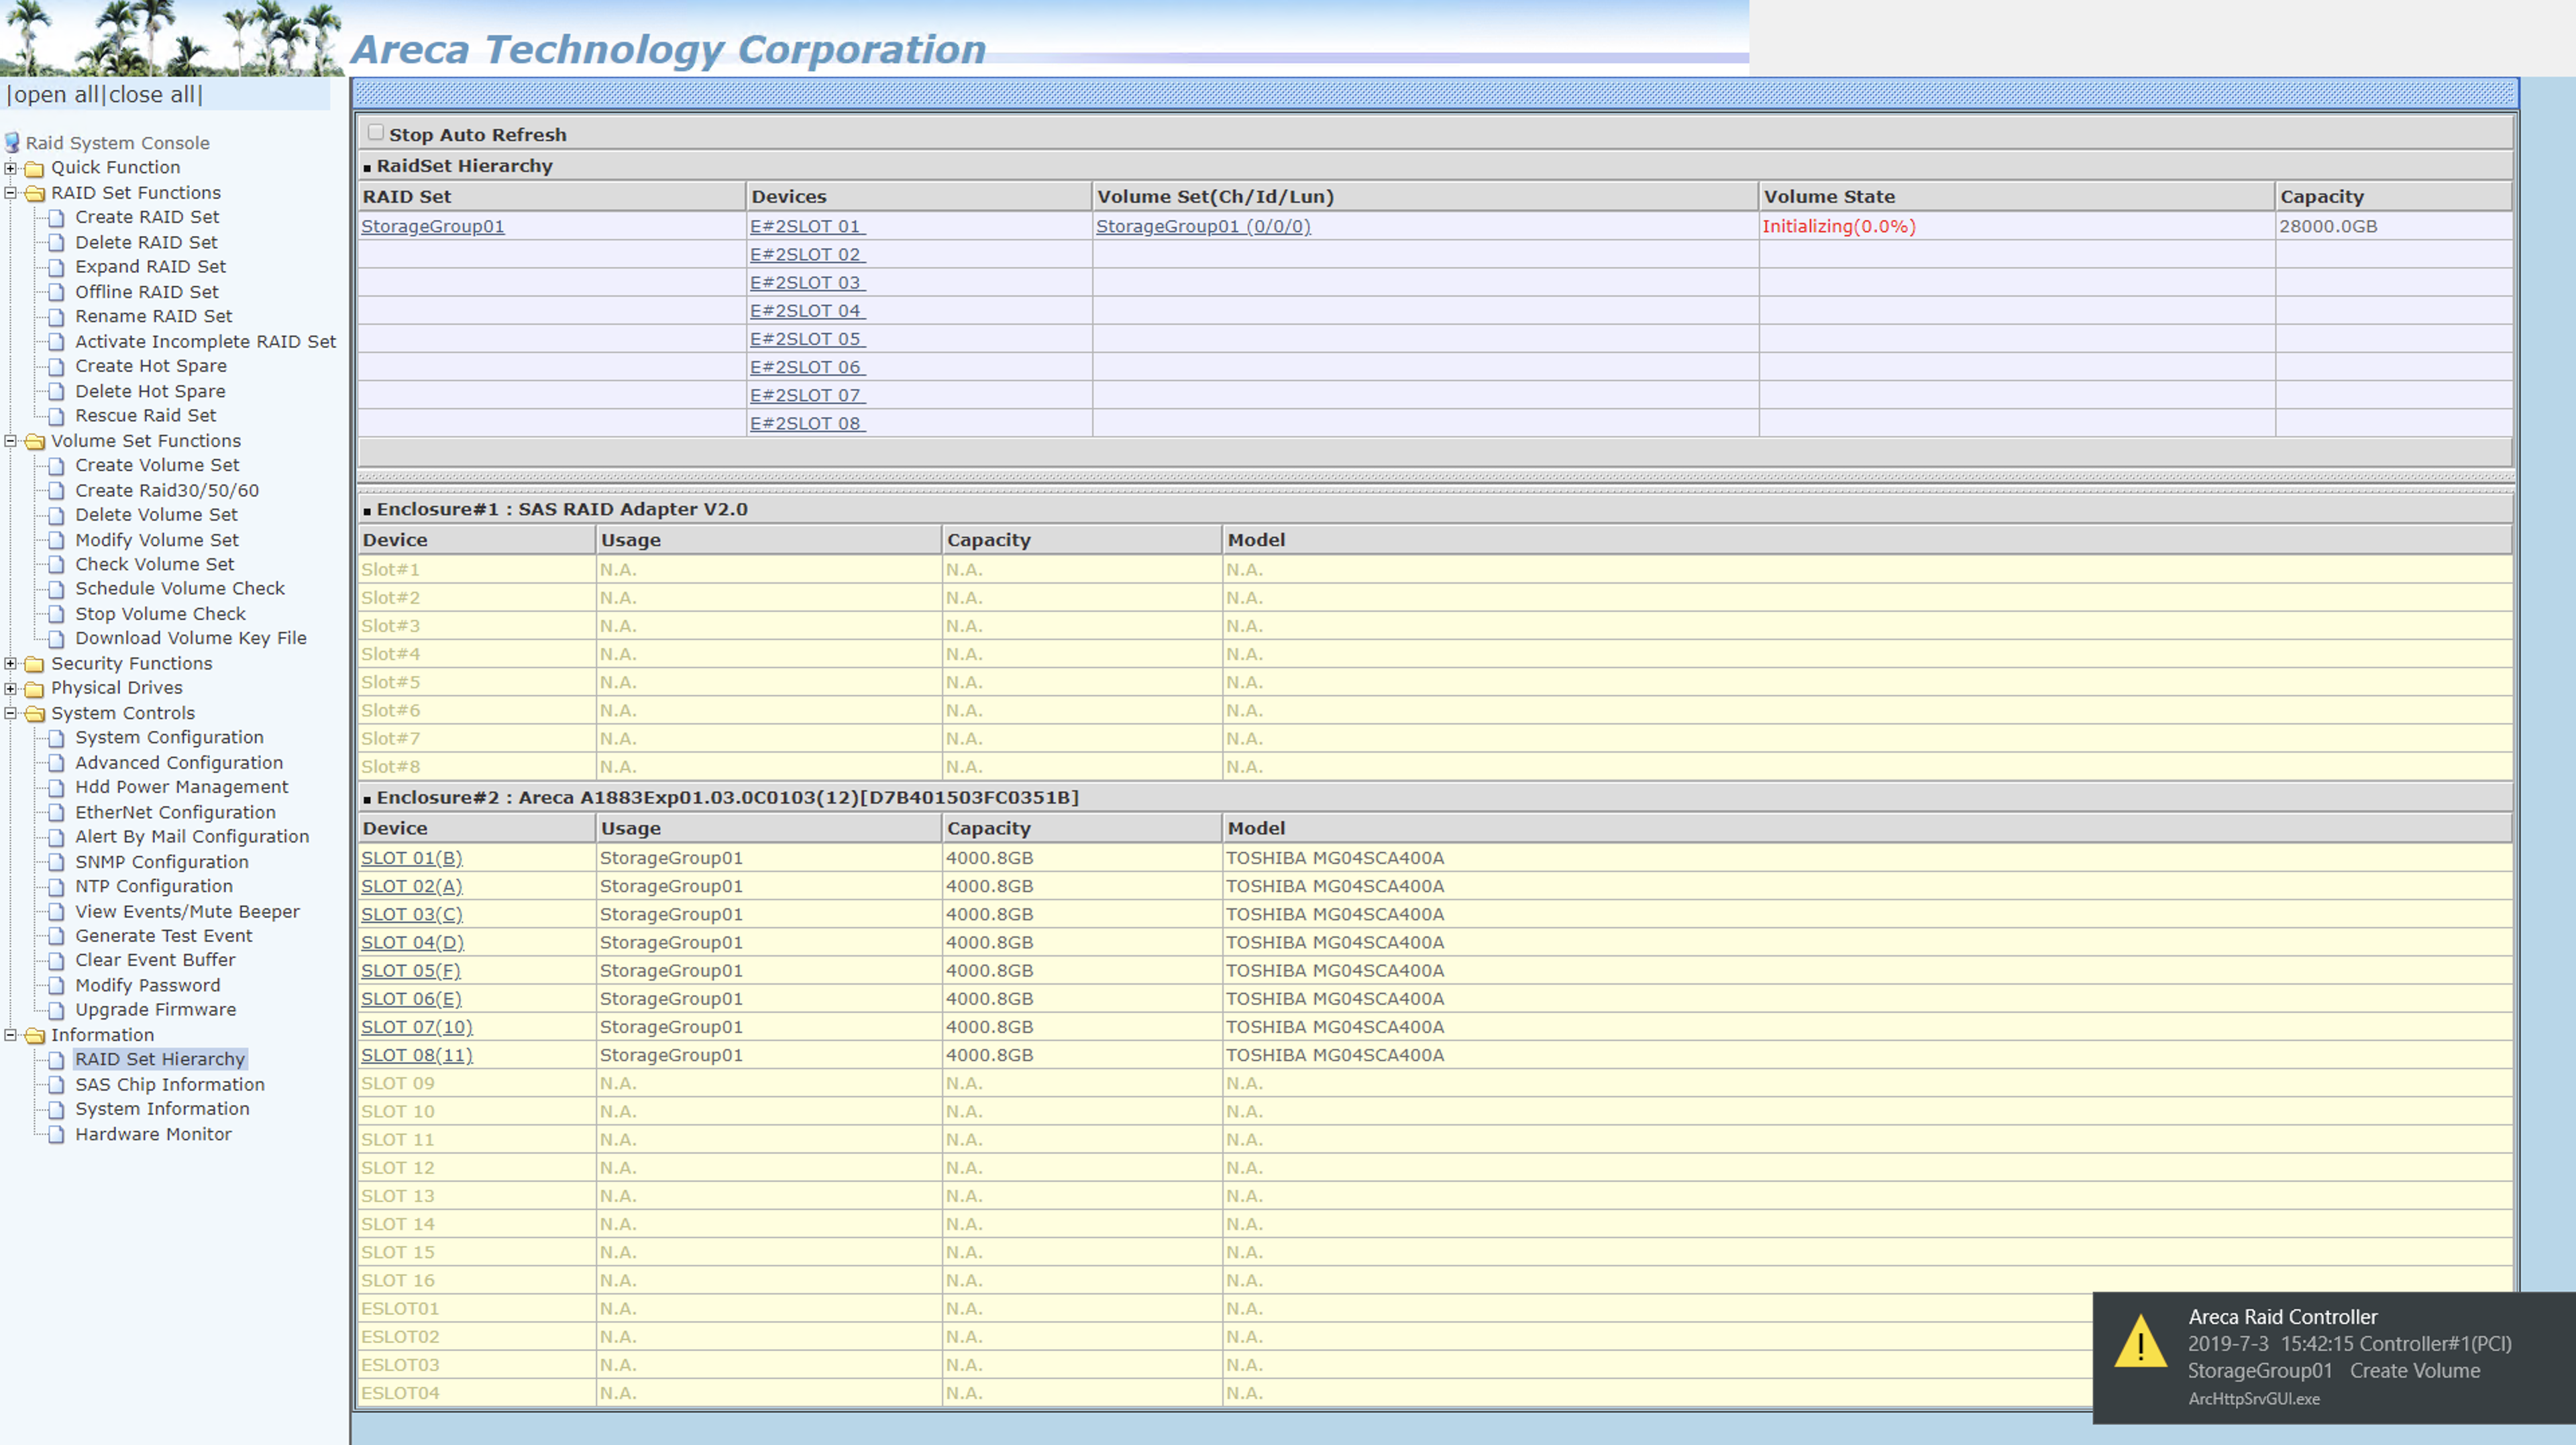
 *RAID Set Hierarchy will display progress
12. Once you have access to the volume, open Disk Management on Windows. An initialization window should appear. Ensure GPT is selected and click 'OK'.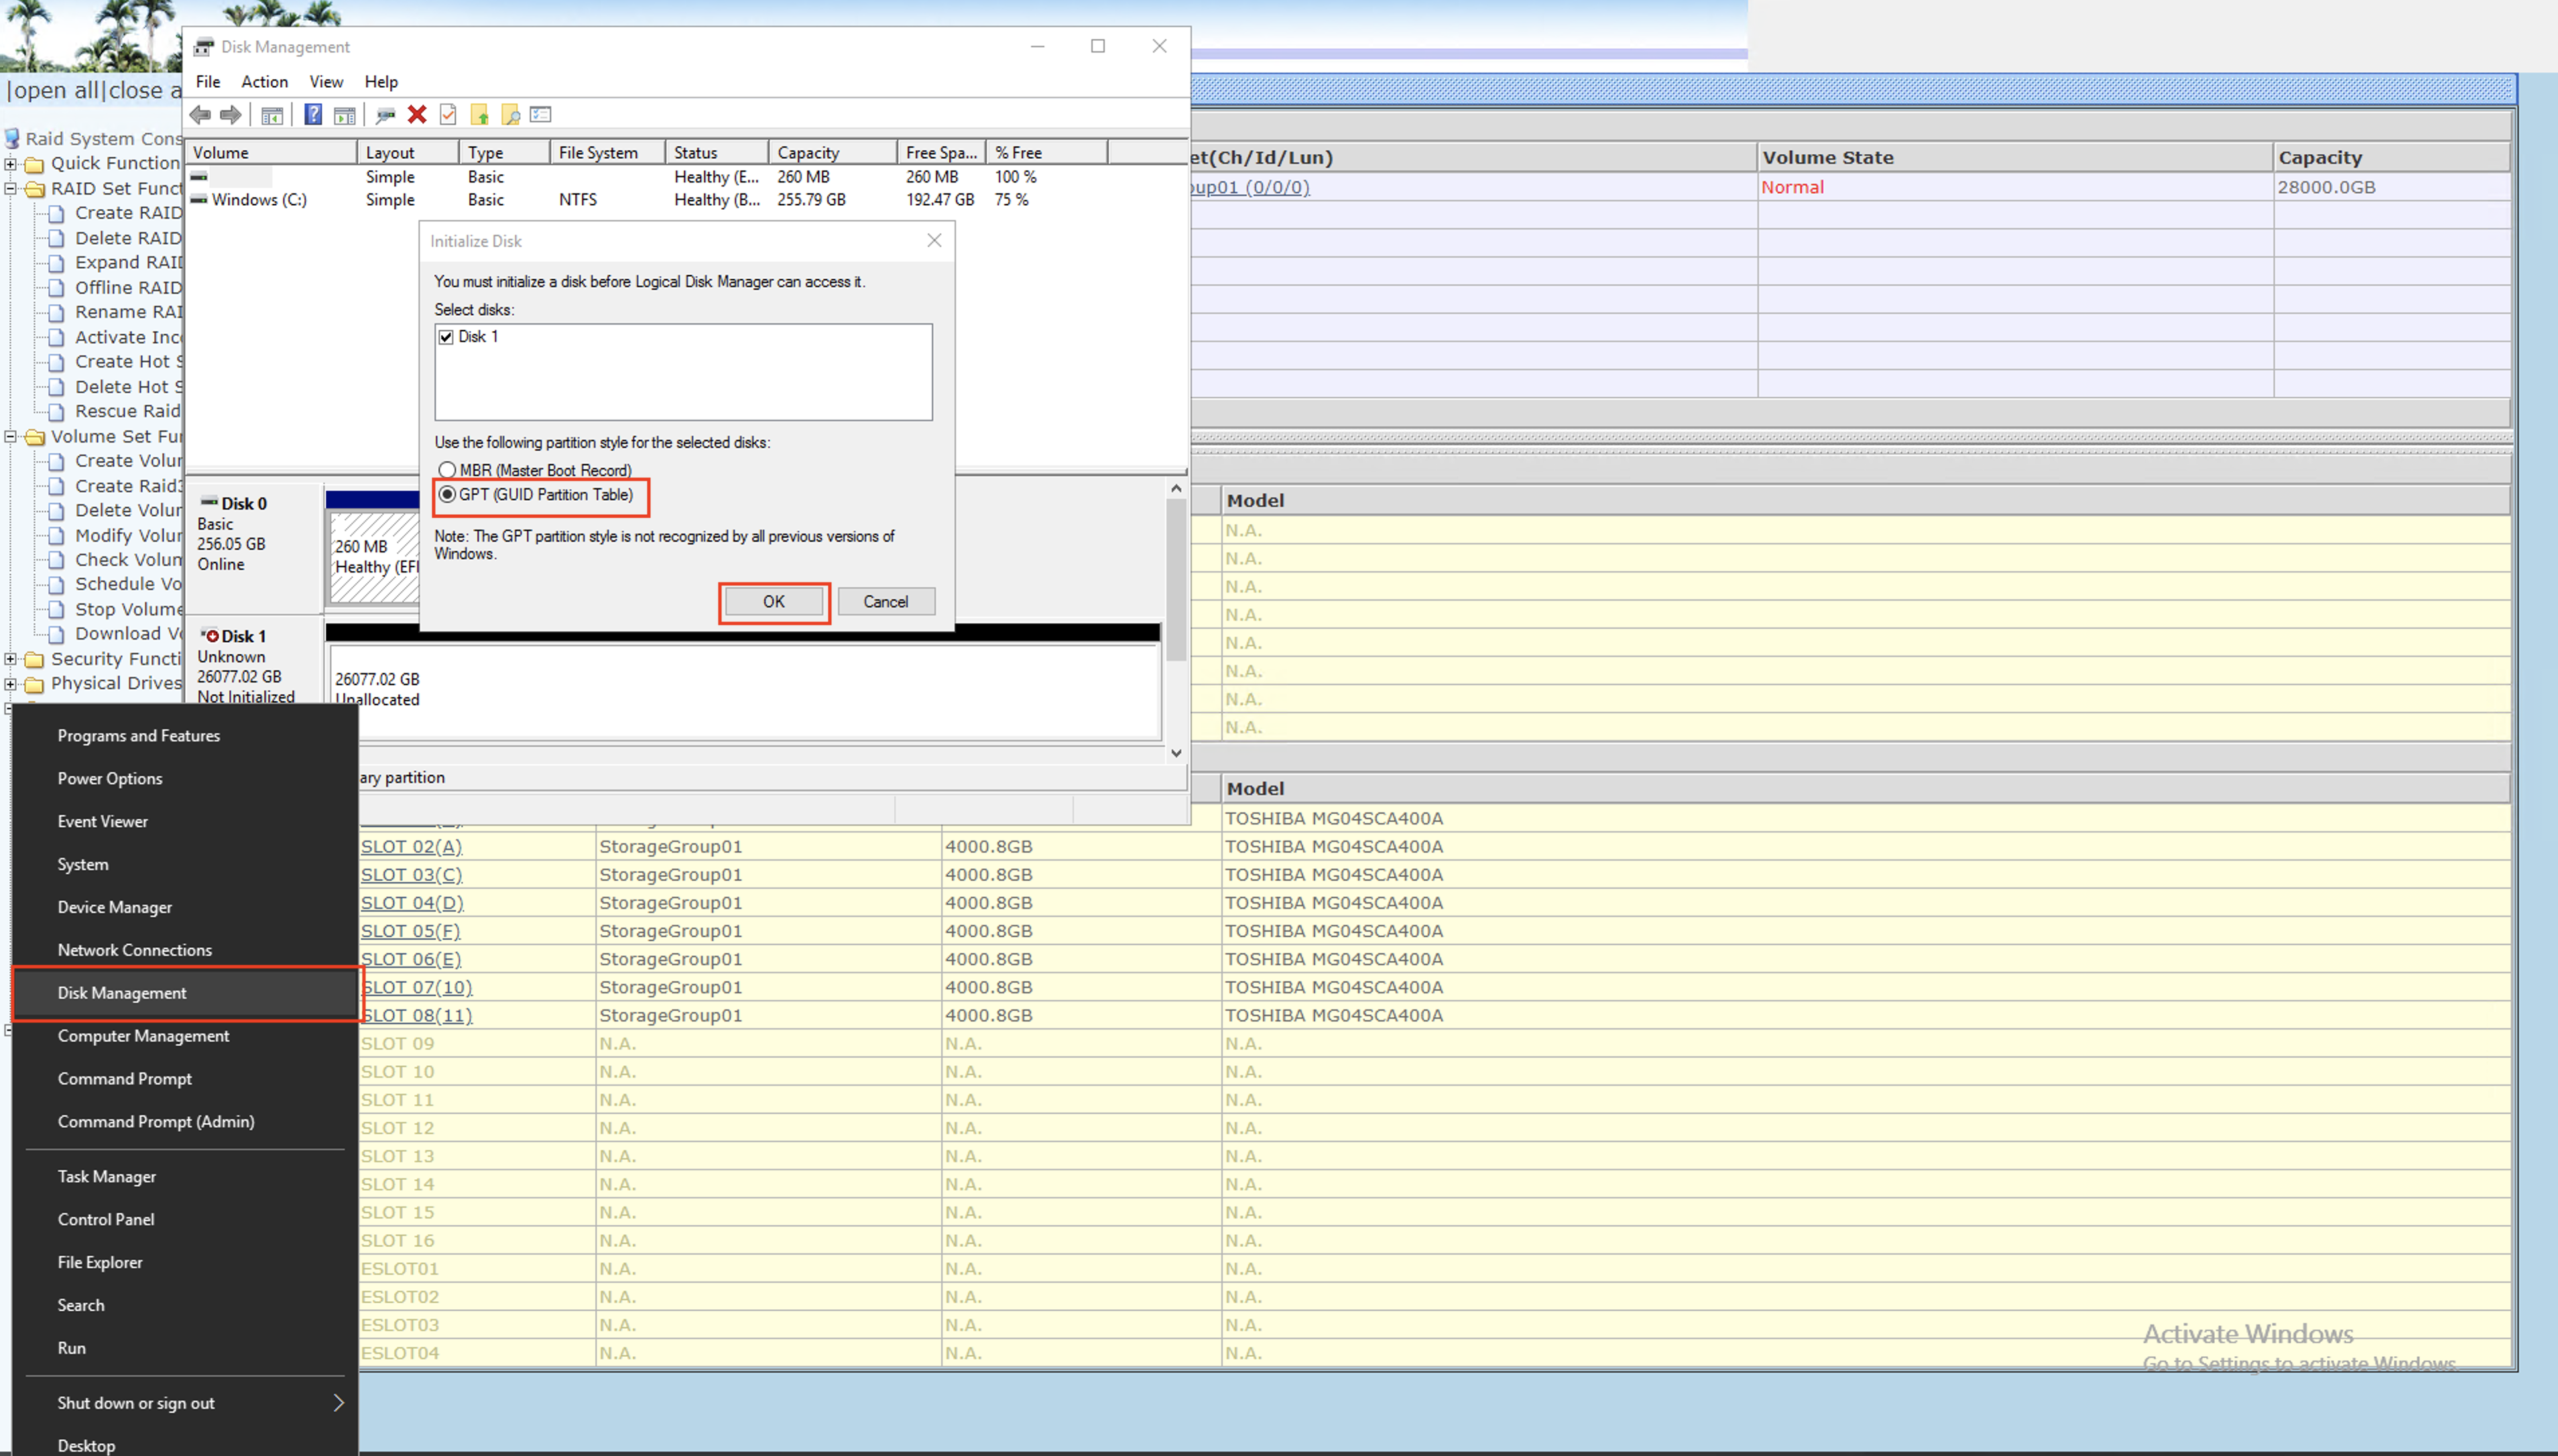
13. Right-Click on the New Volume and select New Simple Volume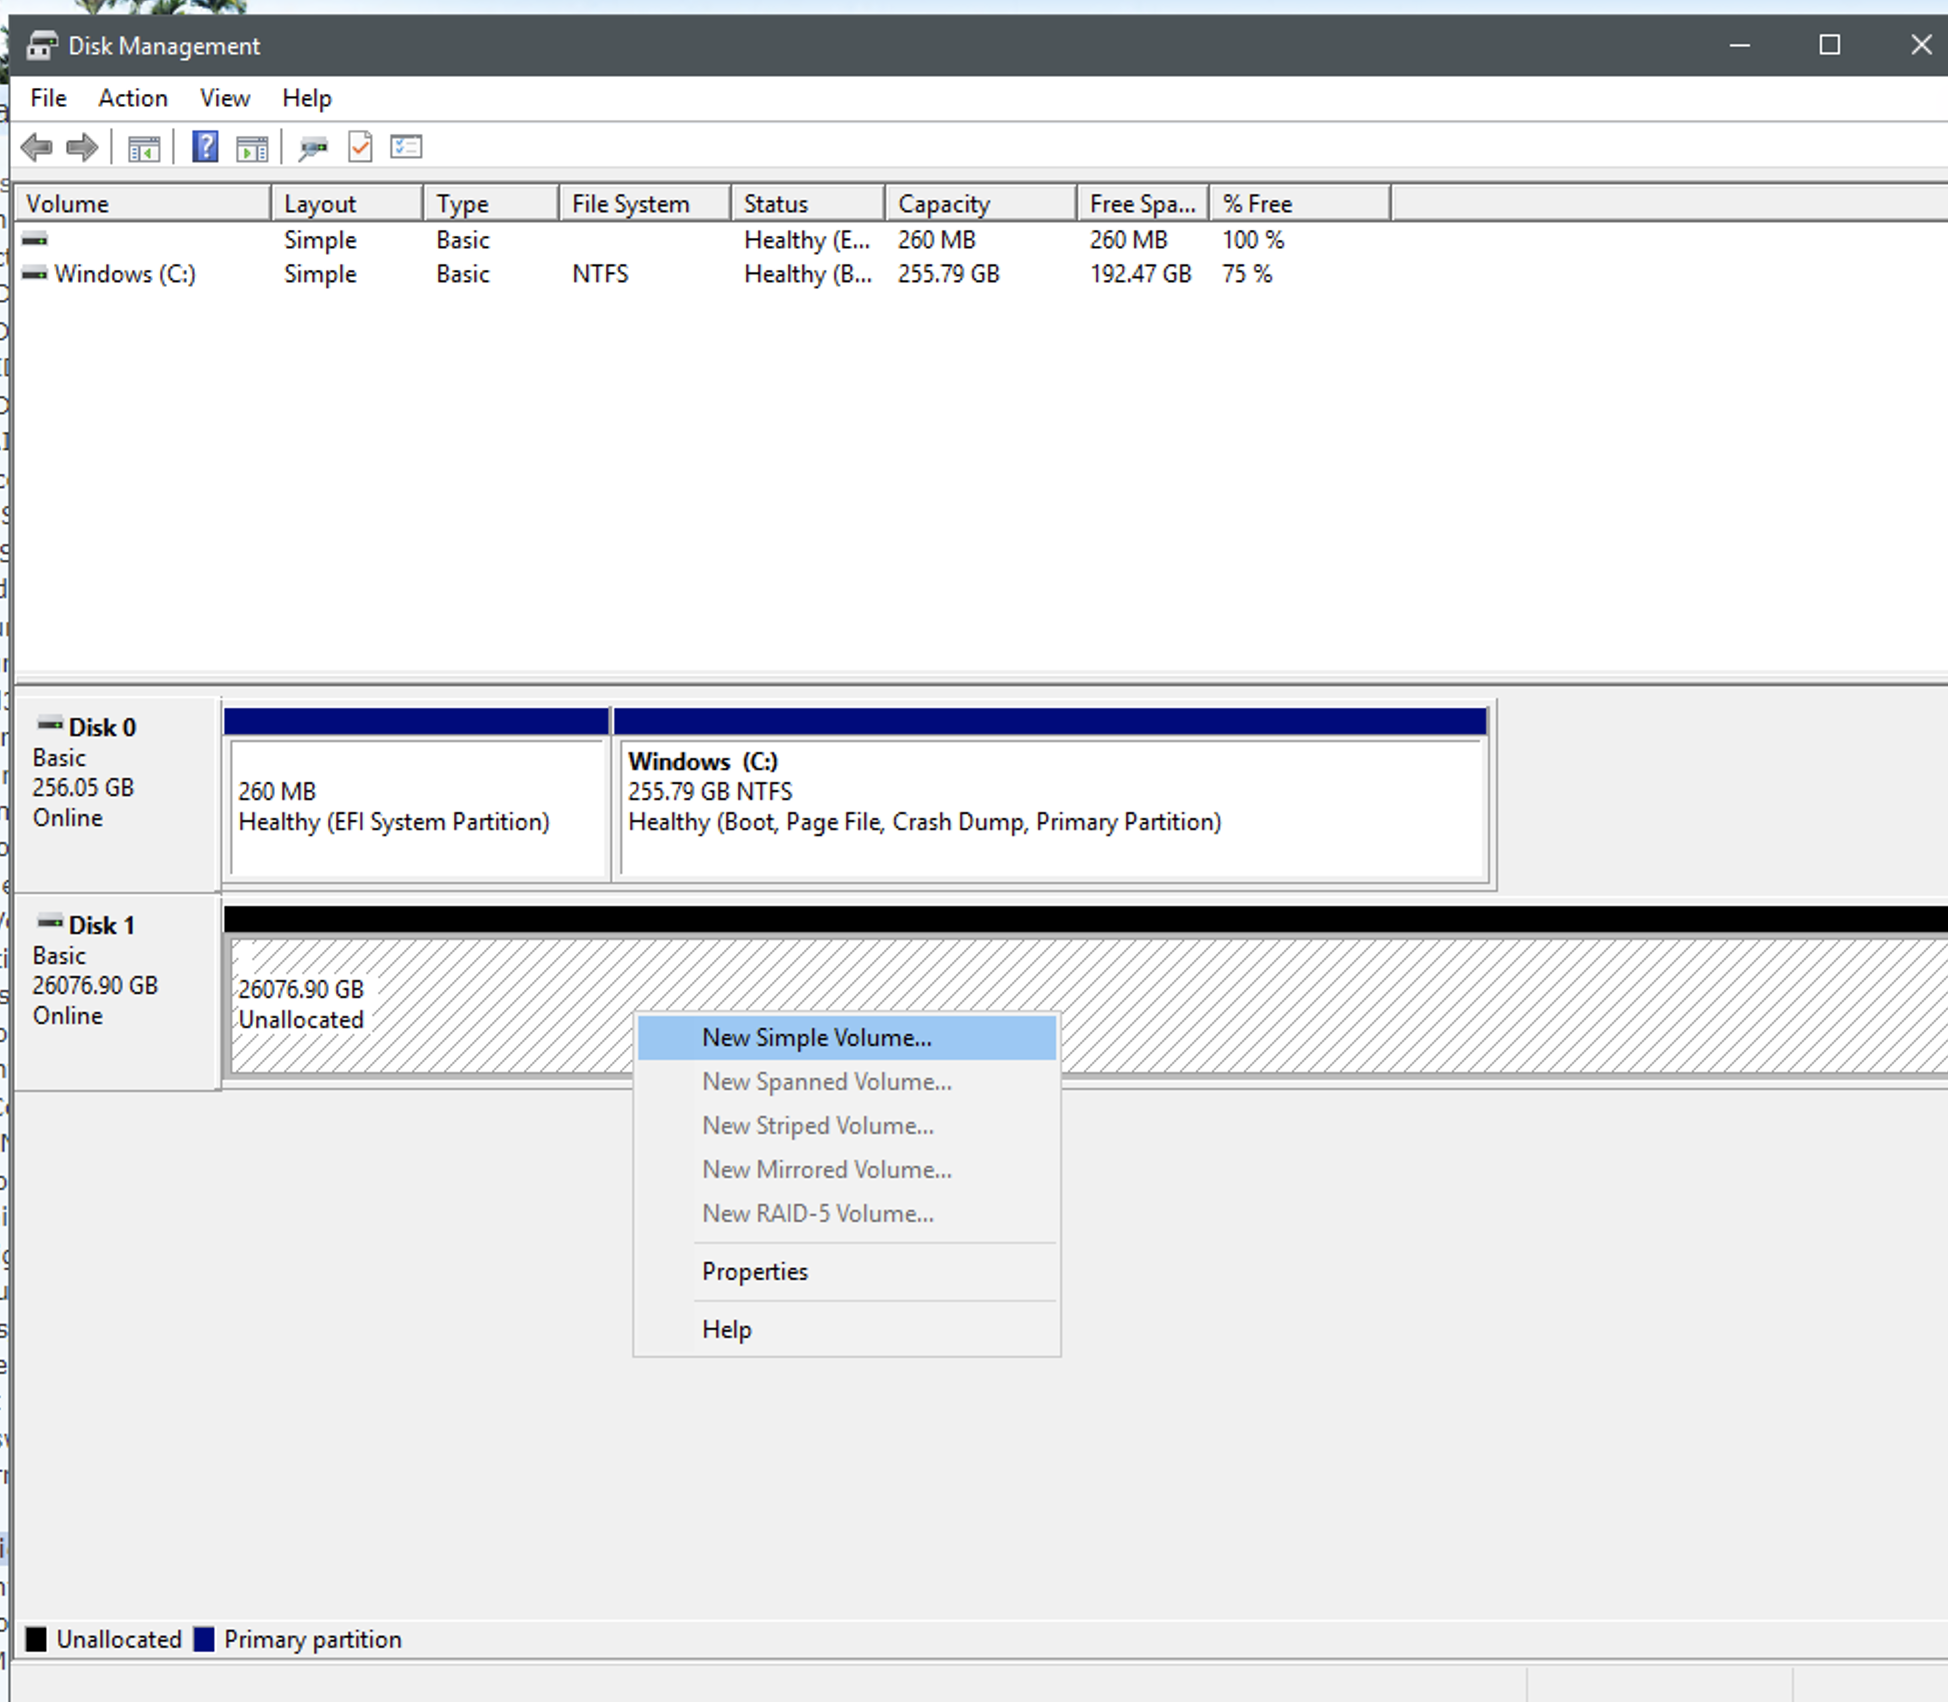
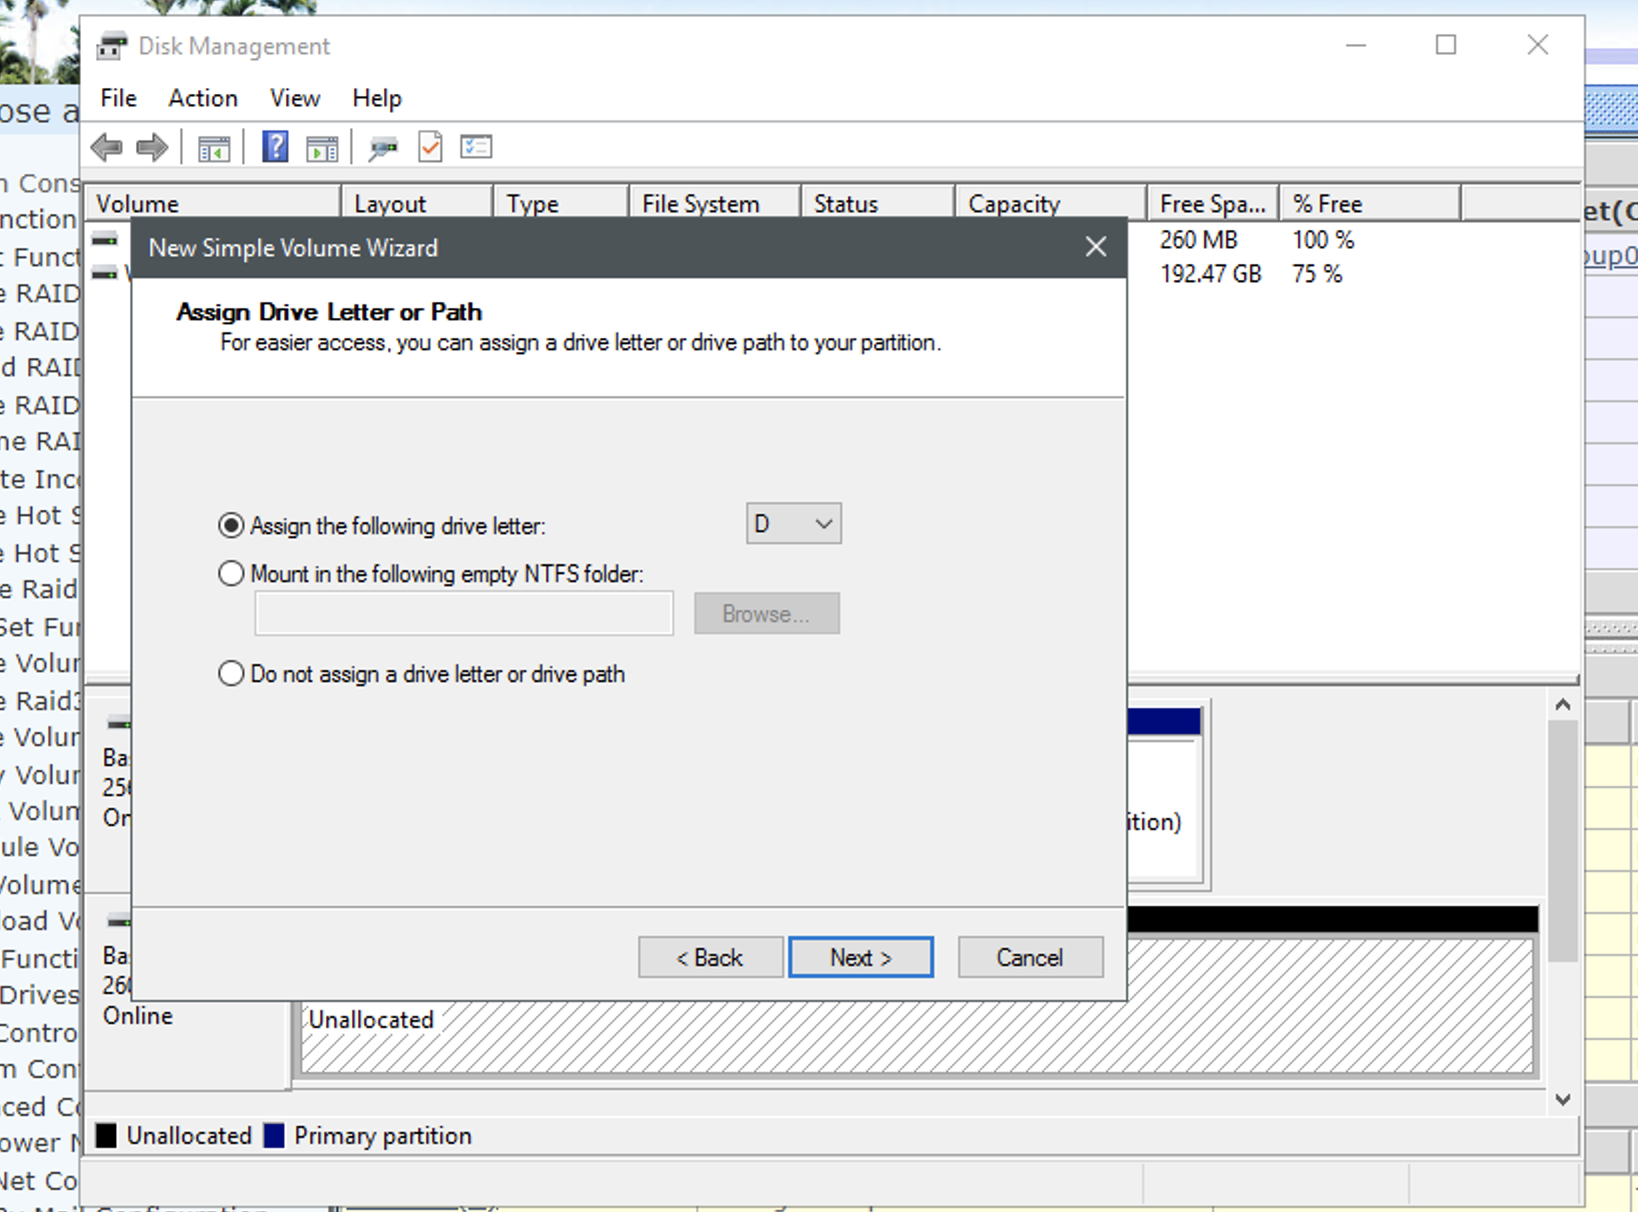
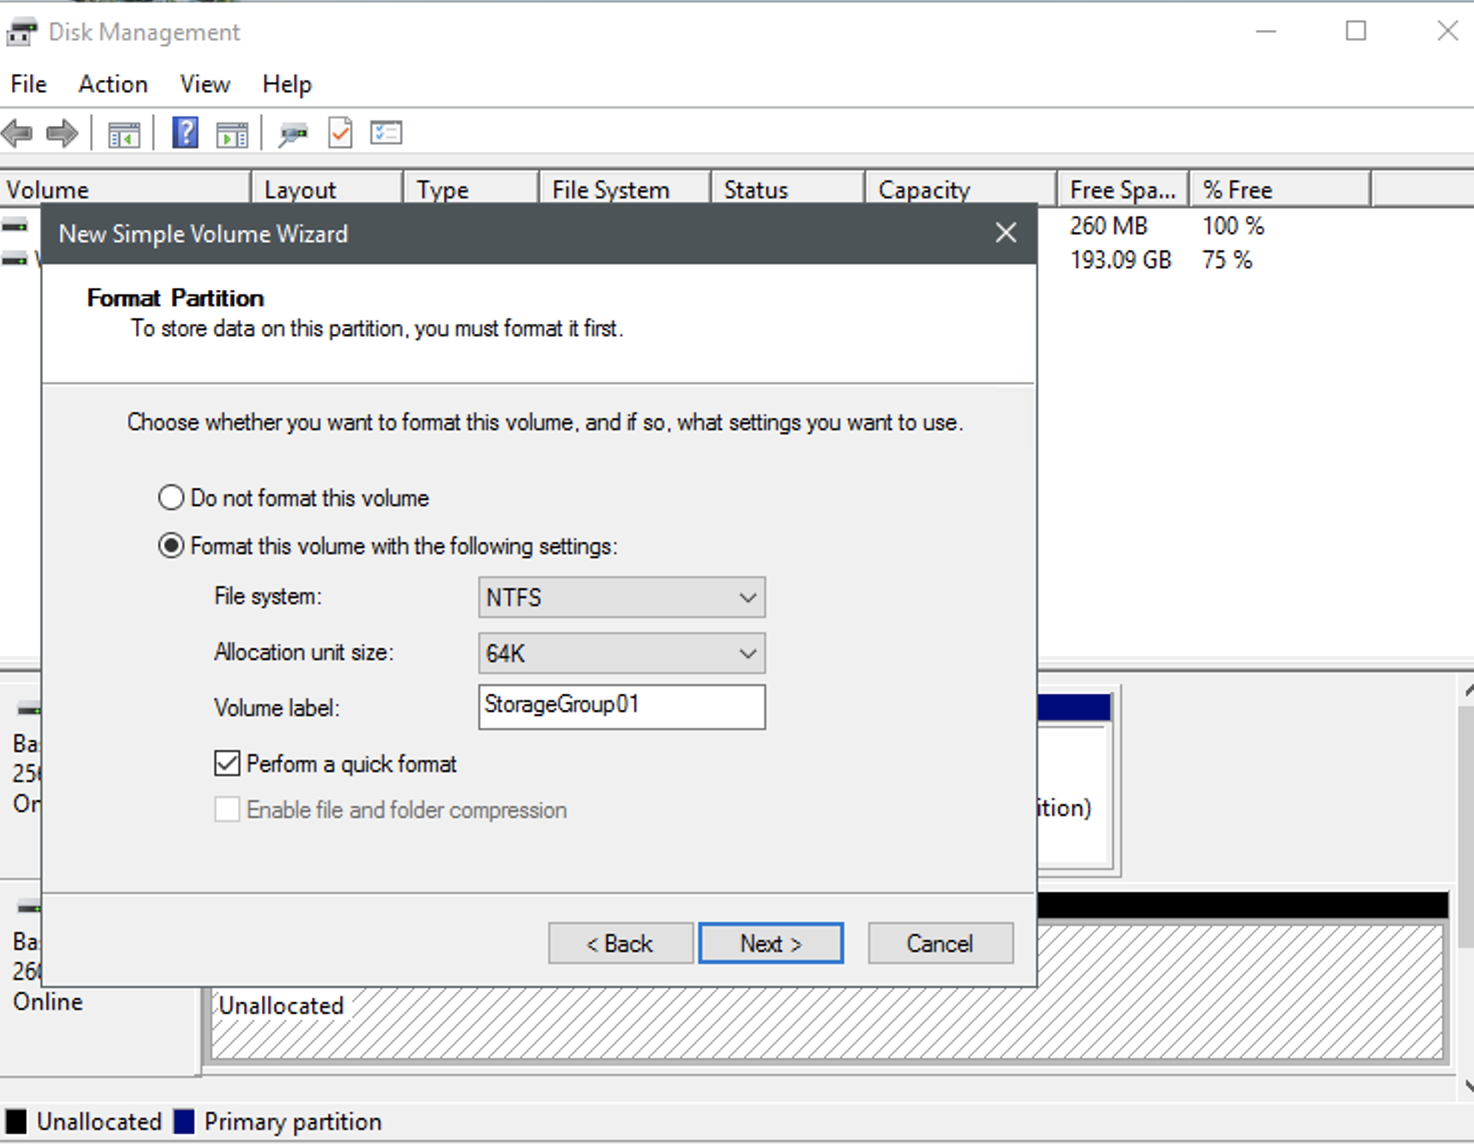
14. Assign the drive letter. We recommend using the next available letter following the C drive.
15. Rename the Volume Label to be the same as the RAID Set and Volume Set name. Set Allocation Unit Size to 64K.
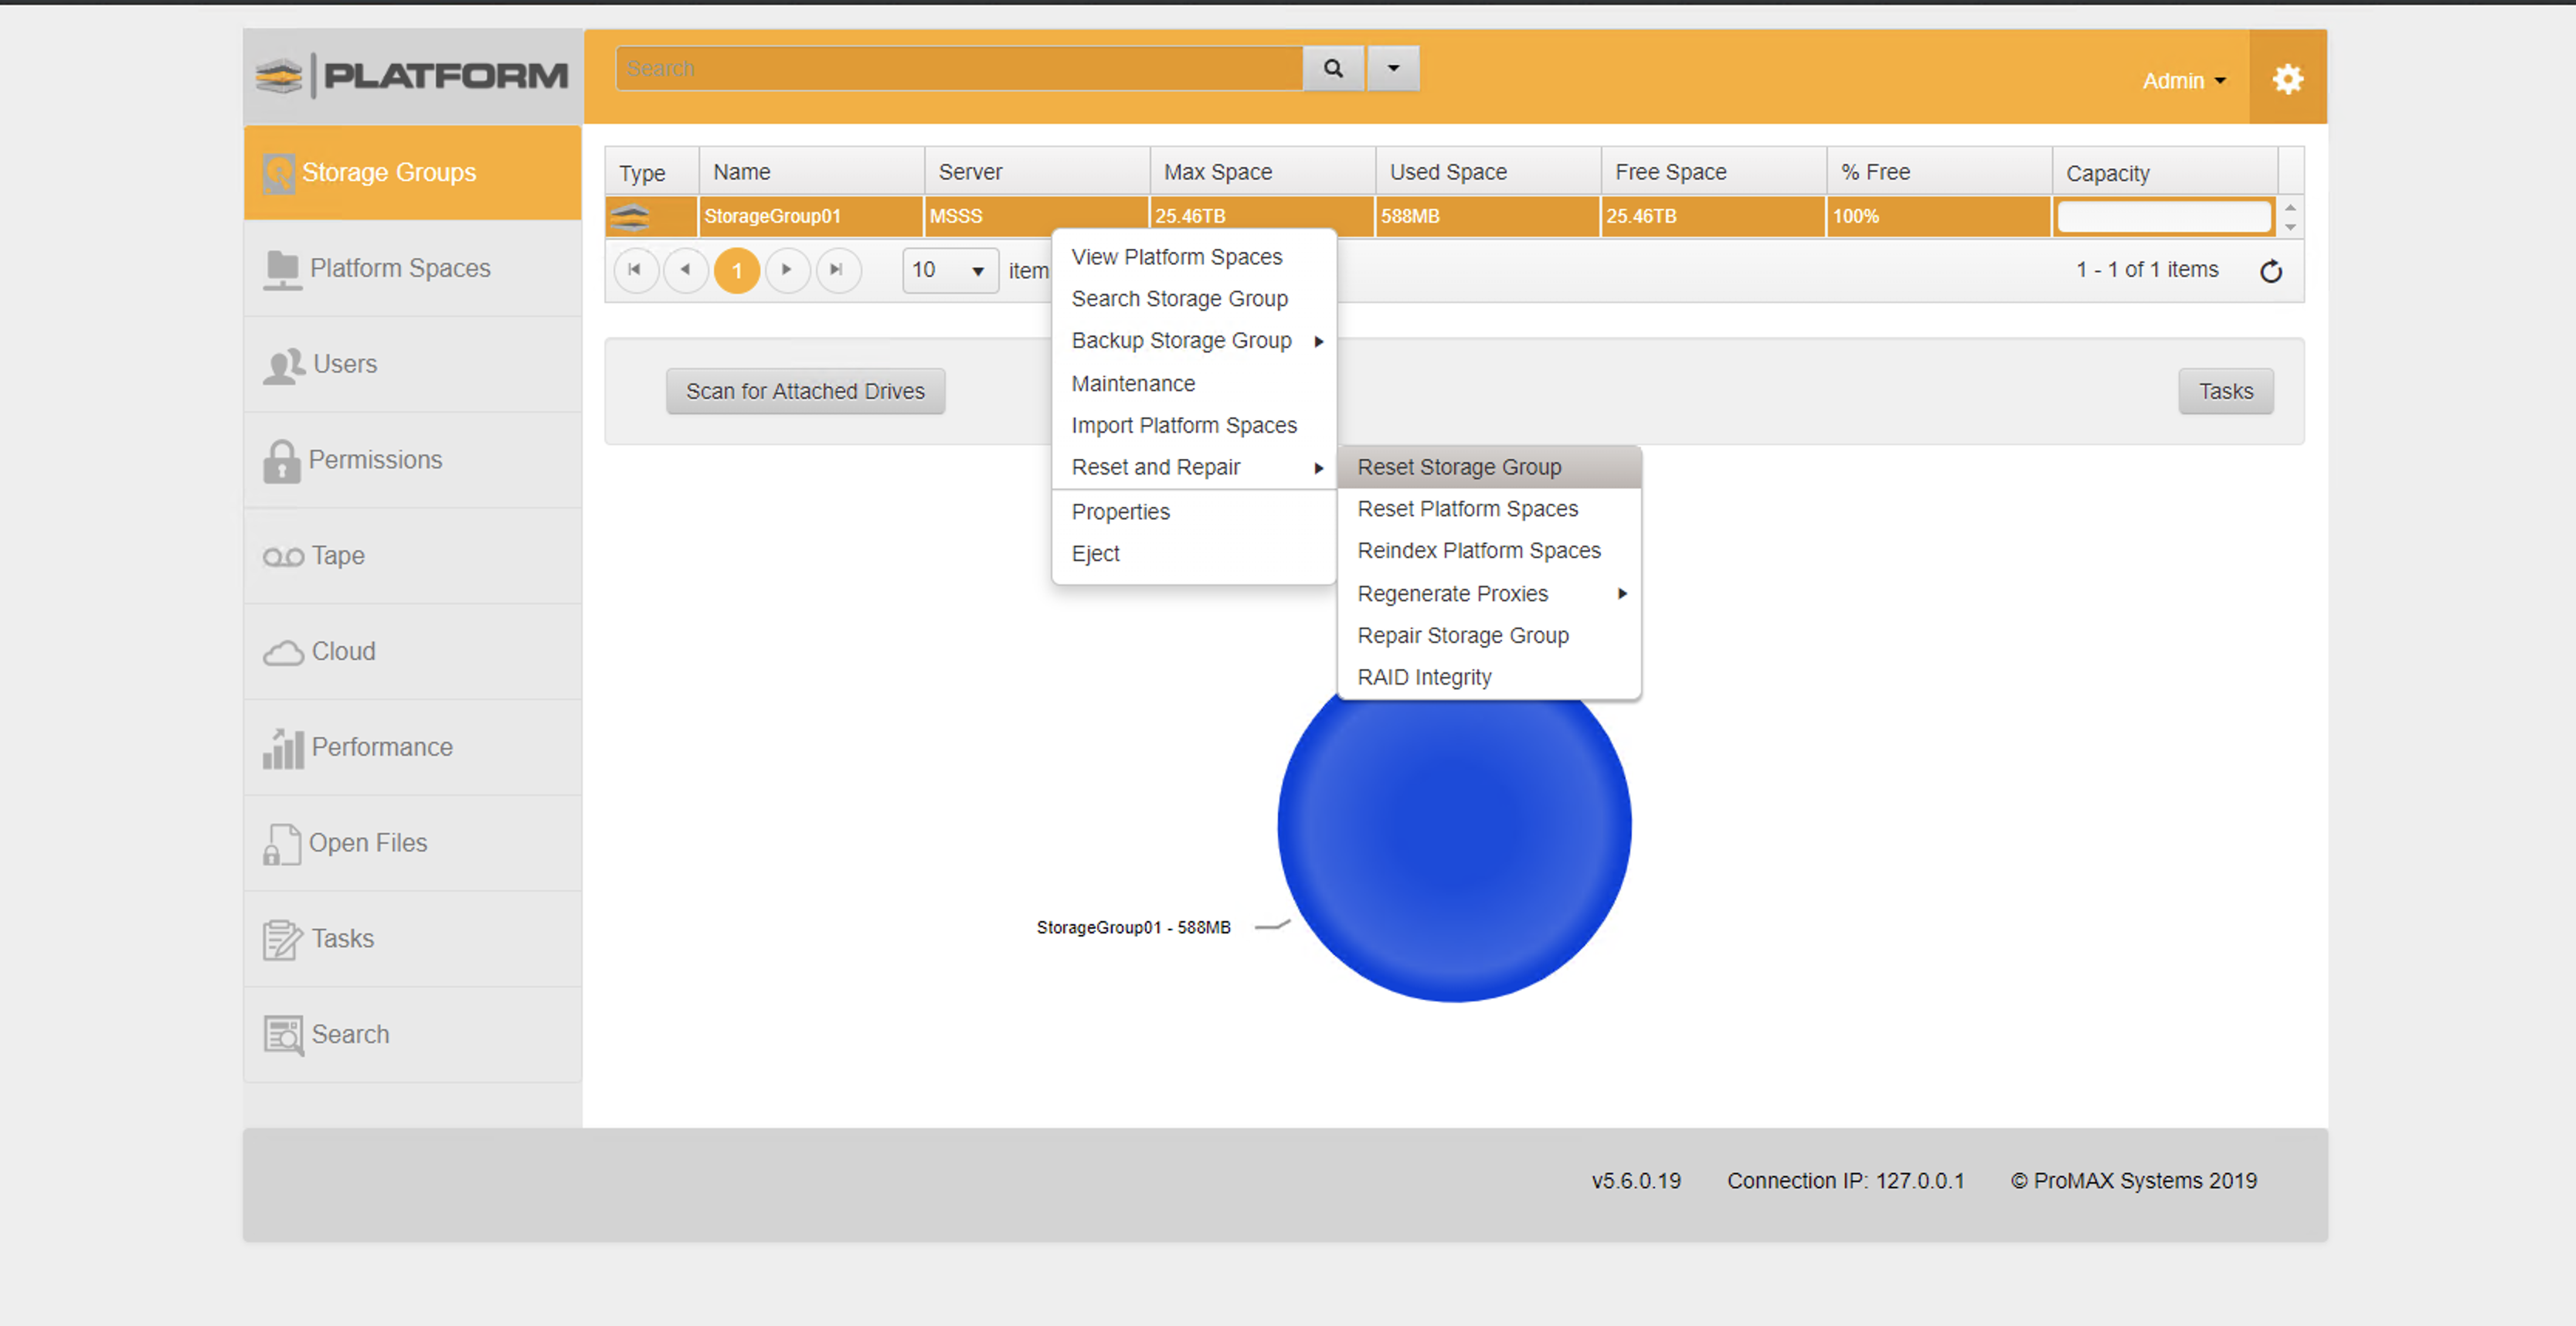
16. Return to the Platform UI. Right-click the new Storage Group-->Reset and Repair-->Reset Storage Group. This will allow Platform to take control of the storage and permission.
17. Click 'Yes' to Proceed.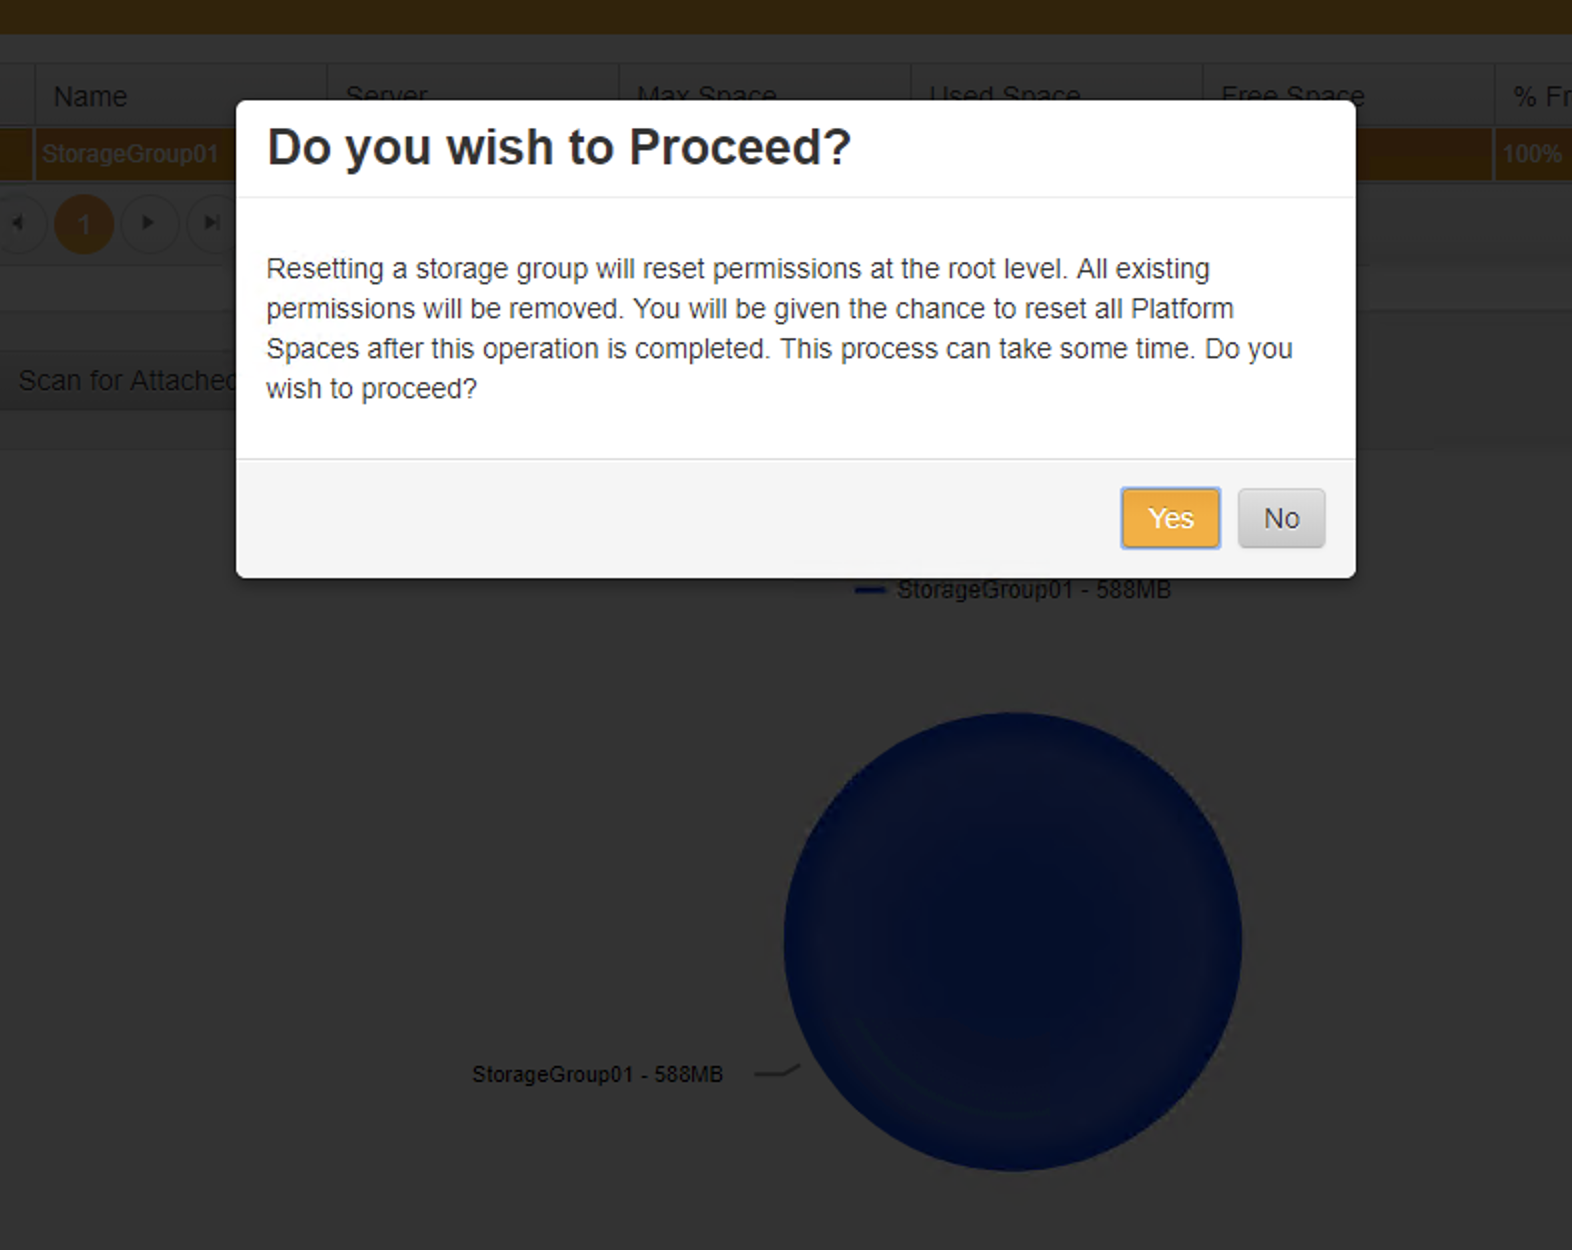
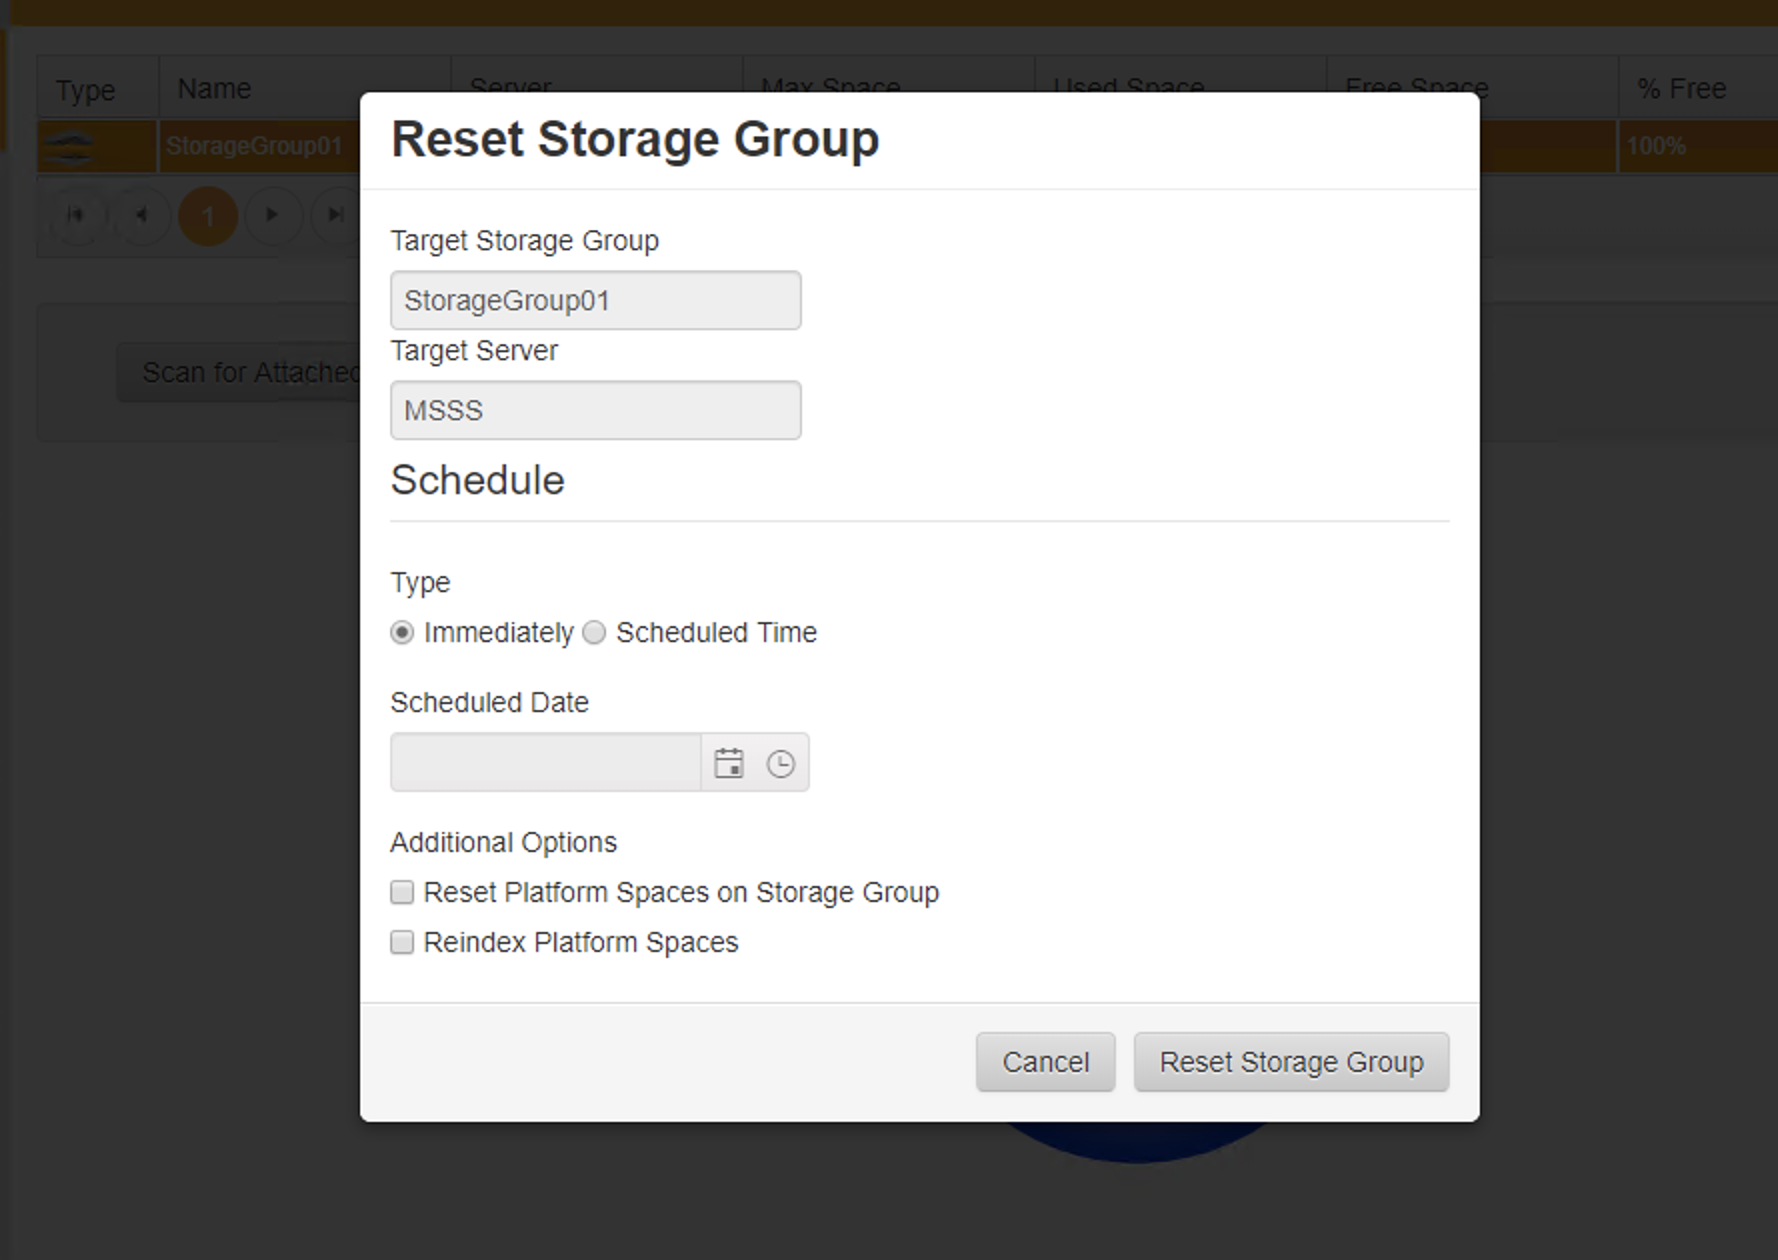
18. If there is any existing platform spaces on the storage, check mack 'Reset Platform Spaces on Storage Group' and 'Reindex Platform Spaces' and proceed by clicking 'Reset Storage Group'.
19. Once the task is completed. your storage is ready for use with Platform.