I have an Platform Studio that the Power supply has failed. What do I do?
1. Purchase a replacement power supply. These are off the shelf power supplies that can be purchased from any online retailer. We recommend purchasing a Corsair RM650X or higher as this power supply is fully modular and would be easiest to replace for newer studios or will upgrade older units.
2. Unplug the studio of all its connections and place on a table top to work on.
3. Open the unit on both side panels to be able to access the interior components. There may be Philip screws that need to be removed to unlock the doors as they need to slide towards the back of the unit to remove. 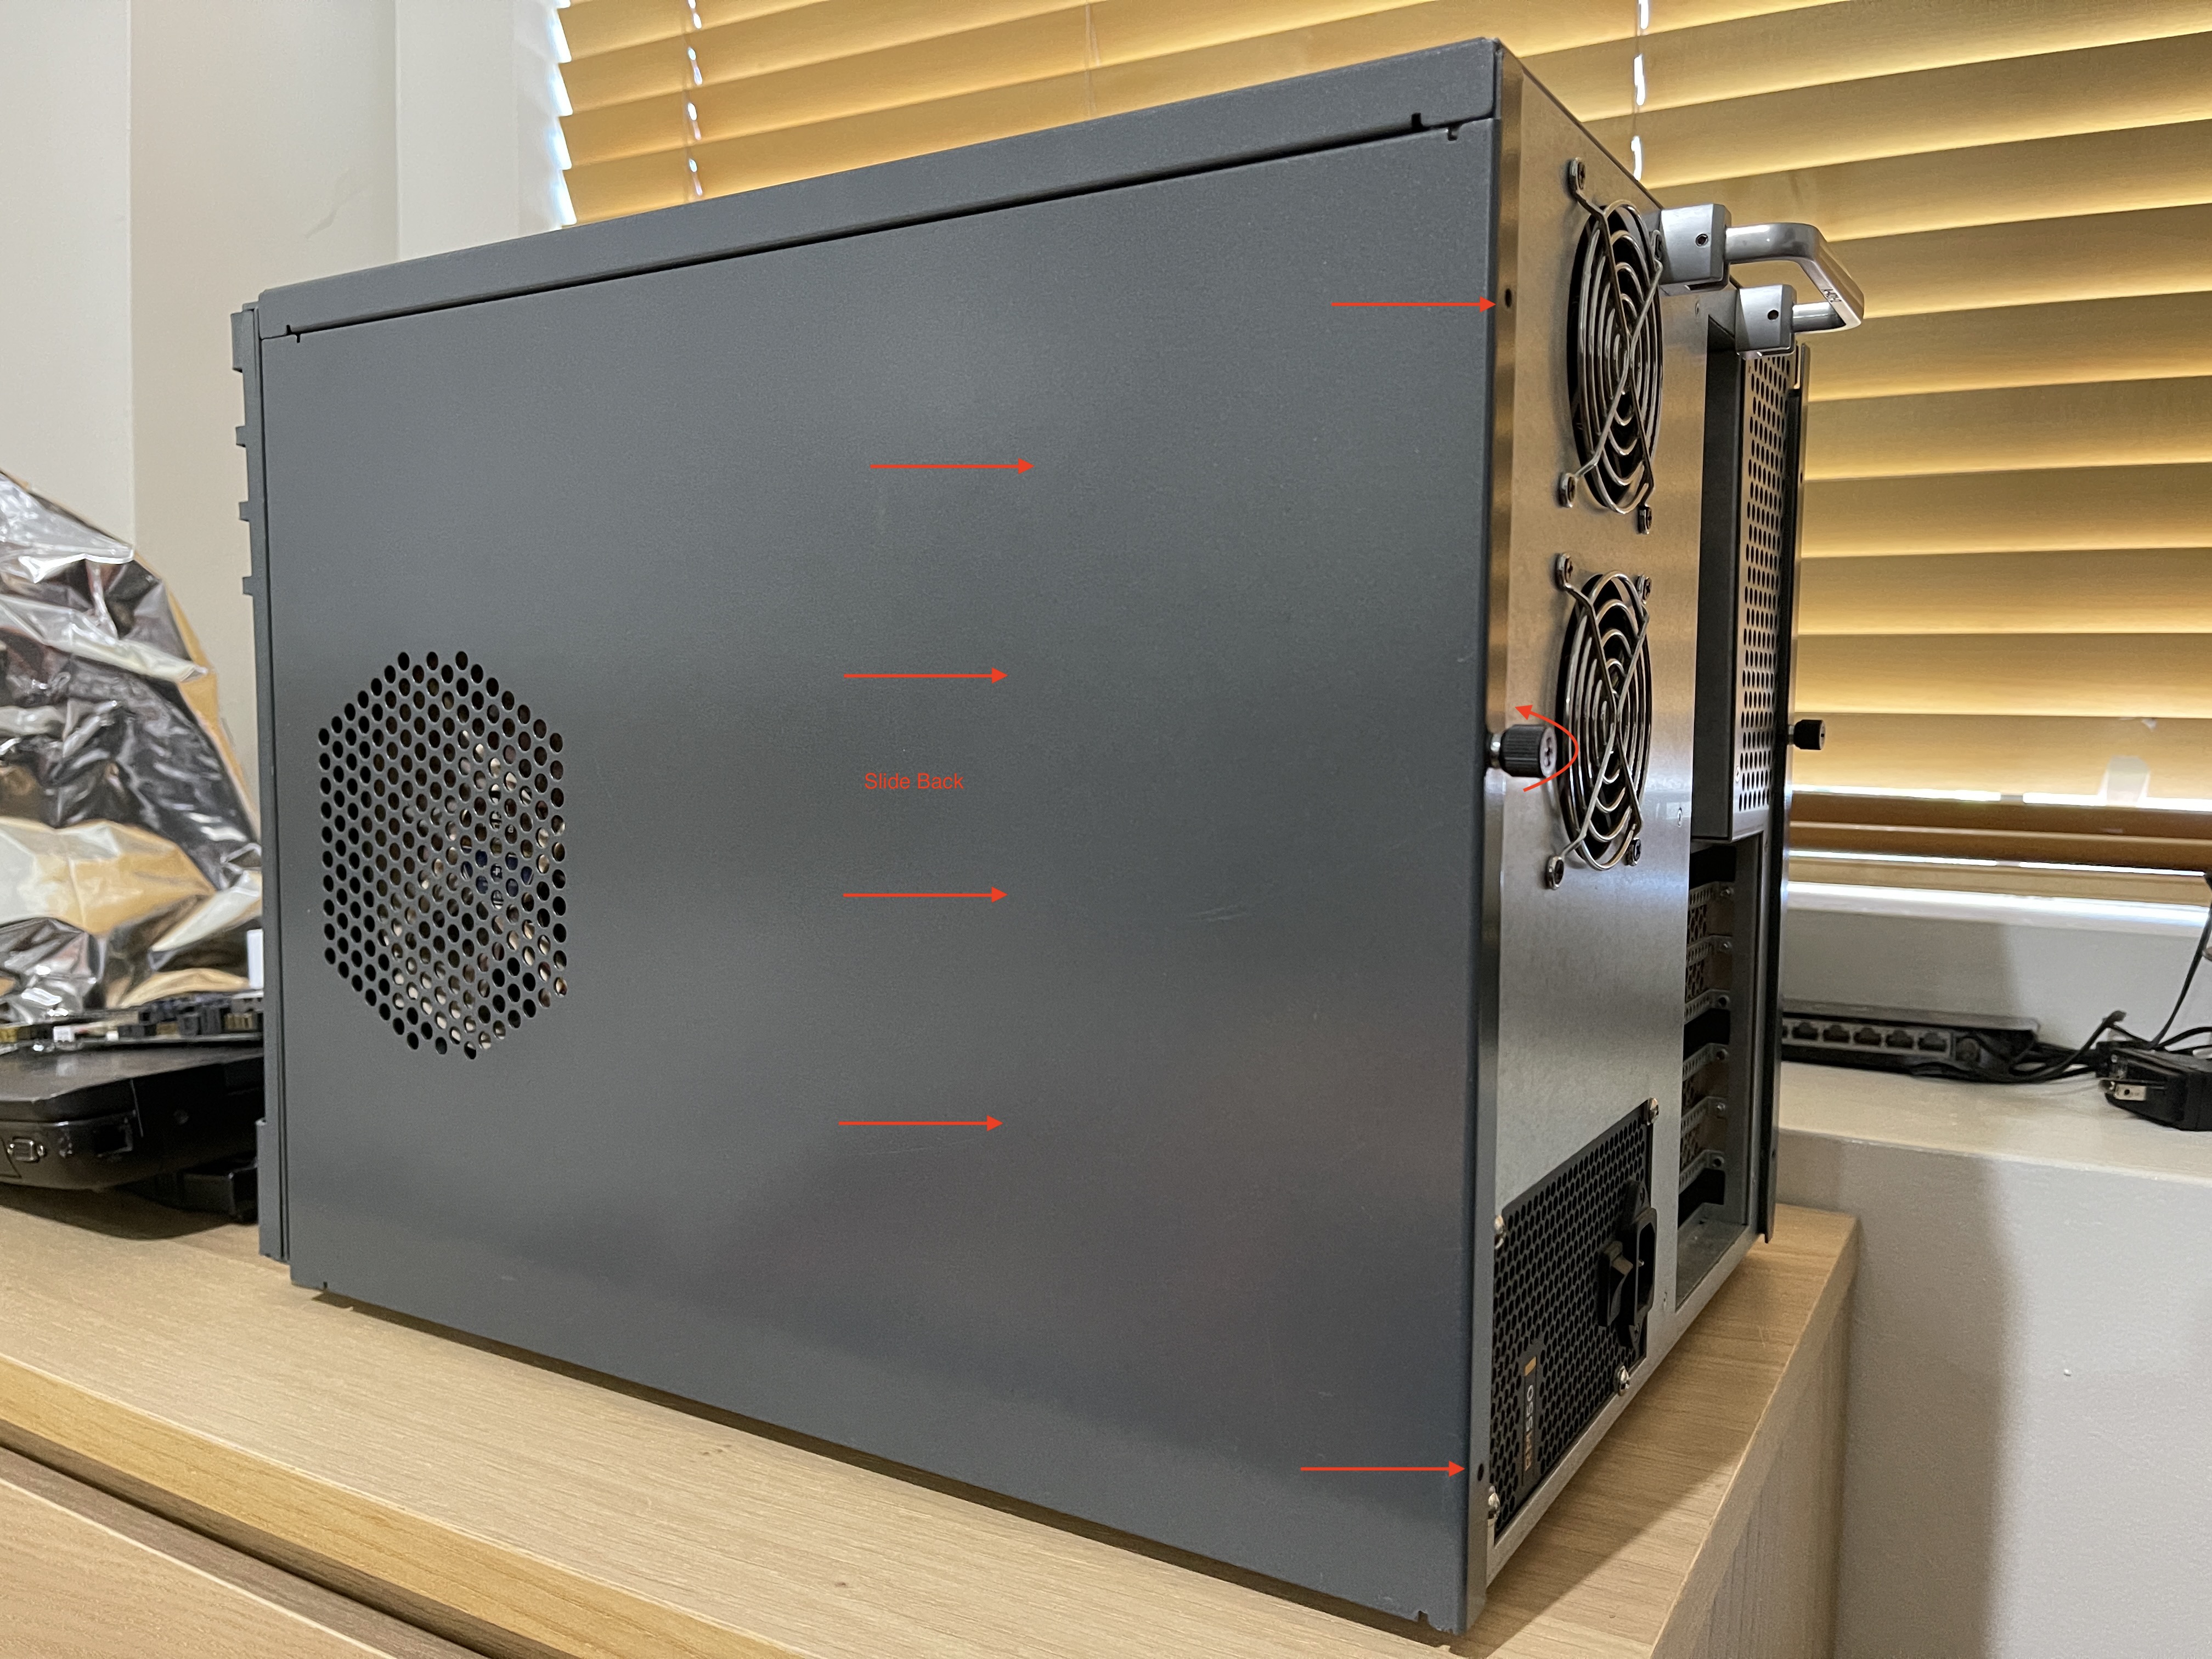
Do be careful when removing the doors as one of the doors will have a fan that is connected to the motherboard.
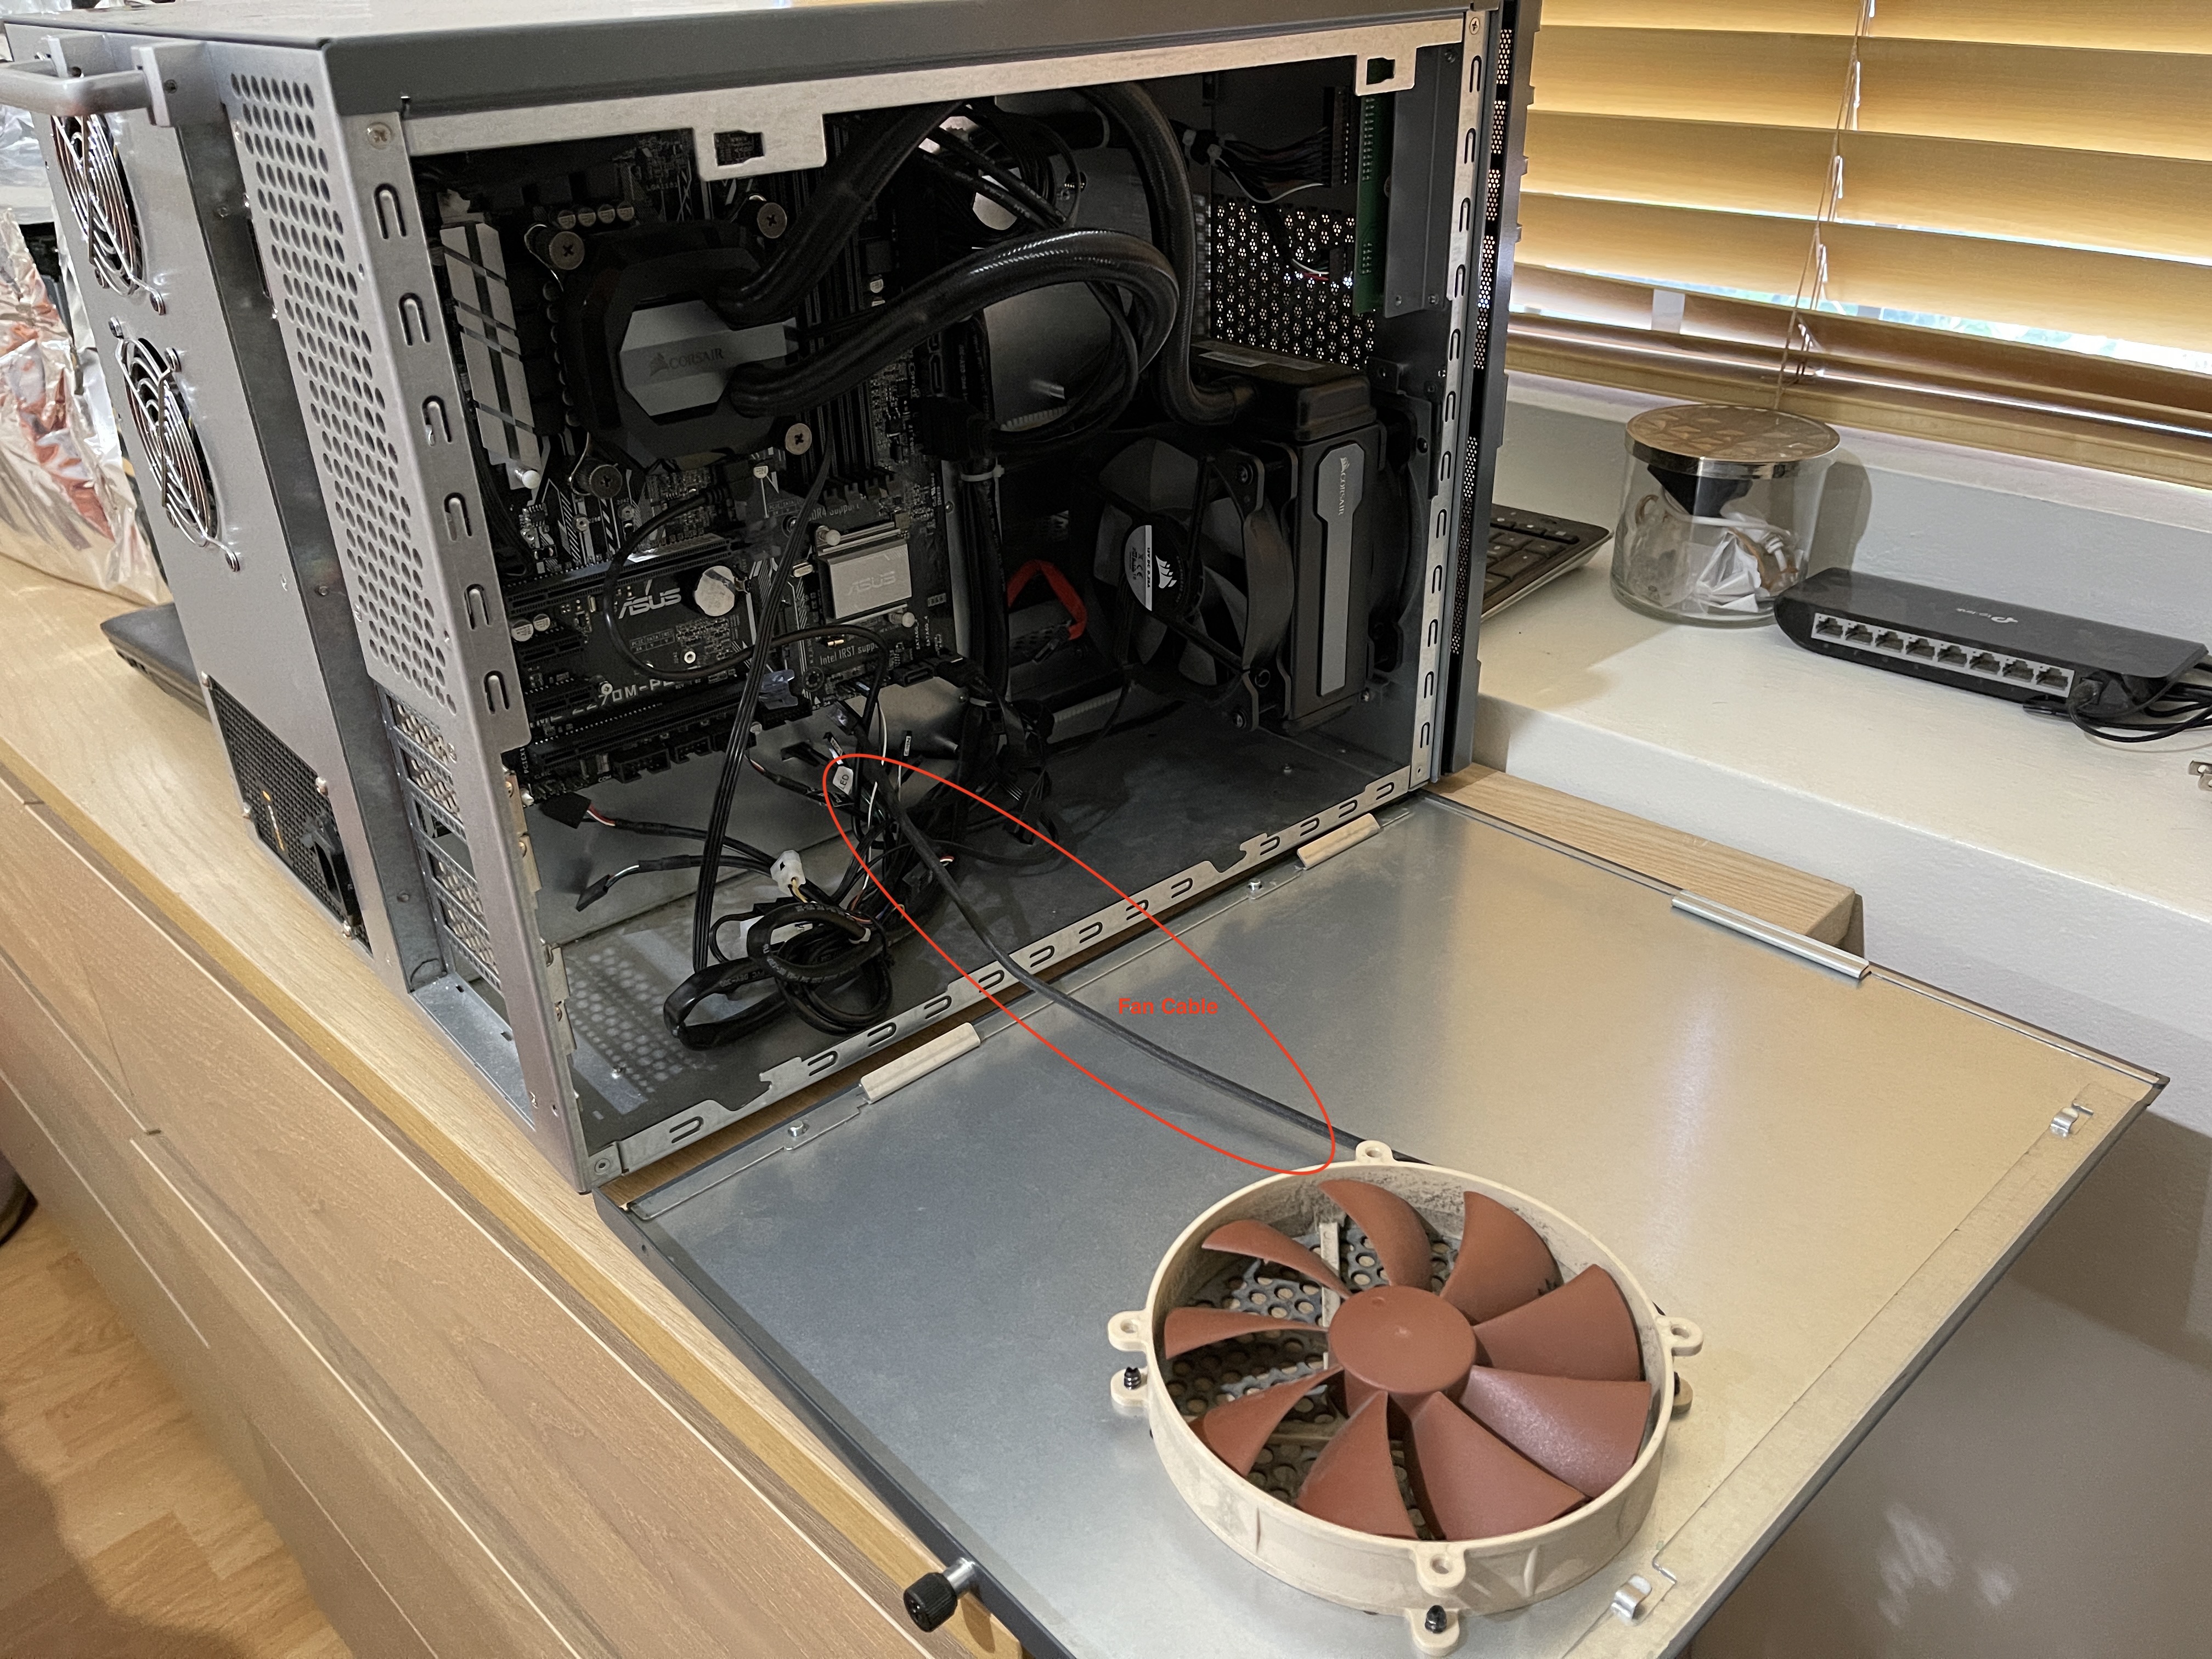
4. There will be (4) important connector types to that need to be noted to plug for function.
a. 24-Pin ATX
b. 8-Pin CPU Power
c. Molex Power (Powers the RAID Hard Drives)
d. SATA Power (Powers the Operating System Drive)
Motherboard models may vary however they retain the same type of connectors but may vary location.
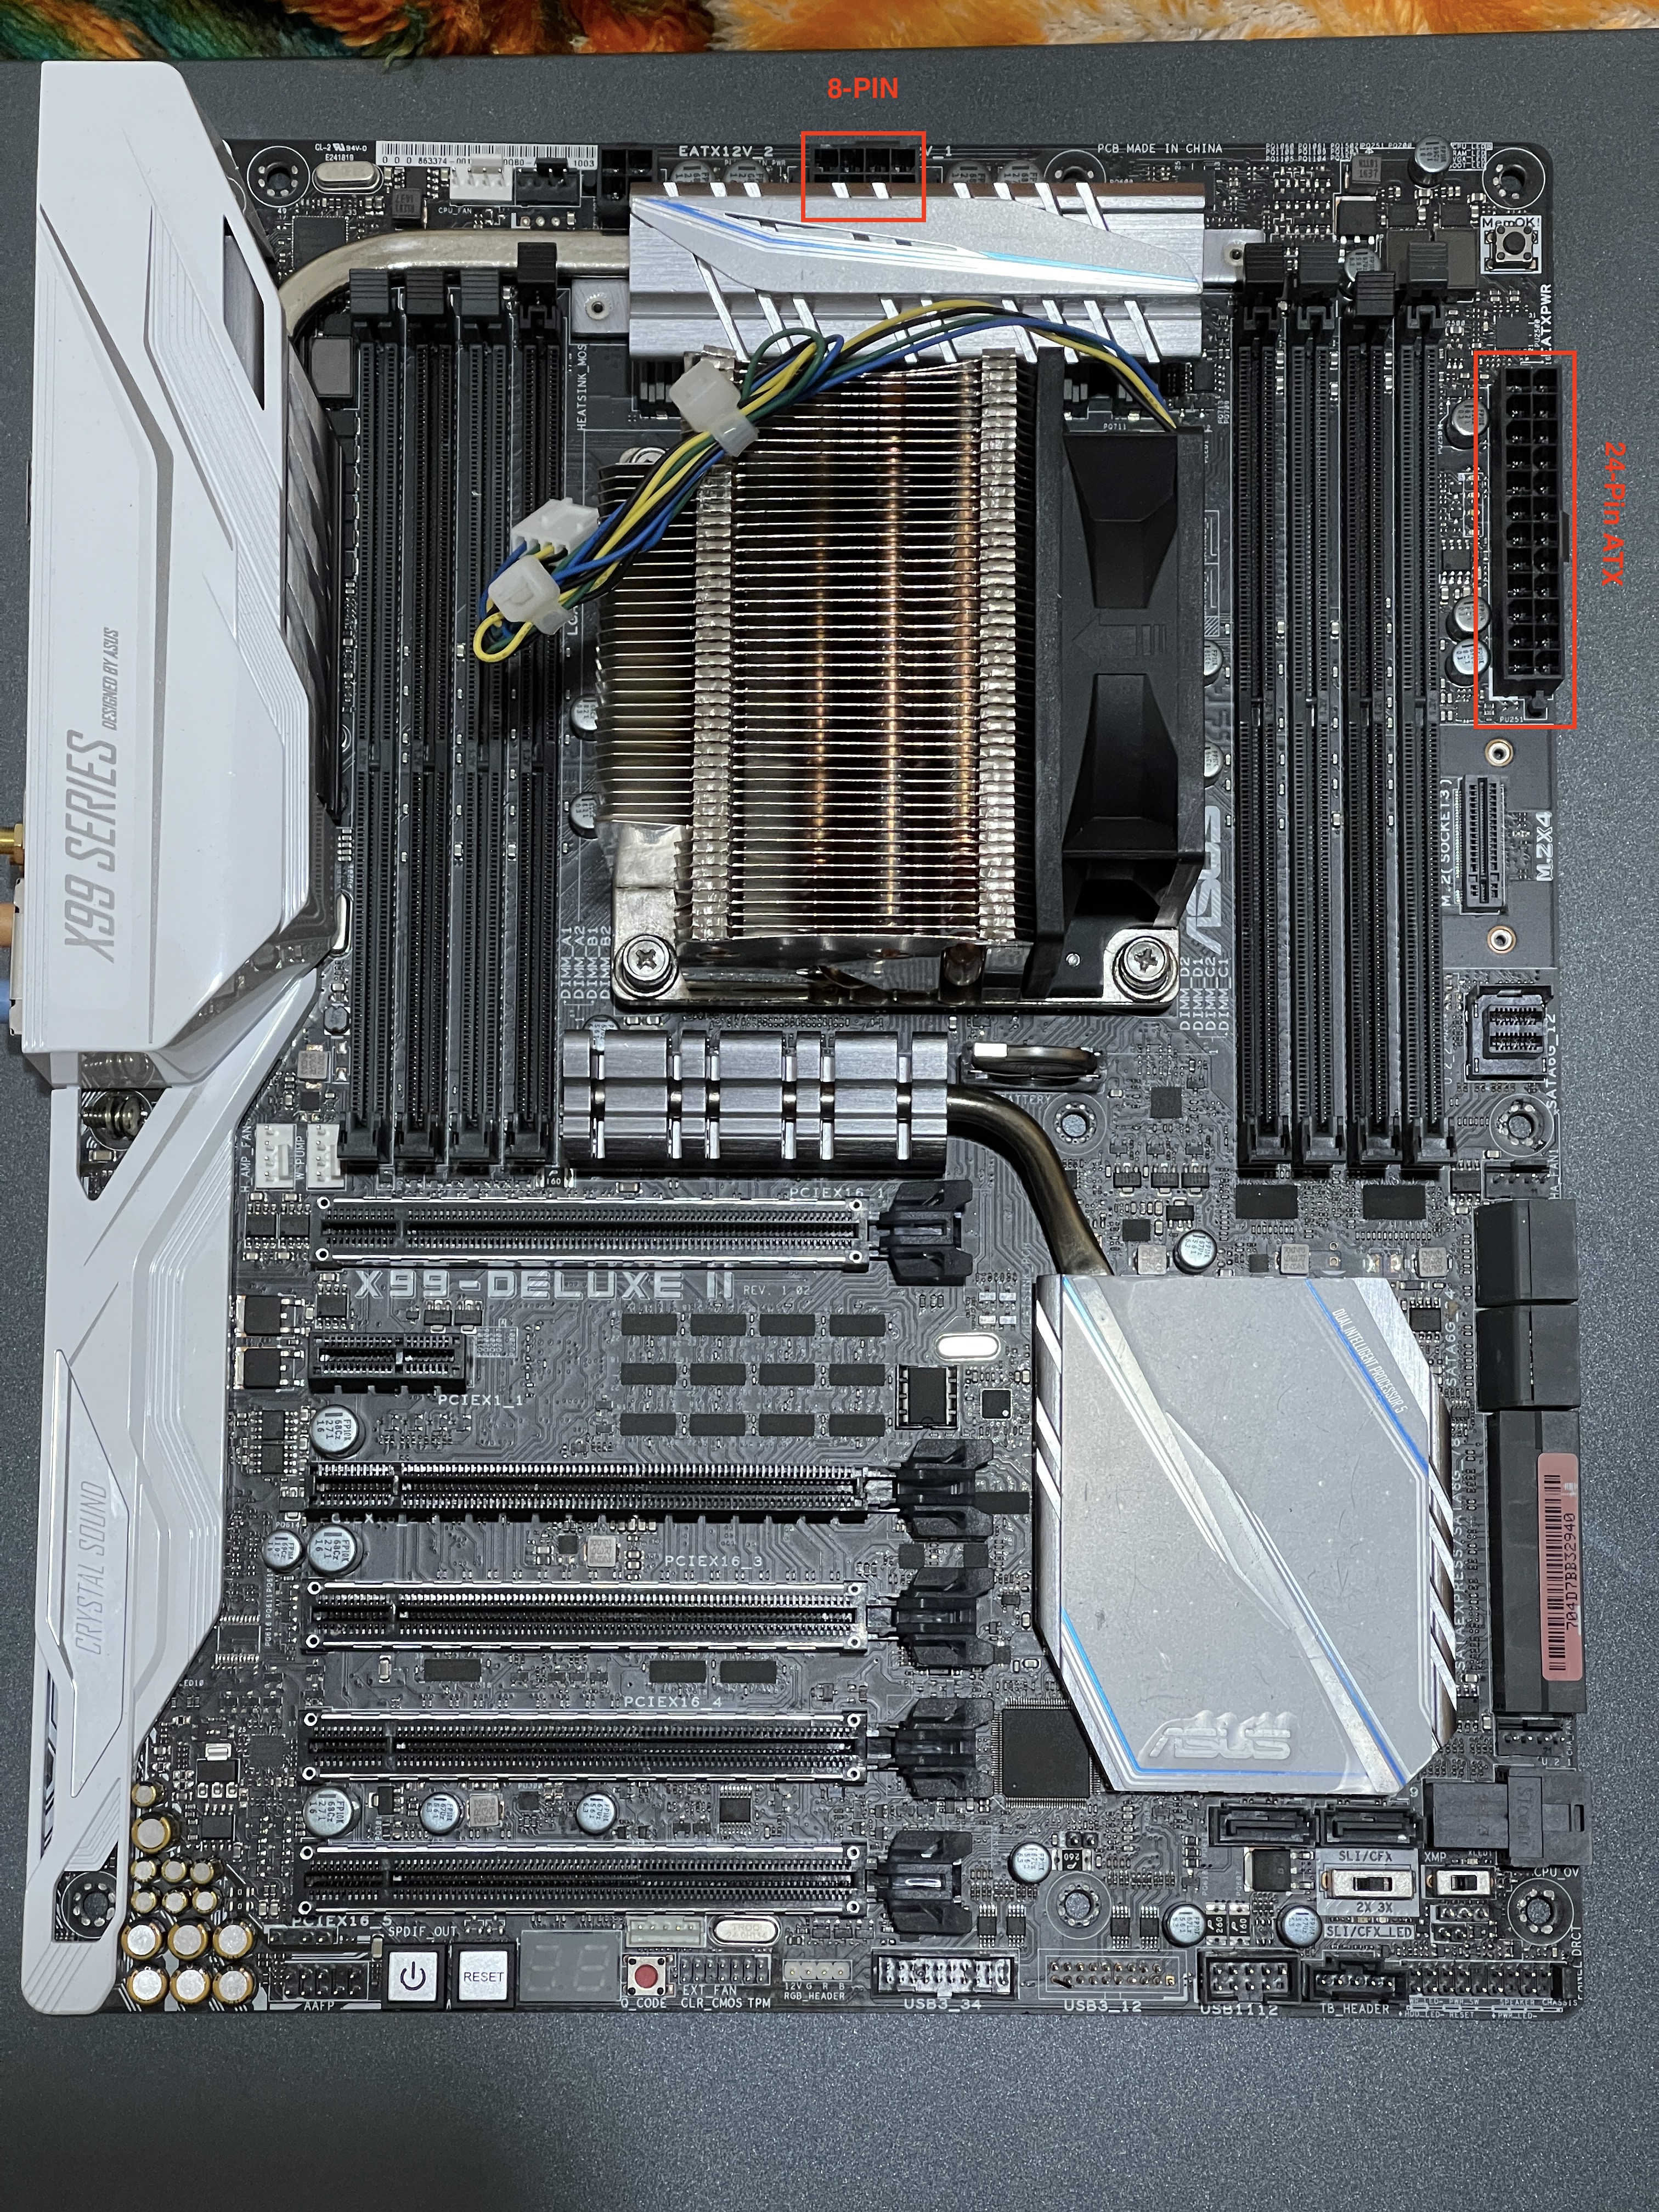
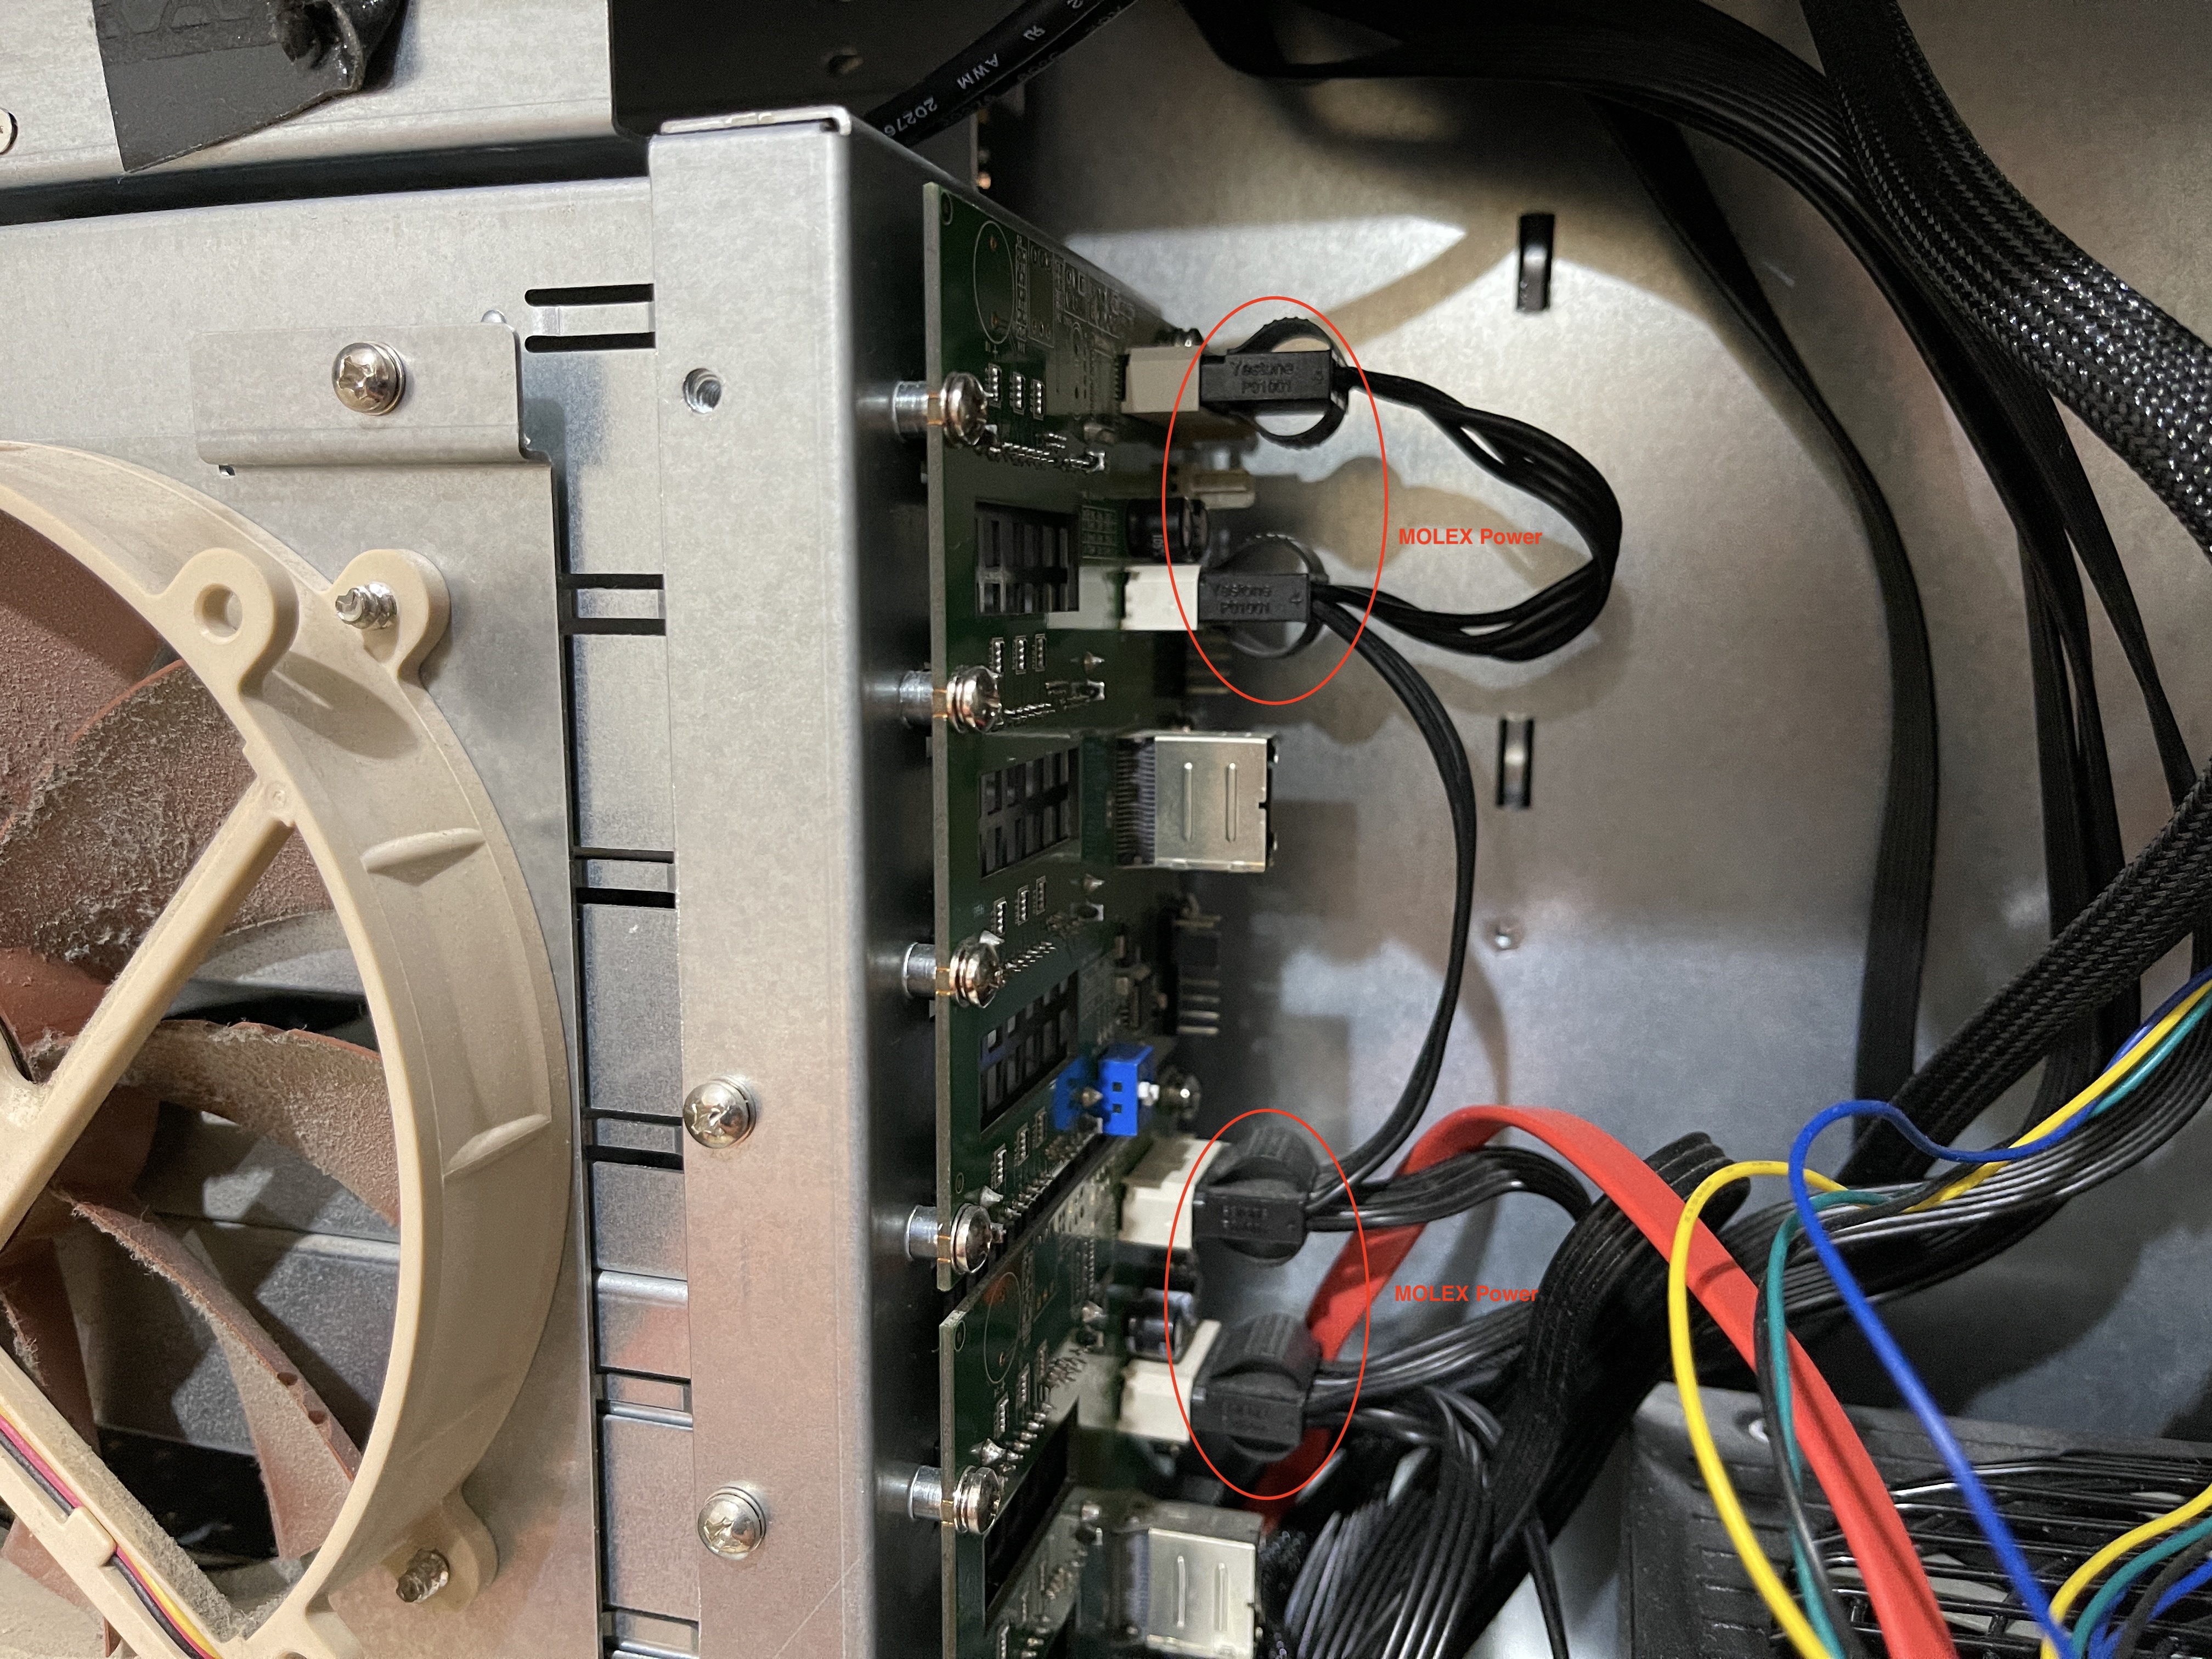
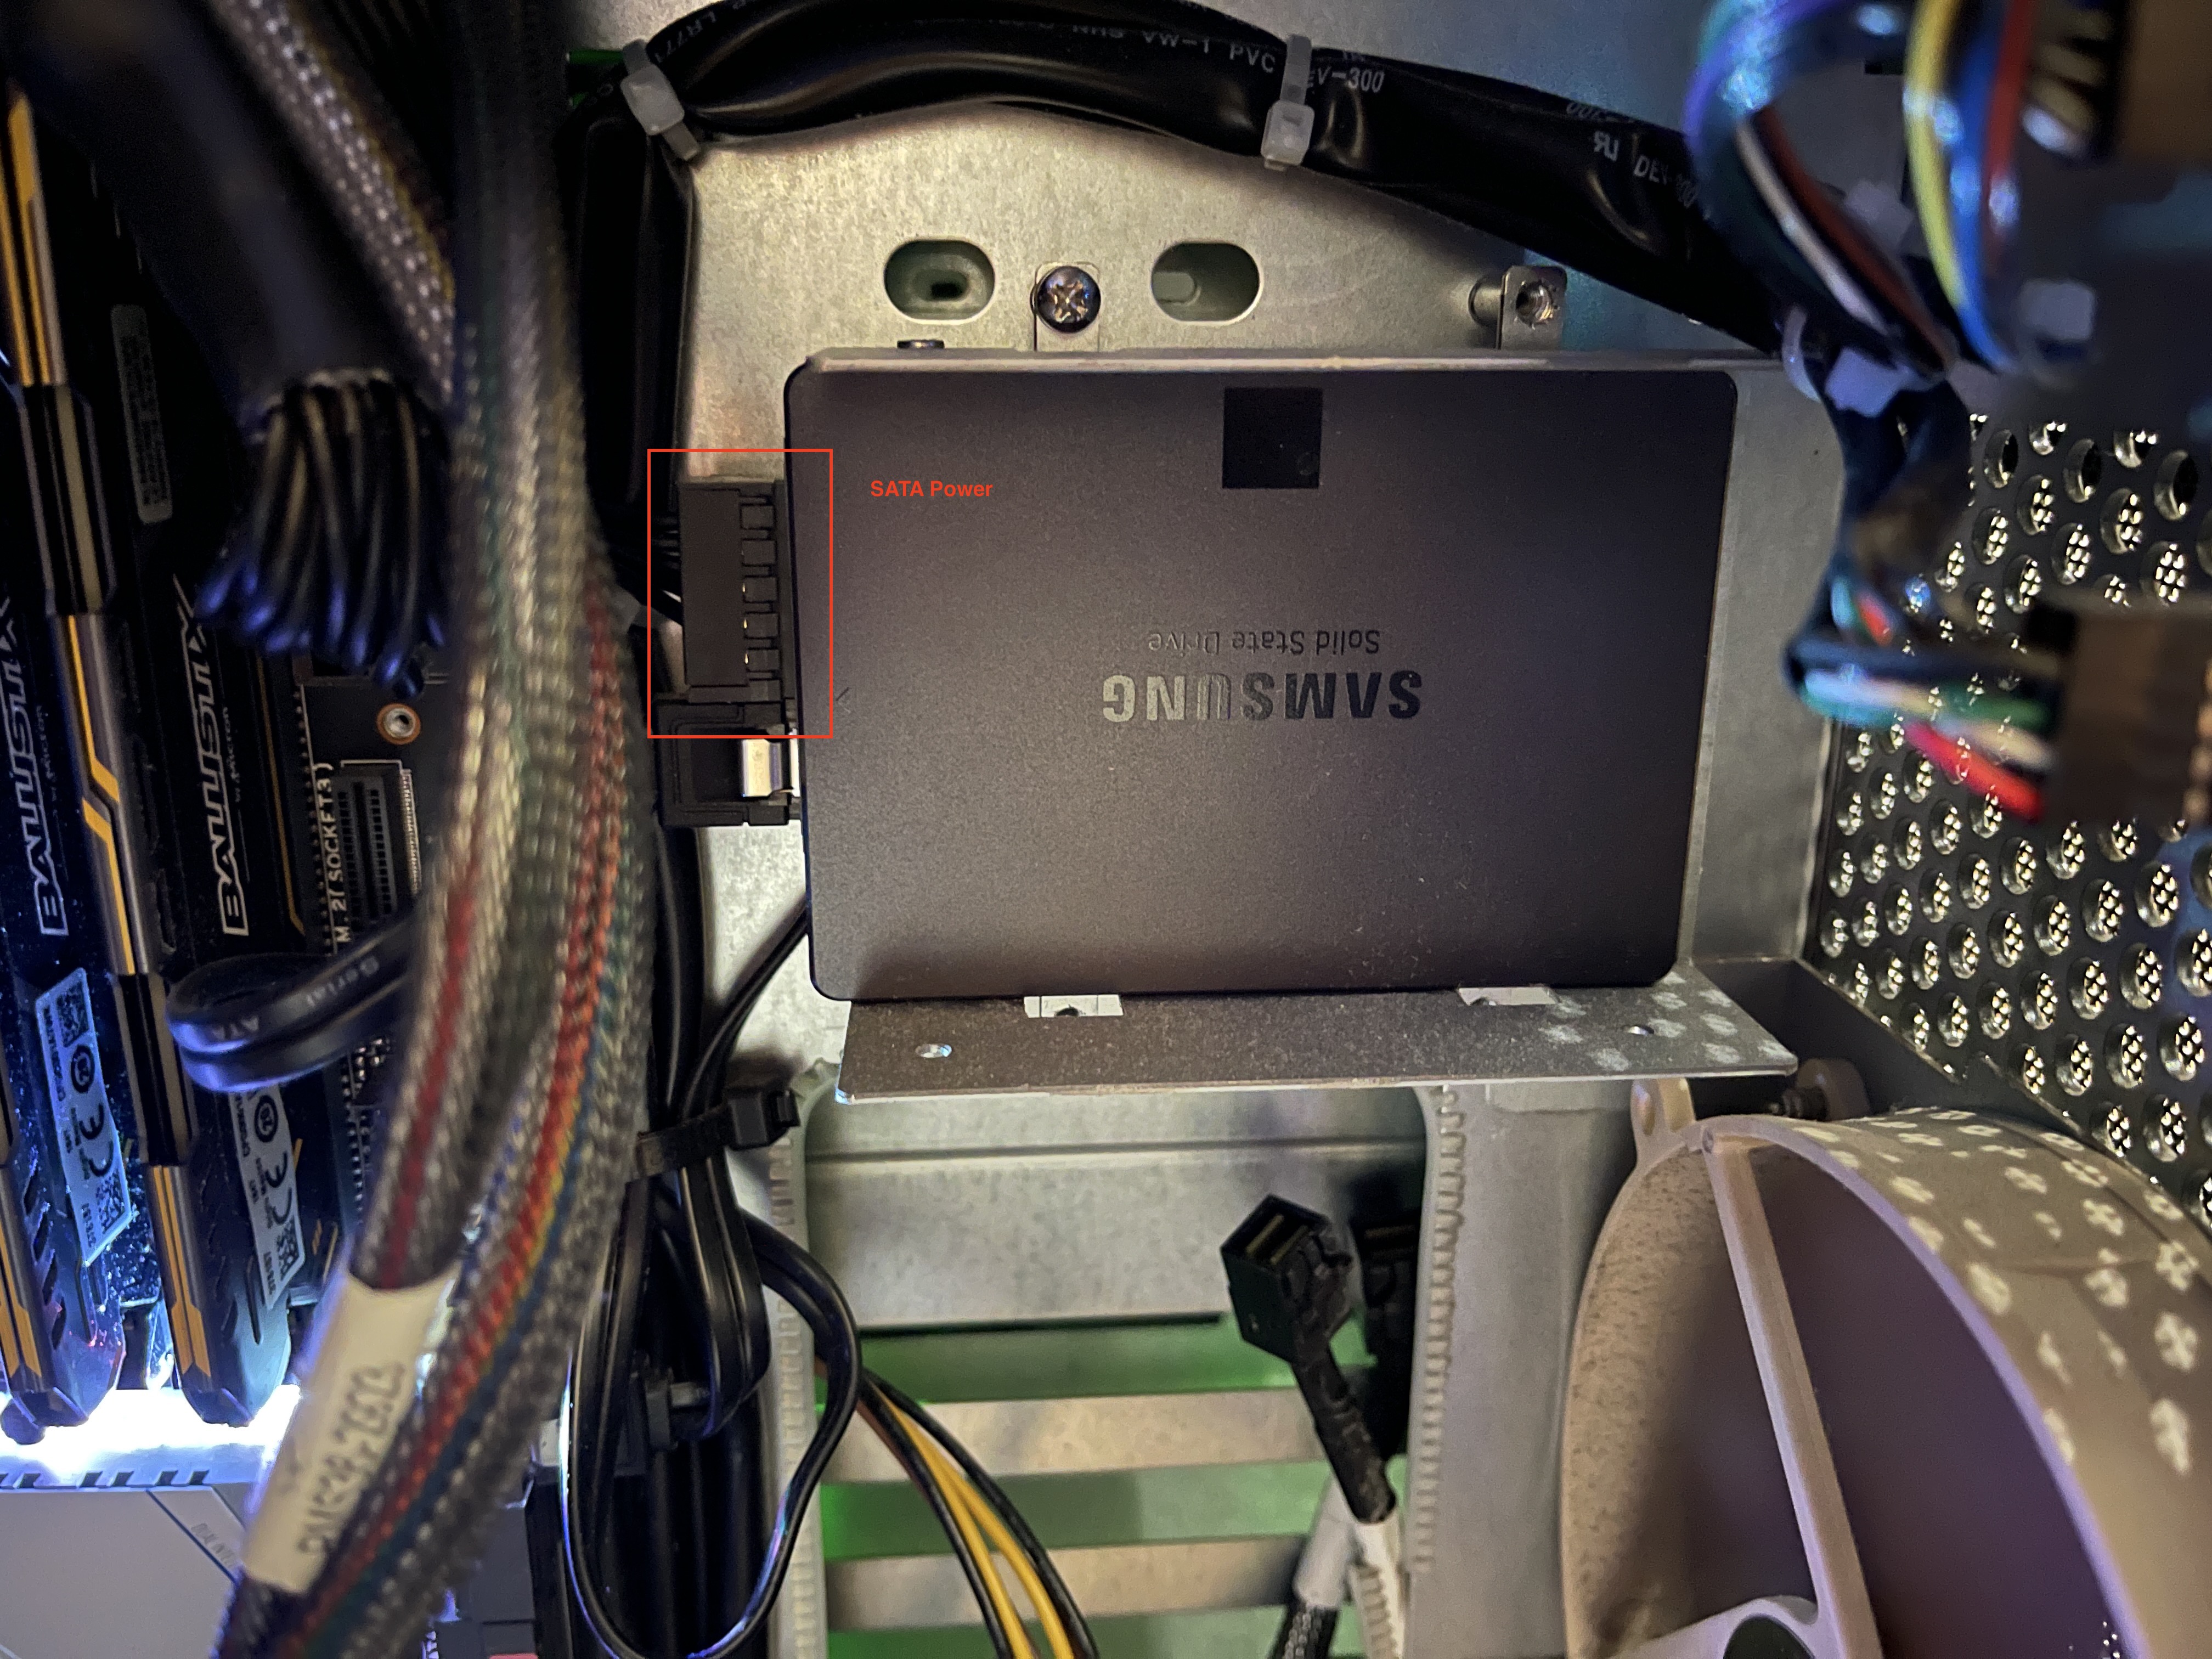
5. To test initial power, stage the replacement power supply outside of the Studio and only plug in the 8-Pin and 24-Pin connectors. Ensure that the power switch is on. Press the power on the unit to check if the unit is able to power on. If it is, then go ahead and take the old power supply out and install the new power supply with the appropriate cables.
If the power does not turn on, other items will need to be checked such as the motherboard, the jumper cables for power switch, and individual components such as the PCI cards, ram and other hardware to ensure all connections are secured.
Note that if you have an LTO or card reader, you will need to connect the additional appropriate power cables.