FCPX and Platform: Working with Sparse Bundle
Creating the Image in Disk Utility
1.Open OSX Disk Utility on any workstationwith connectivity to the Platform.
2.From the File menu or ribbon select the option to create a new image.
3.Enter a file name for the sparse bundle image and select the Desktop as the save target.
4.Enter the name which you want to correspond with the mounted image. It is recommended that this be a unique name and not the same name used for theactual file name.
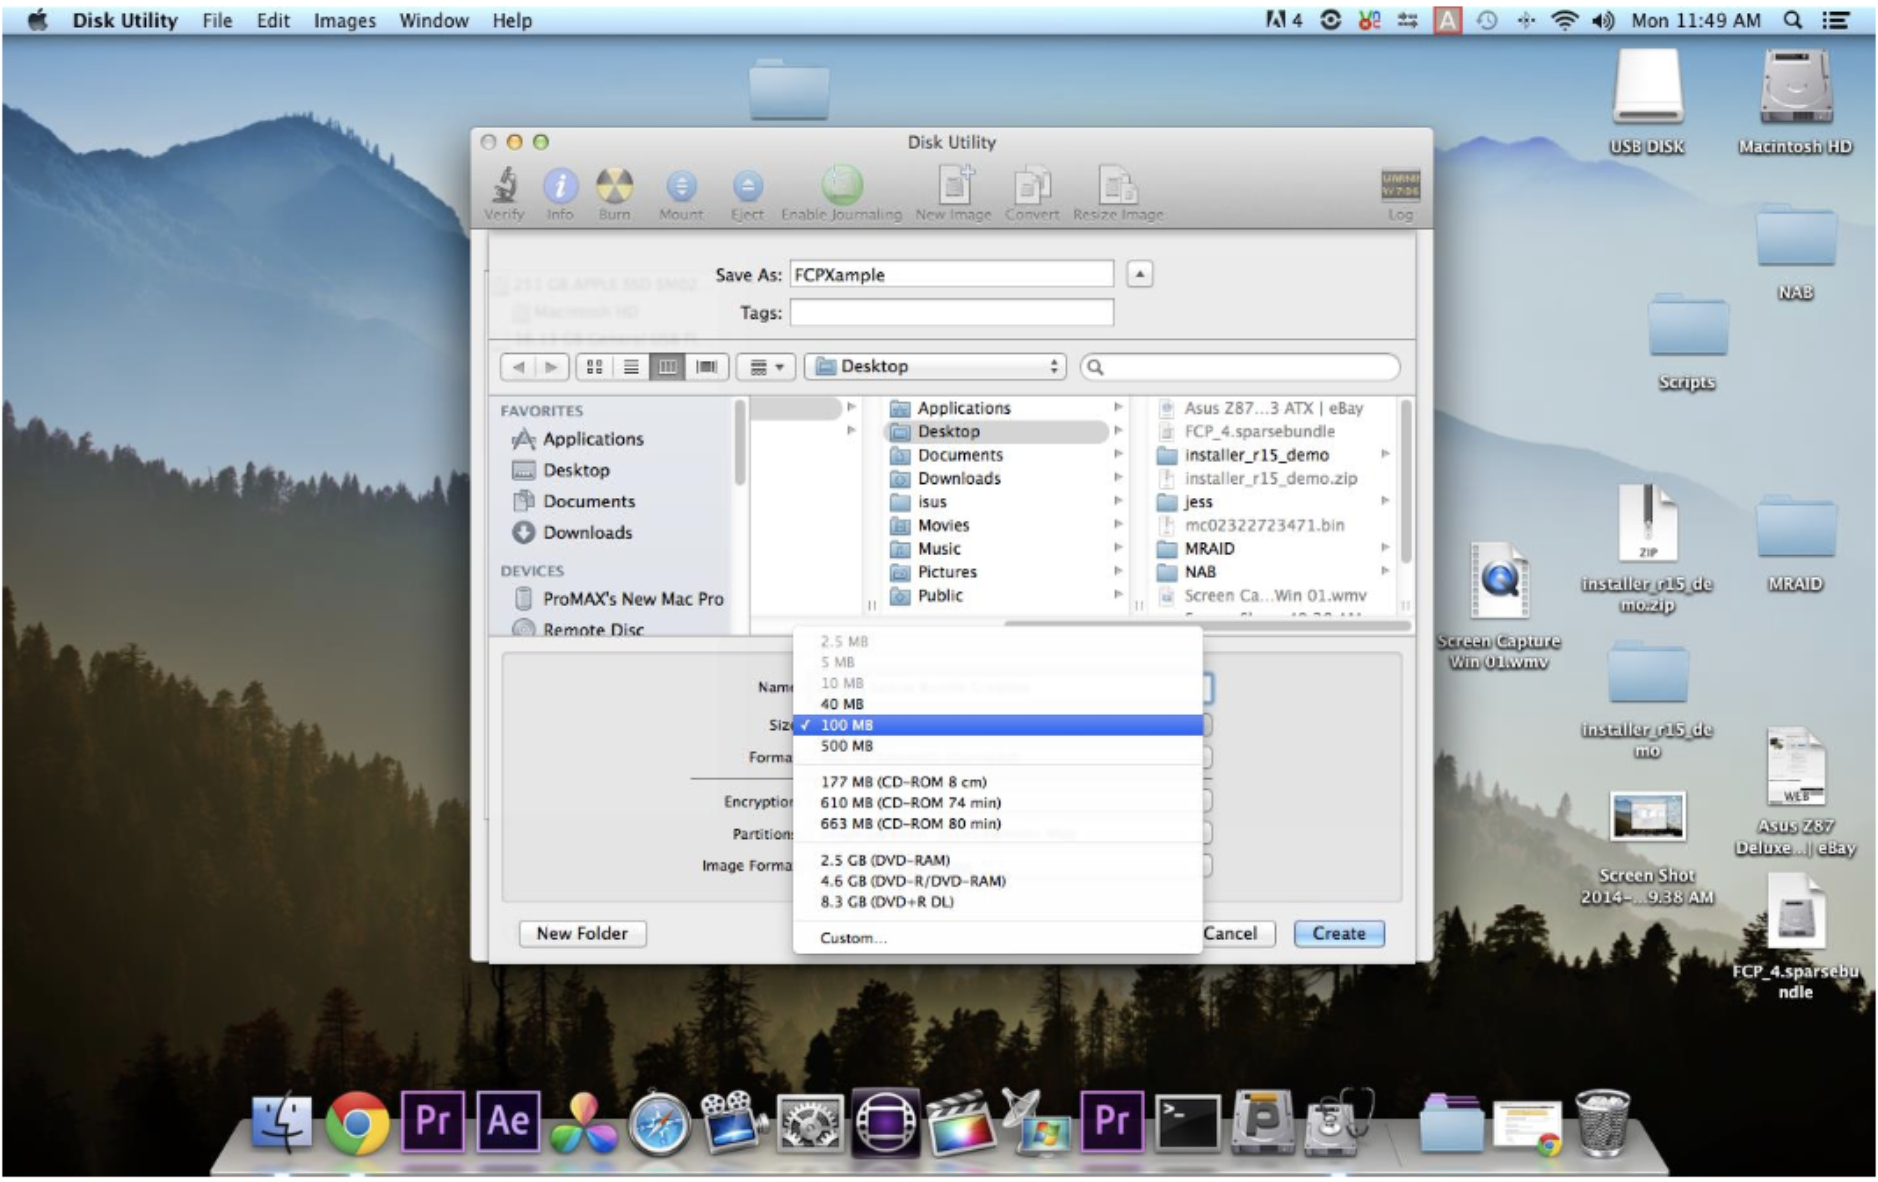
5.After you have entered those settings, adjust your desired image size or set a custom image size using the drop-down menu as shown here:
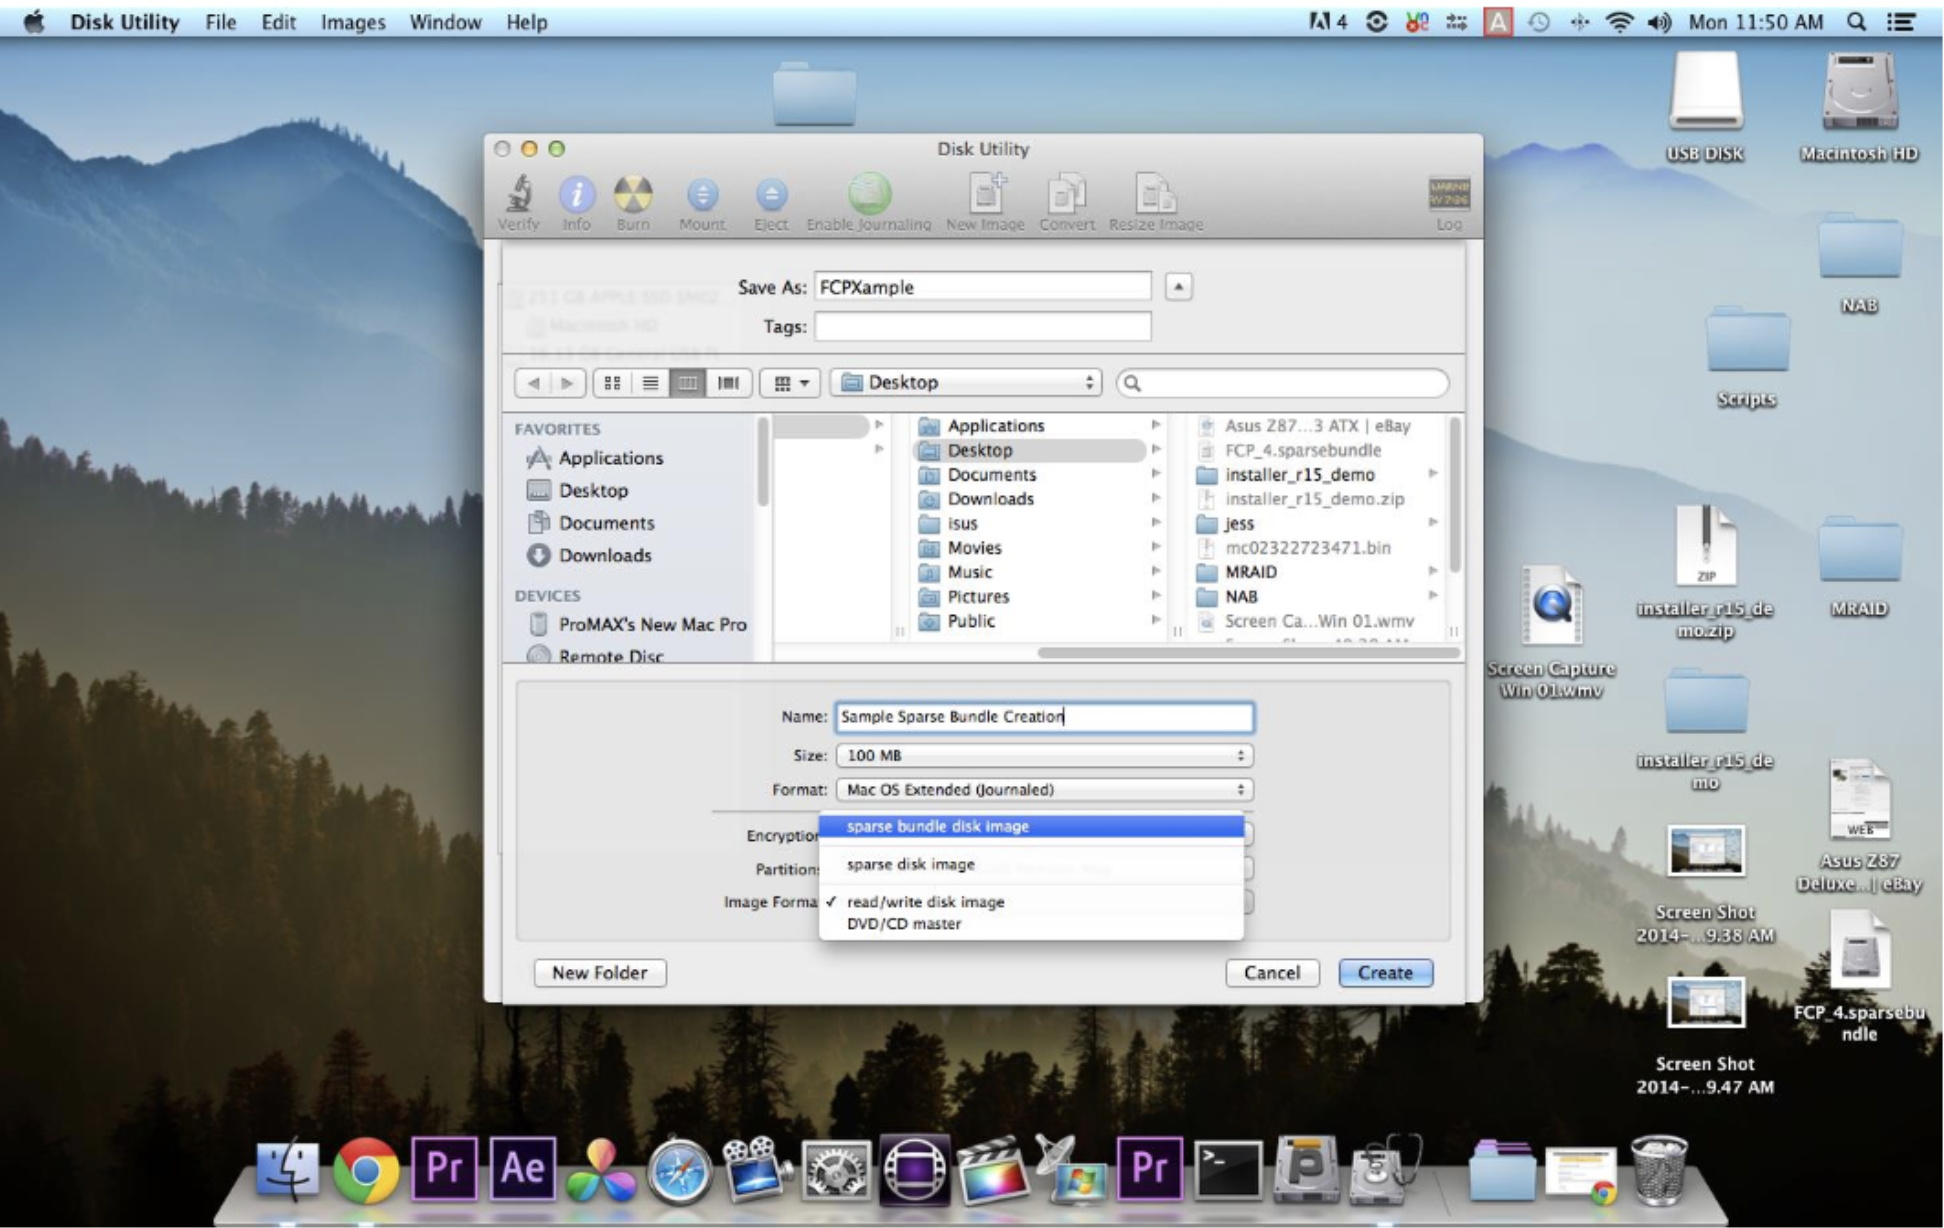
6.From here, you need to now specify the type of image you’re going to create. From the drop-down menu labeled Image Format, select sparse bundledisk image:
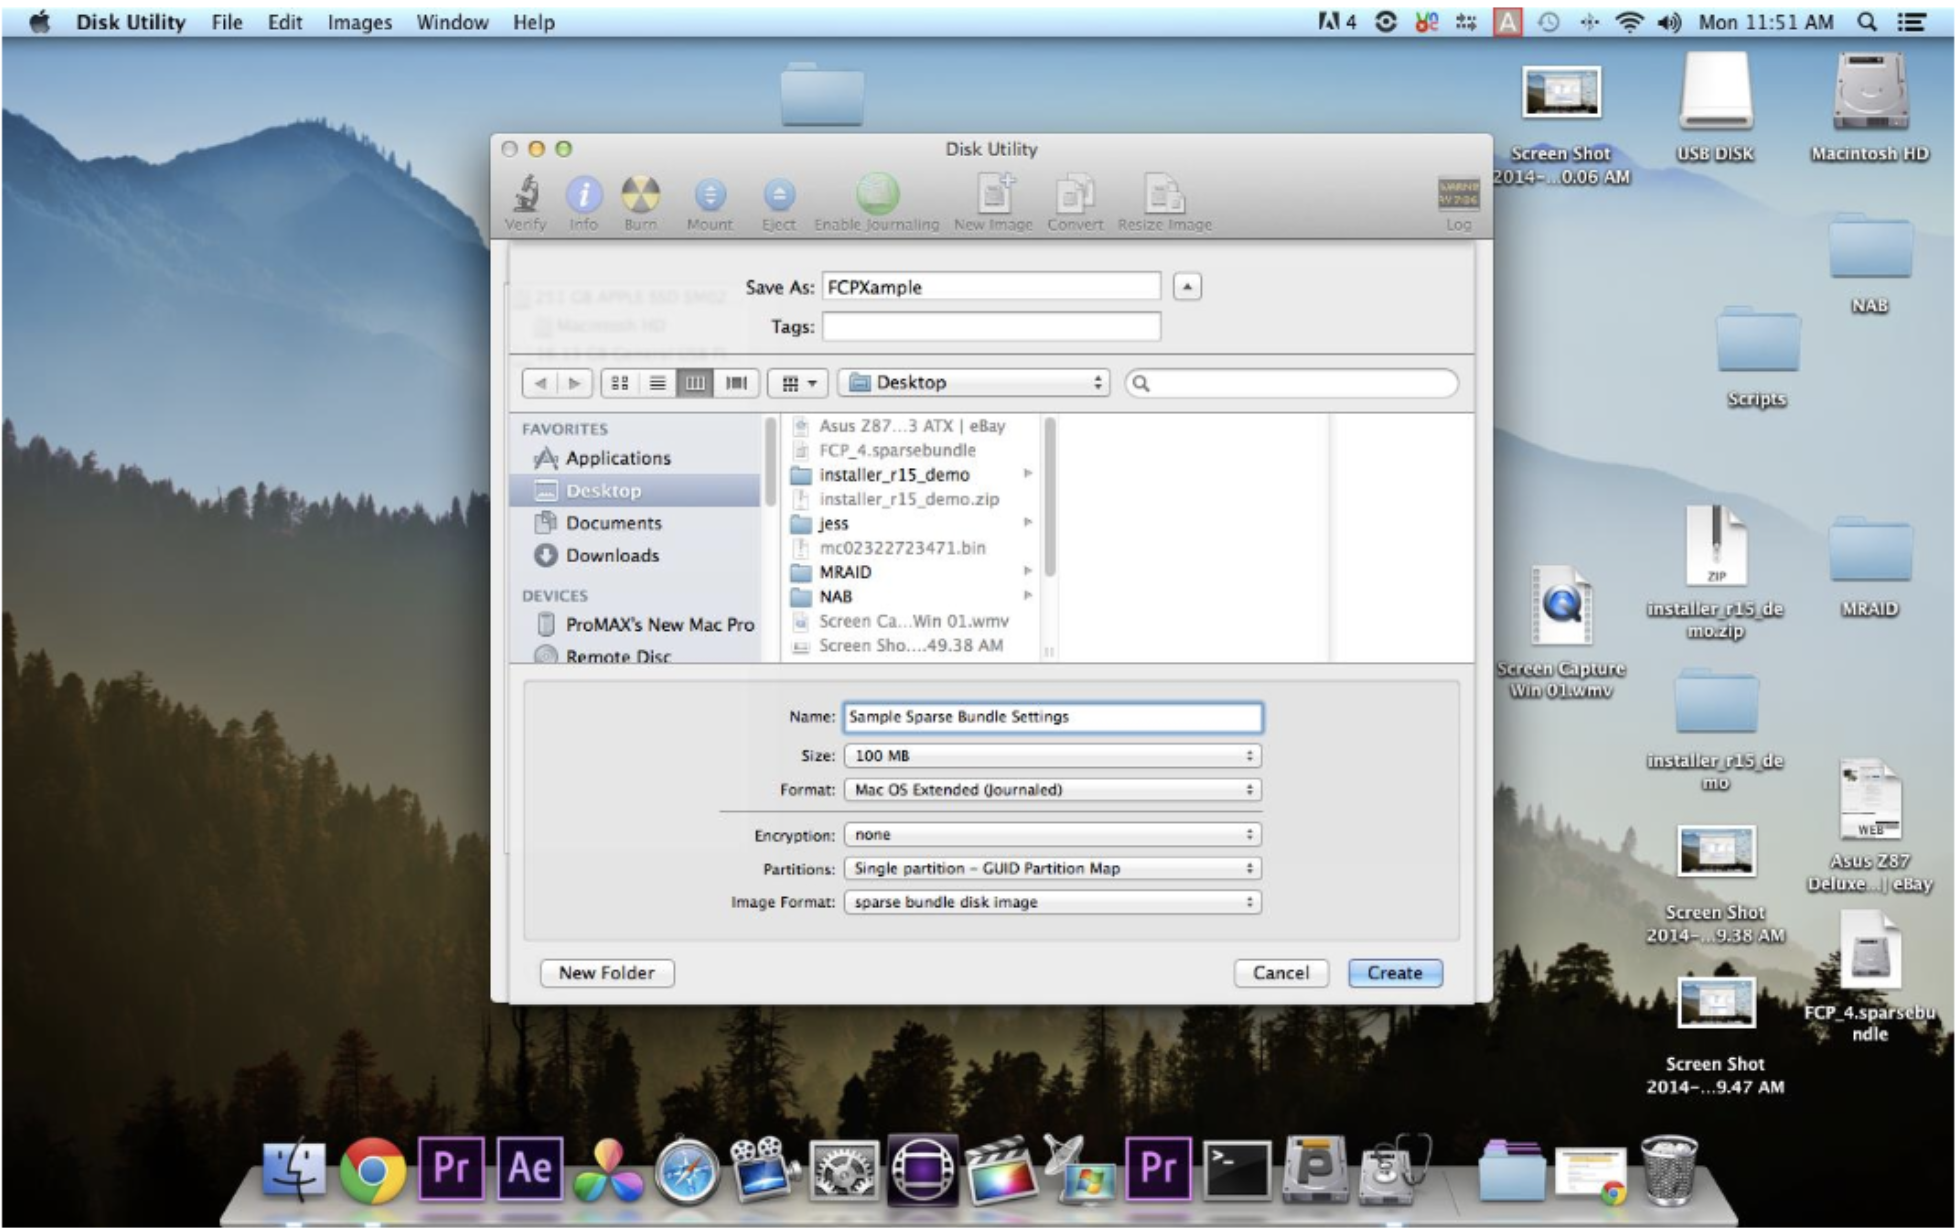
7.The disk image settings should look similar to the screenshot below:
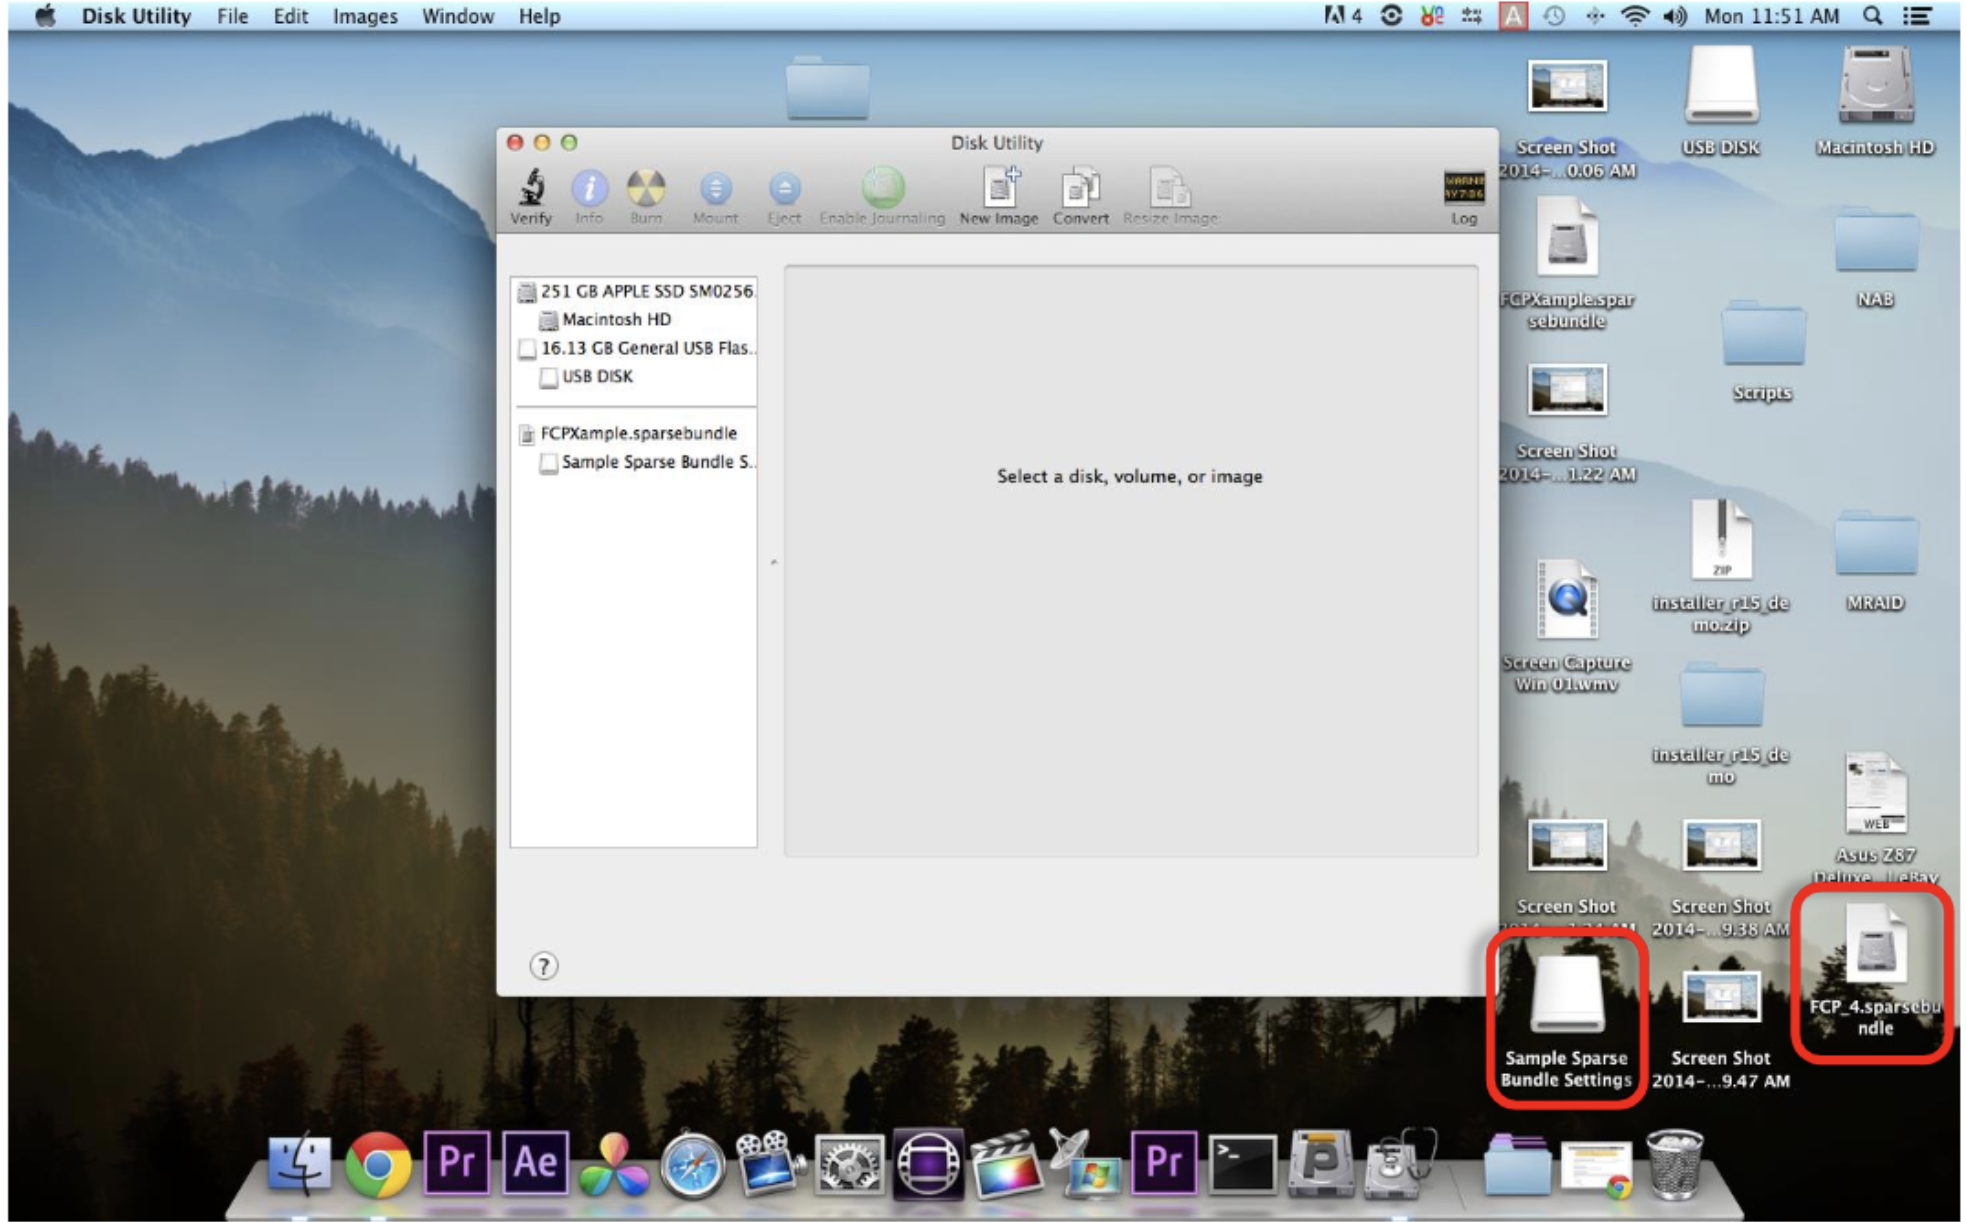
8.Click create and you will see the disk image file AND mountedimage volumeon your desktop upon creation:
Note: It is crucial that this image be set as a “sparse bundle disk image” and NOT“sparse disk image”.
Storing the Sparse Bundle Disk Image on a Platform Server
1.Once you have created the imageit will automatically mount to your desktop.
2.Eject the mountedvolume so that you’re left with only the disk image file.
3.From your Platform Client Monitor application, mount the Platform Space where you intend to store the FCPX data.
4.Drag and Drop your sparse bundle image file to your desired Platform Space.Working
Working with the Sparse Bundle Image from Platform
1.To use the disk image you simply need to double click/mount the image directly from the server. Navigate to the Platform Space where the file is located and mount the image. The image will now show as mounted on your desktop.
2.At this point, the image is ready for use (read/write) with FCPX. You can drag and drop data and set the image as the “save to” destination in FCPX. Once work has been completed, you will need to close FCPX when finished before your system will allow you to completely dismount both the sparse bundle and the Platform Space.