1. Rackmount Expansion Chassis
2. Install Drives
3. Connect Expansion to RAID Controller
4. Power On Expansion
5. Format New RAID in Windows
6. Add RAID to Platform
7. Reset StorageGroup
1. Install expansion chassis in rack.
2. Load drive into expansion.
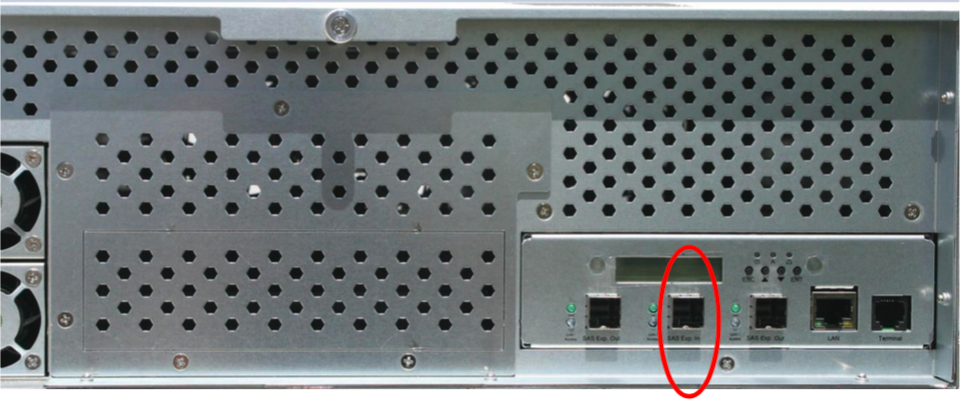
3. Connect SAS cable from middle port of the expansion to the SAS connection of the RAID controller.
Please note, you can connect this cable while the Platform Online is still running.
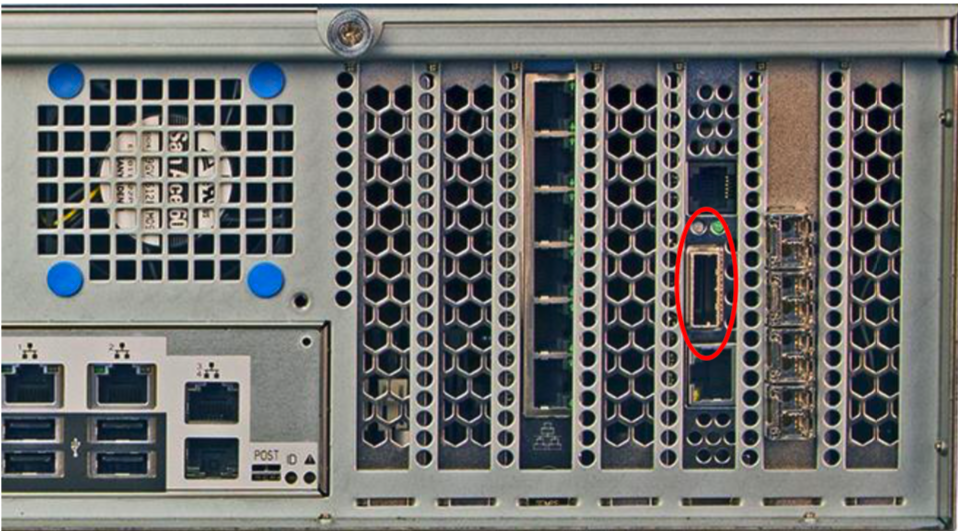
**Picture above is a SAS 6G connection. Units may vary as newer RAID controllers will have a 12G connection.
4. Connect Power and Power on when connections are verified.
5. Open Disk Management. If the New StorageGroup is already appearing, skip to step 7.
6. Normally the new expansion chassis will automatically be assigned a LUN number and your storage group will automatically show up in the Platform Interface. However, if there is a conflict, a unique LUN number must be assigned. Please follow the following steps:
a.) Login to Areca RAID controller. To do so, please follow directions here.
b.) Go to Volume Set Functions-->Modify Volume Set. Select the new StorageGroup and Submit.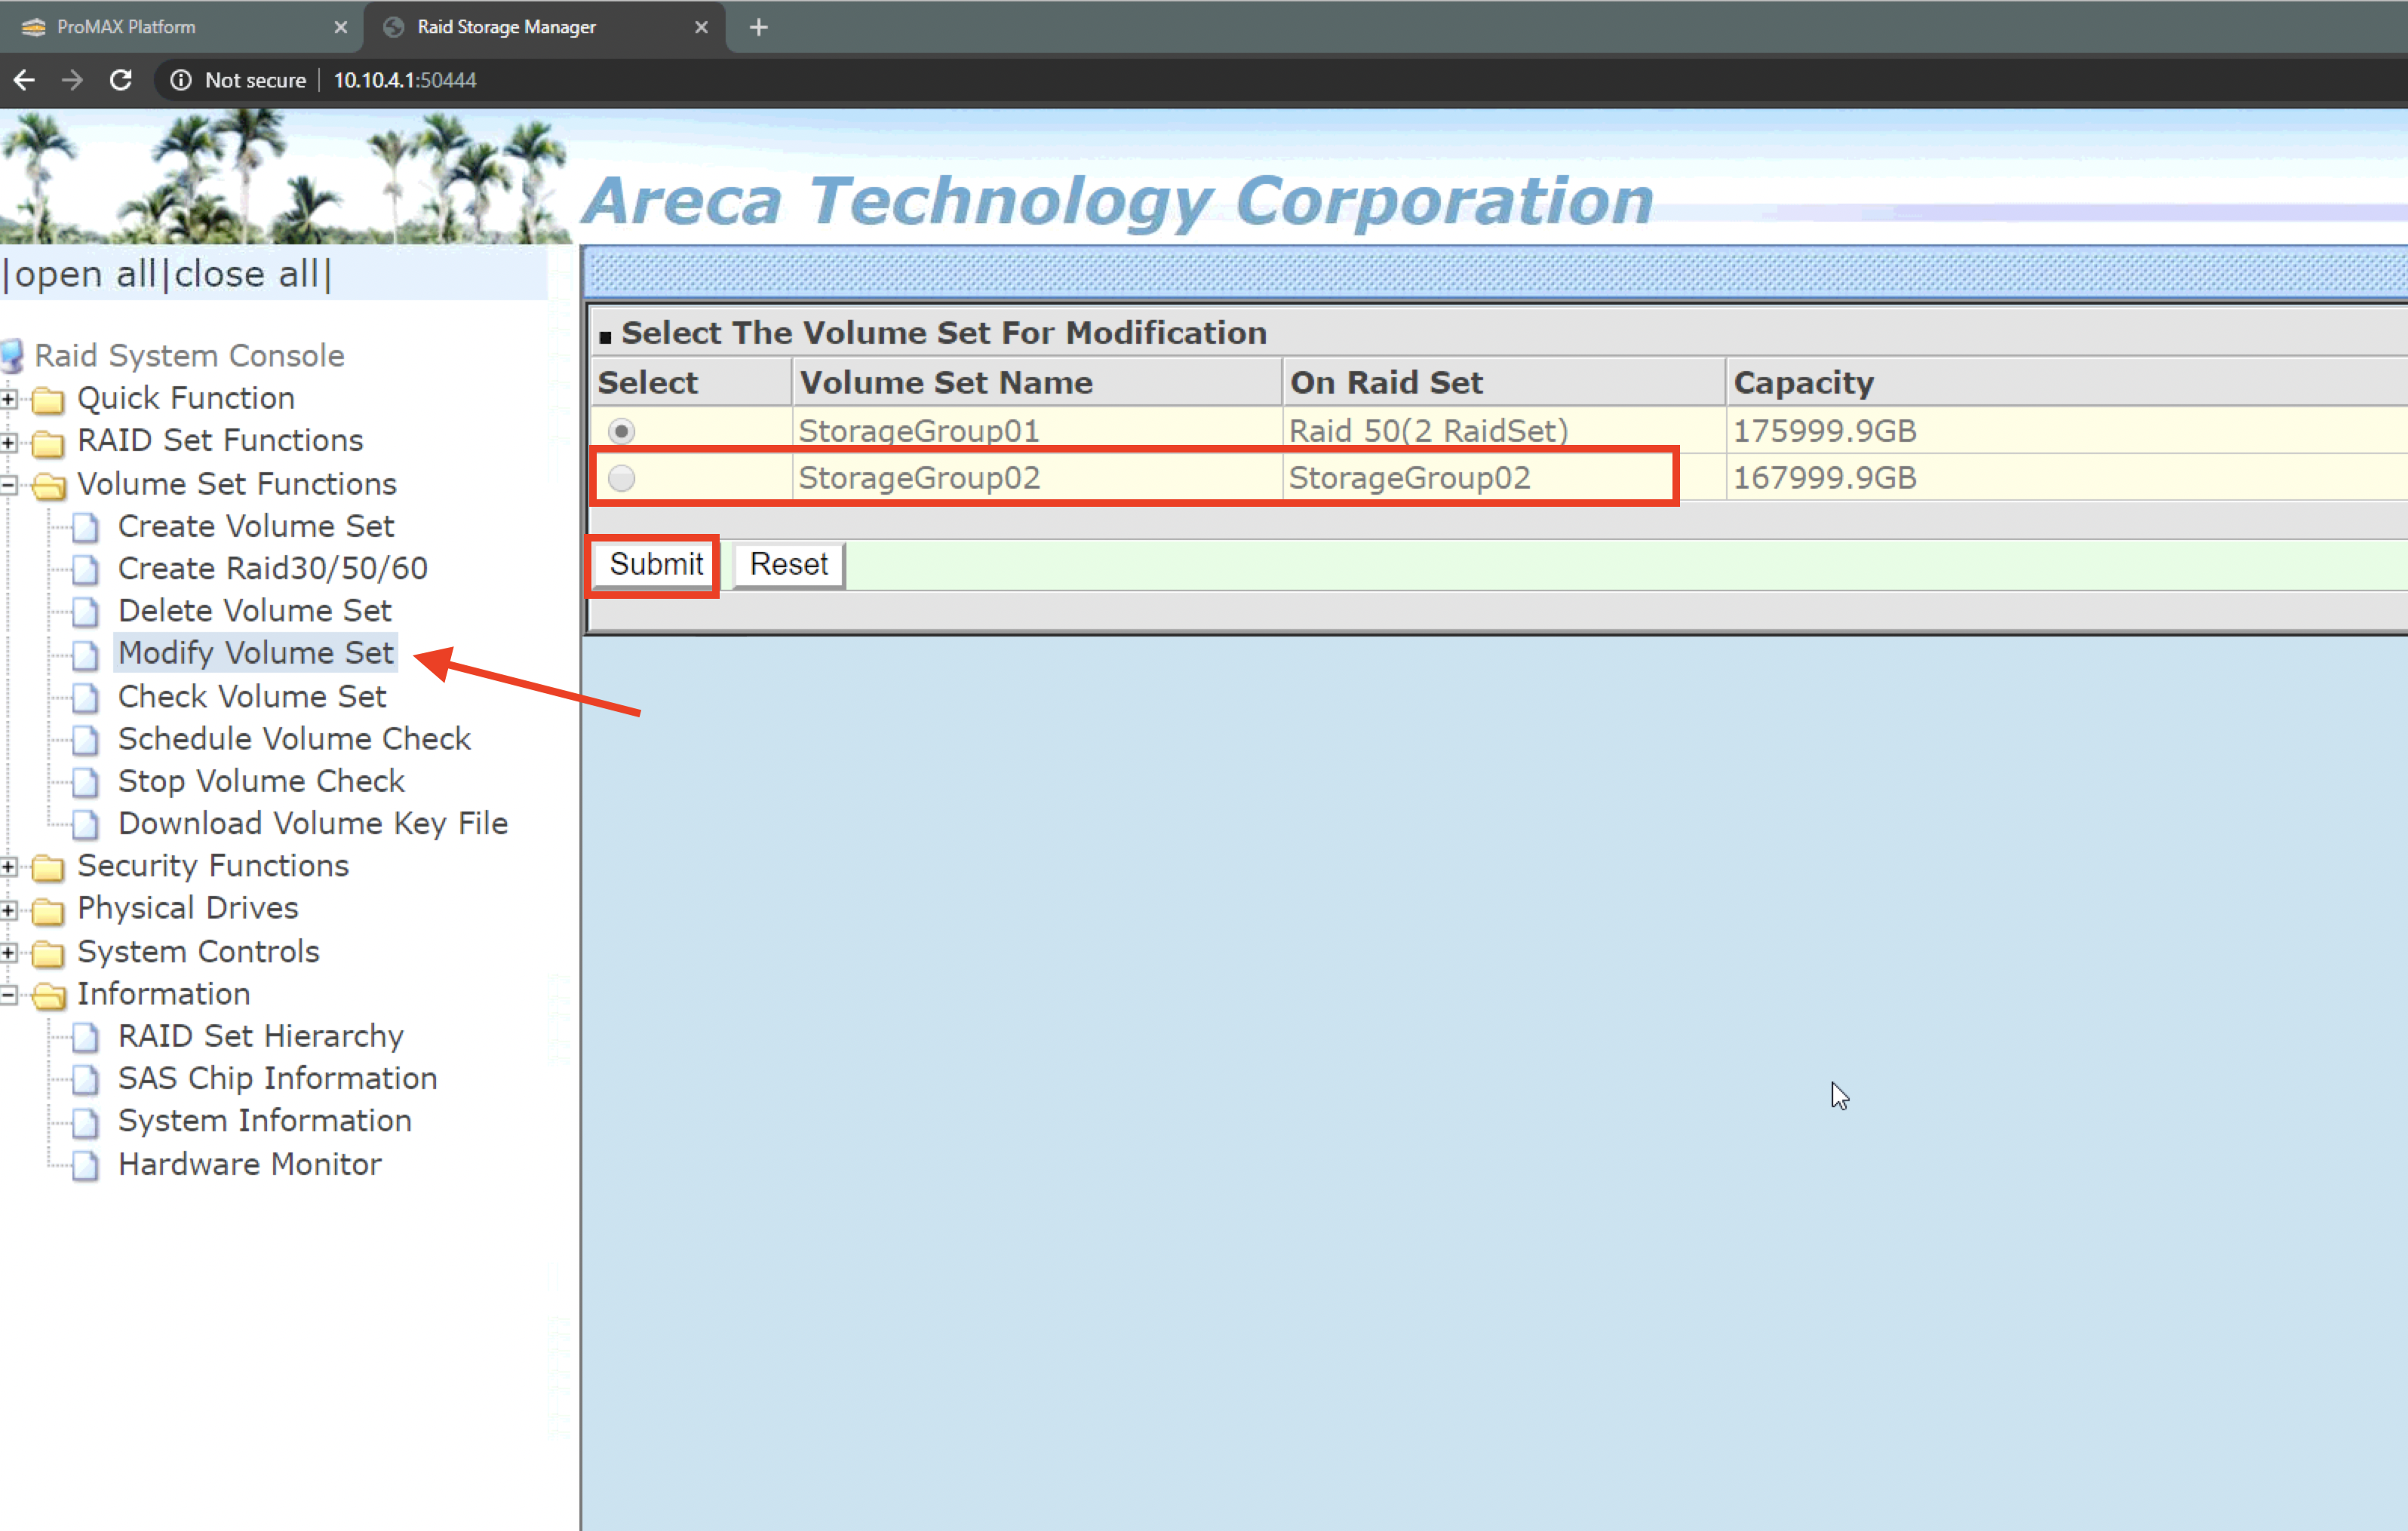
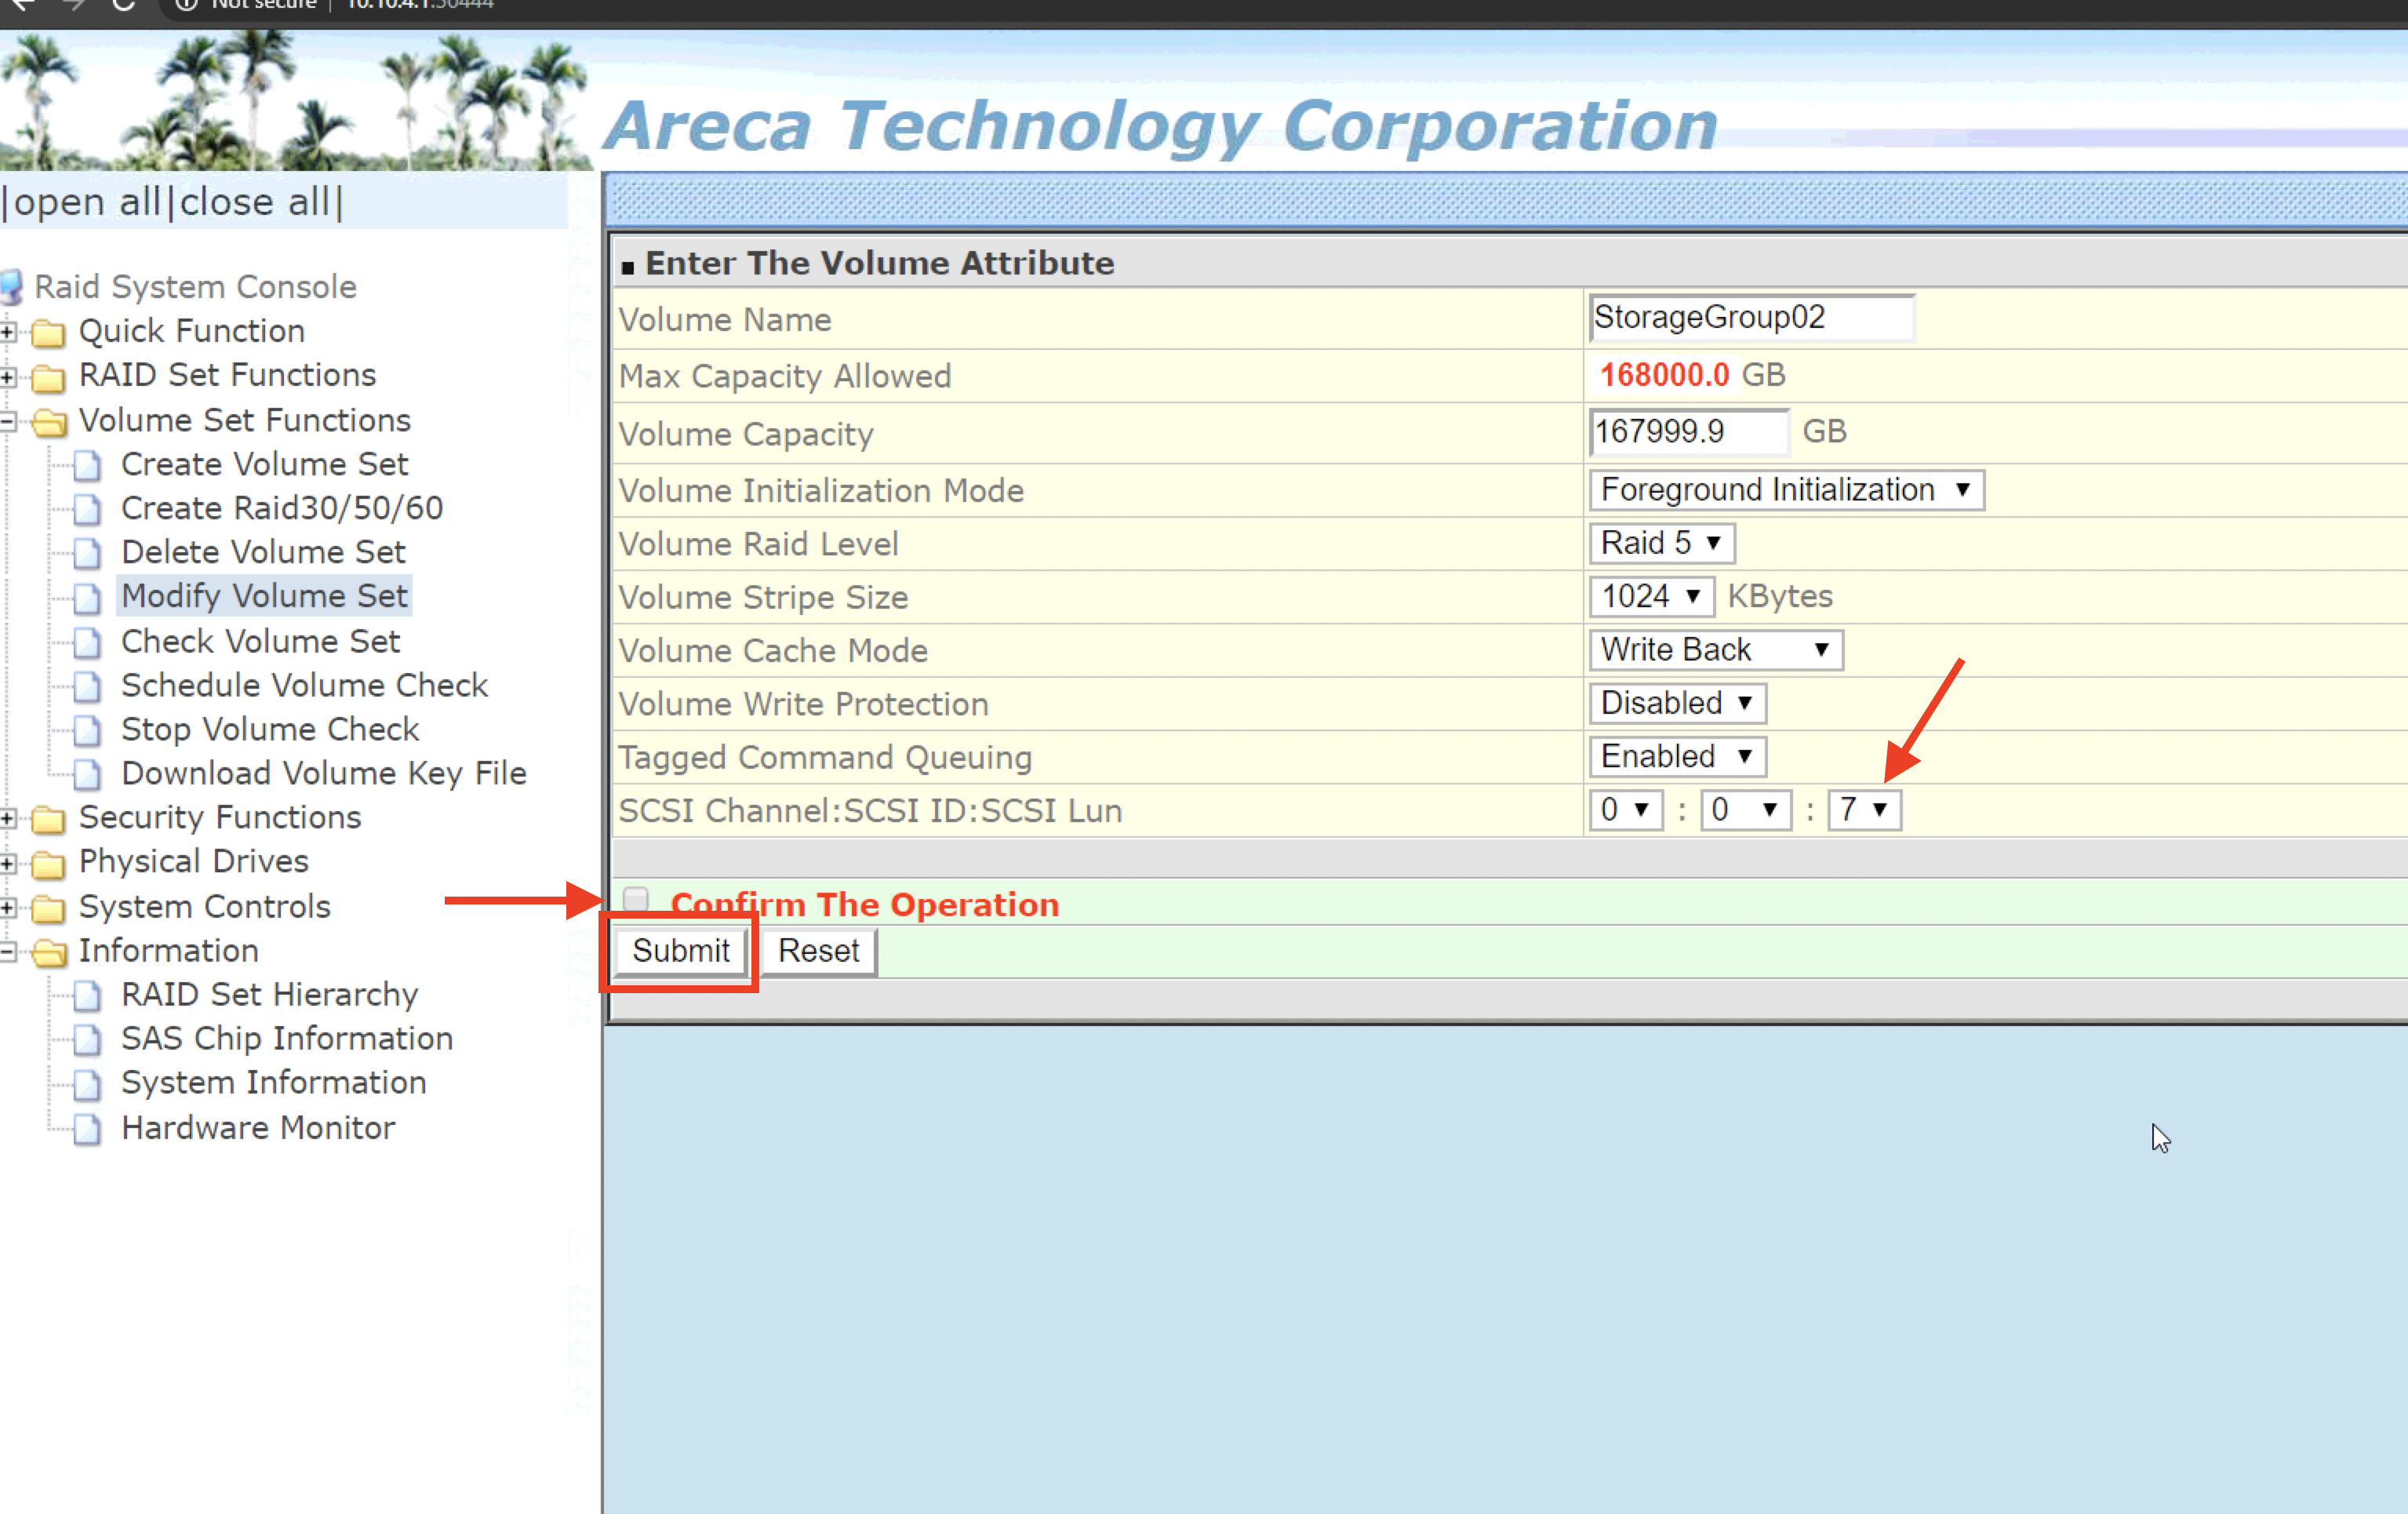
c.) Change the last number in the Lun to anywhere between 1 and 7 until. If there is a number already in place, chose a number other than that number.
7. Open Disk Management in Windows
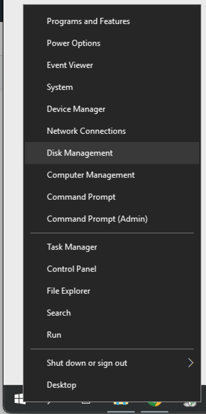
8. Initialize the newly formatted RAID
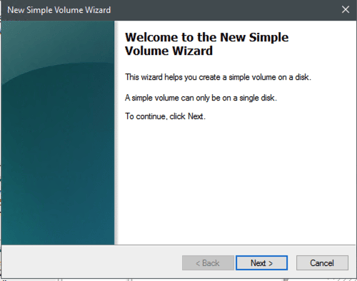
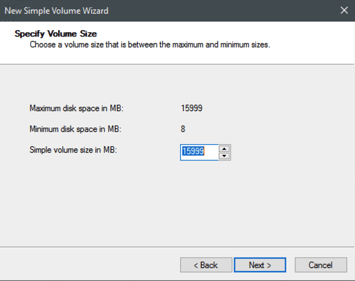
9. Right-Click on the new volume and create New Simple Volume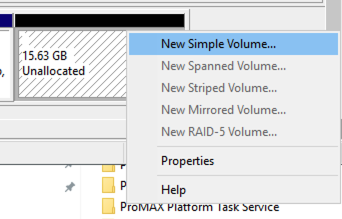
If you plan on using the entire volume, leave the space allocated. If you plan on partitioning the volume, you must decide how much space to allocate to each volume you create. If you plan to use Snapshots, you must be below 64TB.
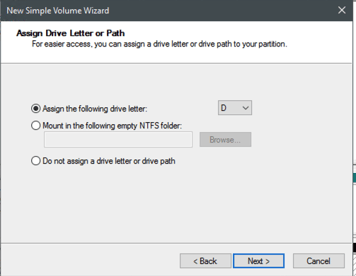
Assign Drive Letter
10. Format in NTFS and 64K Block Size
Name volume to match name given in RAID Set and Volume. Above example is StorageGroup02 in the RAID Set and Volume Set so the Windows Volume should be StorageGroup02.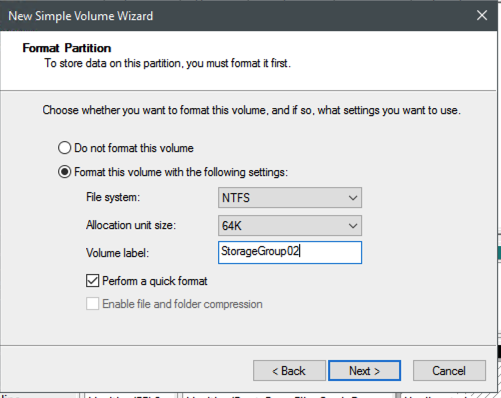
11. Return to Platform Reset Cache.
12. When in the Platform UI, go to the StorageGroup screen and click 'Scan Attached Drives'.
13. When the new Expansion Chassis is connected to the Platform, it will be given a new name, for instance StorageGroup02. Since this new group is now connected to the Platform, the permissions need to be set to work with your Platform System. To accomplish this you will need to run a Reset Storage Group command.
Go to the Storage Groups tab in the Platform Interface. Right-click on the new storage group and select ‘Reset Storage Group’
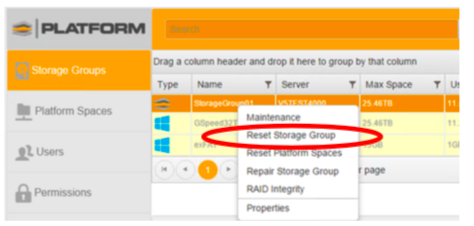
This command will be scheduled as a task and will reset the permissions on the storage group so that it may be used in your system