If this is a new installment of Platform please see this article here first to license. If you are updating from an already running version of Platform, please move forward to the rest of the document.
Ensure that you are logged into the correct admin account.
Standalone units will be using admin.
AD joined units must be logged into the admin account created by the domain controller **NOT LOCAL ADMIN NOR LOCAL CREATED USER
1. Open ticket to Support to inquire a manual update. Support will verify ProCARE status and will send the link to download the update file to deploy.
2. Use the link supplied by support to download and install on server(s).
3. Launch the ProMAXPlatformServerInstallerV5 program. This program will be used to install the software necessary to continue the installation process.
4. Click Next 2 times.
5. Click Install.
6. At all prompts click Yes or Next.
7. Click Finish.
8. Server will require reboot.
Deploying Platform
**If this was an already running Platform System, skip to Deploy Home and Sub section.
-
In windows explorer, navigate to the
C:\Program Files (x86)\ProMAX\ProMAX Platform Server Installer -
Find the program named ‘ProMAX Console.exe’ and double click it.
-
Answer yes to the UAC question.
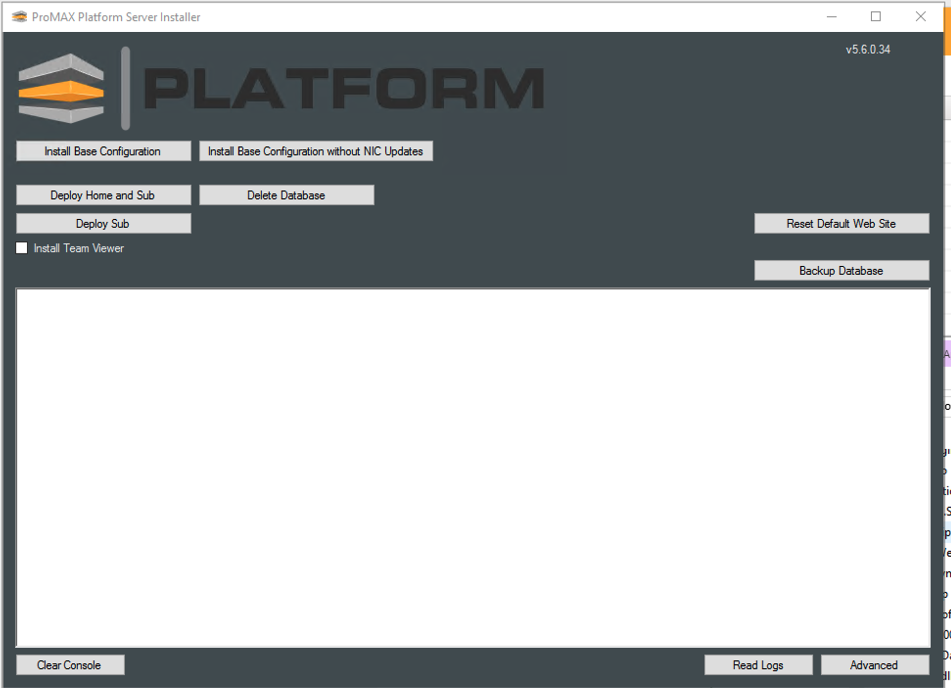
- The system will launch the server installer. Click on the ‘Install Base Configuration Button’
- Click Yes to the question, ‘Are you sure you want to take this action? It cannot be undone’.
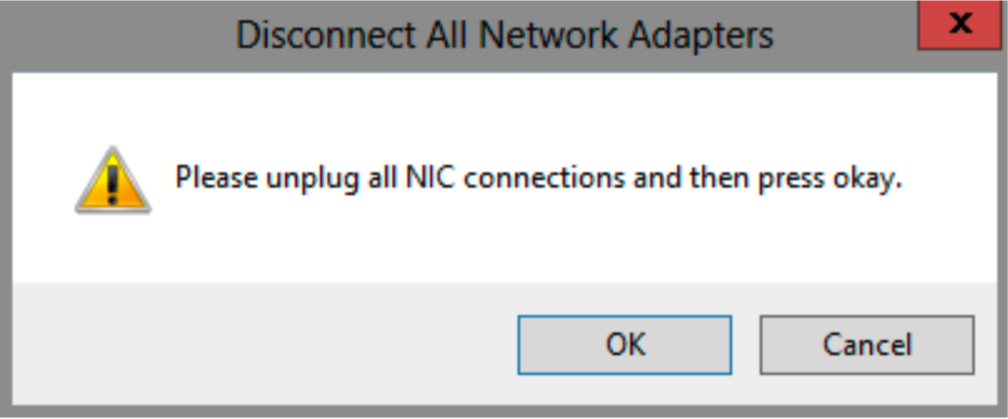
- The system will ask:
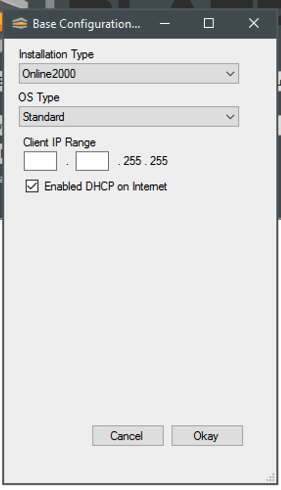
- The system will bring up the configuration dialog box. As a Pro-Cache installation, click on “Installation Type” and choose “Essentials”. You can also select, Enterprise for a Platform system that will connect to an existing domain, or another Platform system.
-
The easiest installation is by clicking ‘Enable DHCP on Internet’. If you have a special condition, you can enter all the other IP information specifically.
-
Enter the Client IP Range. This is usually 10 10 which corresponds to the NIC ports on the server. i.e. 10.10.5.1.
-
Click Ok. The system will begin the server installation and you will see this in the console log.
-
When the operation is completed, it will bring up a dialog box and tell you that you must reboot. Answer “No” to the question.
-
Go thru the dialog box looking for errors. If there are errors in the installation, stop and get a development team member to review the errors before proceeding.
-
Next, click the start button and type in ‘ncpa.cpl’ and press enter. This will bring up the network connections screen. You need to validate that all network ports have been named by the script run. If you see any ‘Invalid’ ports or anything doesn’t look right, stop and contact ProMAX Support before proceeding.

Deploy the Home and Sub
The step installs the Platform software on the server. The Home and sub option is used to install the main server. In most cases you will be installing home and sub. The only time you will use Deploy Sub is when you have multiple Platforms that will be connected together in an Enterprise level installation so the secondary will be deployed as a sub.
1. In windows explorer, navigate to the C:\Program Files (x86)\ProMAX\ProMAX Platform Server Installer
2. Find the program named ‘ProMAX Console.exe’ and double click it.
3. Answer yes to the UAC question.
4. Select the Checkbox ‘Install Team Viewer’
5. Click on Deploy Home and Sub Button.
**If you have multiple servers that communicate with each other, Home and Sub will be used on the Home server (head unit) and Sub will only be on other nodes.
6. Click Yes to the question, ‘Are you sure you want to take this action? It cannot be undone’.
7. The system will ask for the User Name and the Administrator Name
a.) User Name / Password: This is the name of the account that the website and services will run under
b.) Admin Name / Password: This is the name of the domain administrator, typically: Admin
8. Now the system will install the website and all services.
9. Scroll thru the results to make sure there are no errors. If there are errors, stop and contact a development team member before proceeding.