The internet port on the server (ports on the motherboard) are generally set to DHCP unless your network requires a static IP.
DHCP - automatically assign an IP address
Static - Assign a specific IP that follows your network that specifically stays consistent. (This IP must be within the range of your network IP's given and must not conflict with other active machines).
**Ensure you have a Cat6 or Cat6A cable connected and there is a link light on the port and switch.
1. Log into the server's Windows Operating System. *Not the workstation that you edit from.
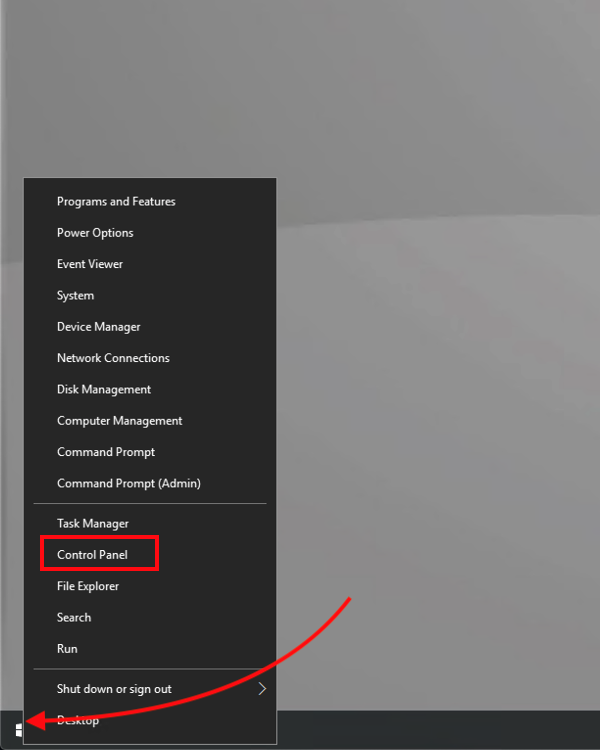
2. Right-Click on the start menu and go to Control Panel. If you are running server 2012, drag the mouse all the way to the bottom left corner until the start menu pops up.
3. Set view to Large Icon and open Network and Sharing Center.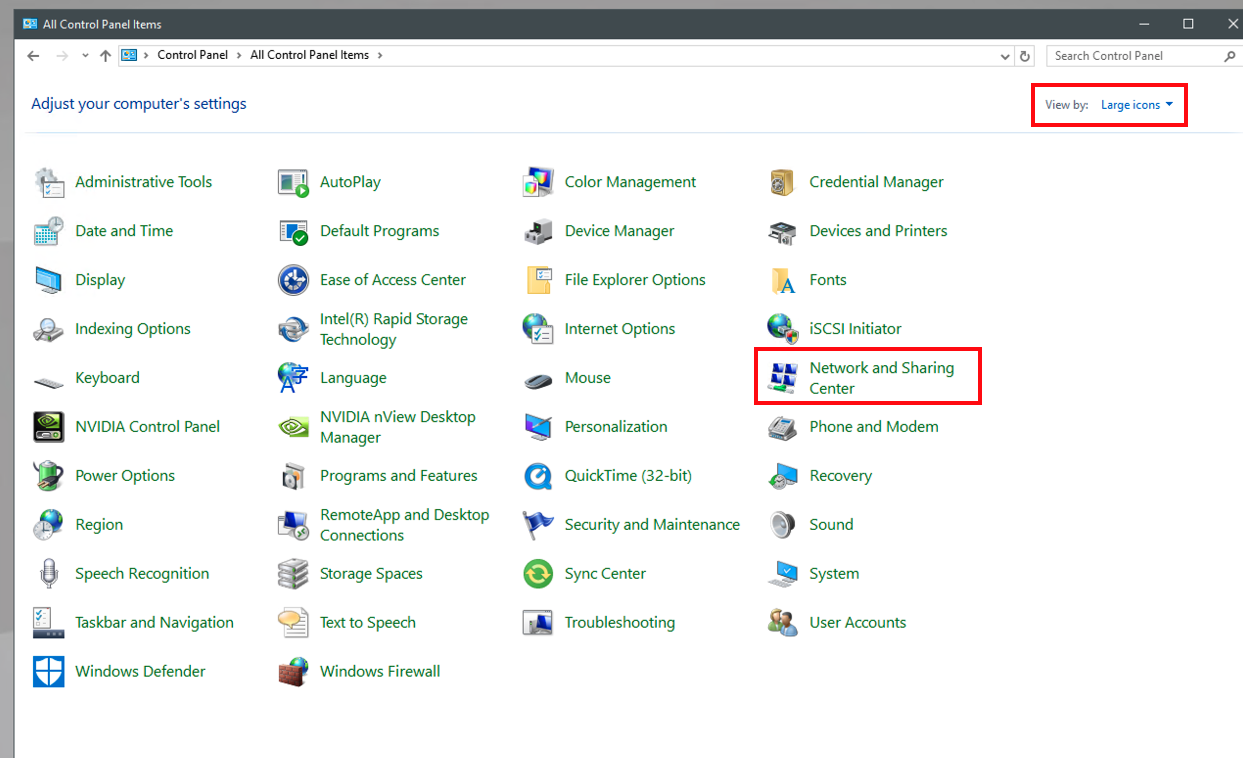
4. Click on Change Adapter Settings

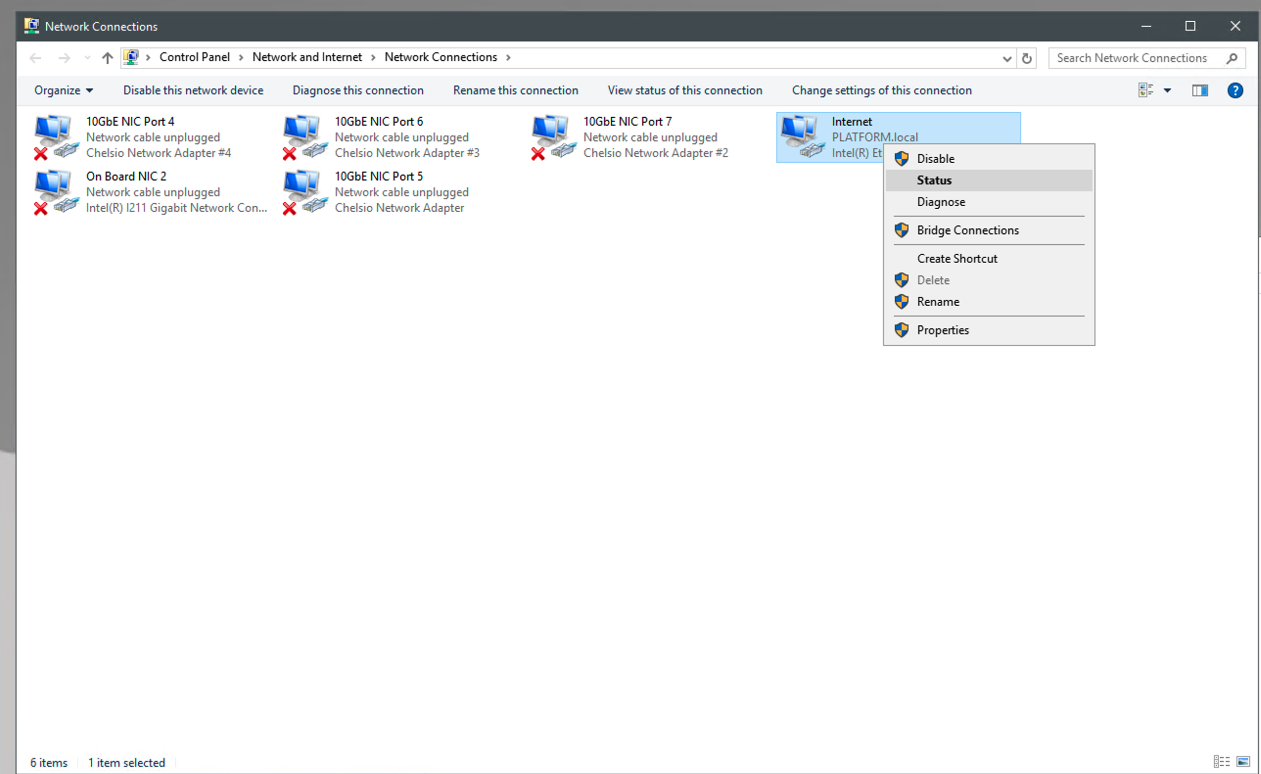
5. Right-Click the Internet Port and go to Properties.
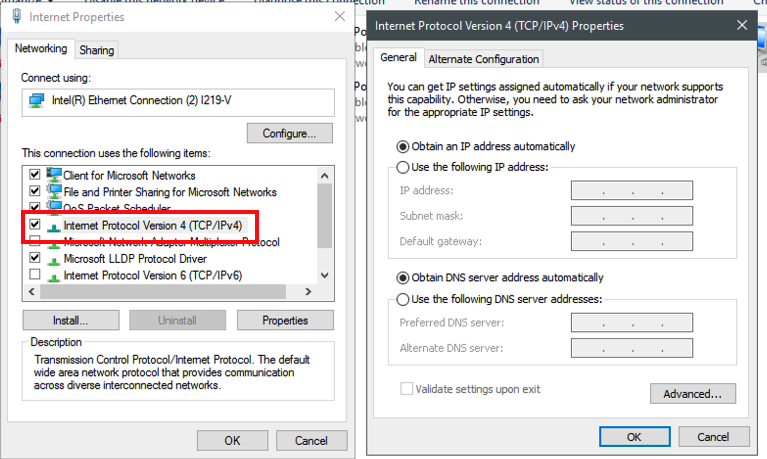
6. Open Internet Protocol Version 4 (TCP/IPv4).
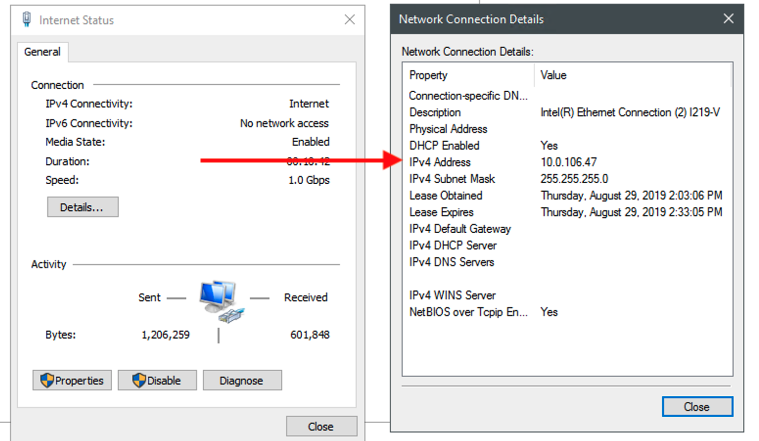
The 2nd window is an example if you are set to DHCP and all items are pulled automatically. If you need to renew your IP, you can see this article here. If you need a Static IP, you will need to refer to your IT team or network engineer regarding your IP settings if you do not know this information.
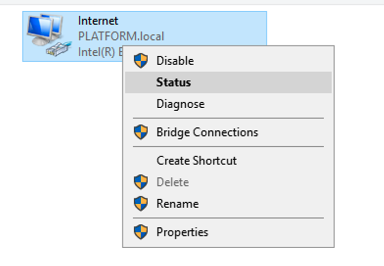
If your network has changed and you need to connect using the new IP, you can find it by right-clicking the port and going to status. Click-Details and the IP Address will appear.